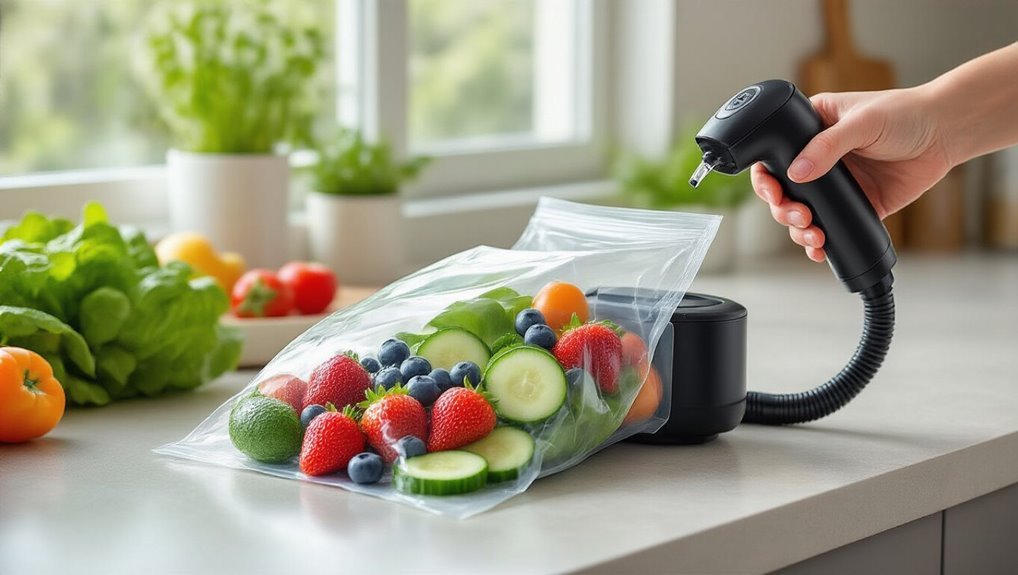
I’ve discovered that most FoodSaver users don’t realize their handheld sealer attachment can work on more than just the brand’s proprietary bags. In fact, I’ve successfully used mine with generic zipper bags, saving quite a bit of money over time. It’s one of those little hacks that makes the investment even more worthwhile. If you’re wondering about compatibility with different storage options or struggling to get a proper seal, there’s a simple technique that makes all the difference.
Understanding the Components of Your FoodSaver Handheld Attachment
When you first get your hands on the FoodSaver handheld attachment, it’s totally normal to wonder what all the different parts actually do. I remember being a bit confused myself!
The main body connects to a power cord, and there’s that distinctive green, squishy sealing pad made of silicone-like material—that’s what creates the airtight seal by pressing against your bag.
Understanding how an airtight seal is formed helps you get the most out of every bag.
You’ll notice a power switch that, well, actually activates both the vacuum and sealing functions. The sealing circle applies pressure to secure your bags during the process.
This packaging innovation is perfect for seed preservation, keeping your garden seeds viable much longer than traditional storage methods.
I think it’s probably one of the most useful kitchen gadgets I’ve bought in years, especially if you’re into gardening or bulk food storage.
Preparing the Sealer for First-Time Use
When I first unboxed my FoodSaver handheld attachment, I laid out all the components—the sealer unit, cover, and connector pieces—on my counter to make sure everything was accounted for.
Before plugging it in, I familiarized myself with the power settings, noting the difference between the standby mode and the active sealing mode that’ll activate when pressed against a bag.
You’ll want to test the unit with a practice bag before storing any actual food, just to get comfortable with the pressure needed for a proper seal.
Using acid-free materials can help protect the contents over time, acid-free materials and related preservation considerations.
Unboxing Key Components
Once you’ve brought your FoodSaver handheld sealer home, it’s time to unbox this nifty little gadget and get acquainted with its parts. For ideal flavor infusion and storage optimization, you’ll want to make sure everything’s in working order before first use.
Here’s what you should check:
- Locate the main device, sealing head, and power cord – they’re the primary components you’ll be working with.
- Examine the green squishy part of the sealing mechanism – it should be firmly attached and free from damage.
- Make sure the power switch is in the “off” position before you plug anything in (I learned this one the hard way).
- Identify the removable cover that gives you access to the sealing components – you’ll need to take this off during use.
Power Settings Overview
How does your FoodSaver handheld sealer actually work?
Before your first use, you’ll need to confirm it’s set to the handheld sealer setting by turning the power knob. I’ve found that proper setup makes all the difference in sealing techniques.
First, check that the green squishy sealing element is making good contact with your bags—this is vital for an effective seal. Then, um, listen for that activation sound which tells you it’s powered up and ready to go.
When I’m teaching friends about power adjustment, I always suggest they do a test seal first.
Press firmly on the sealing area and, if needed, adjust the power settings for different bag thicknesses. It’s kind of like finding the sweet spot on your toaster, you know?
Selecting the Right Bags for Vacuum Sealing
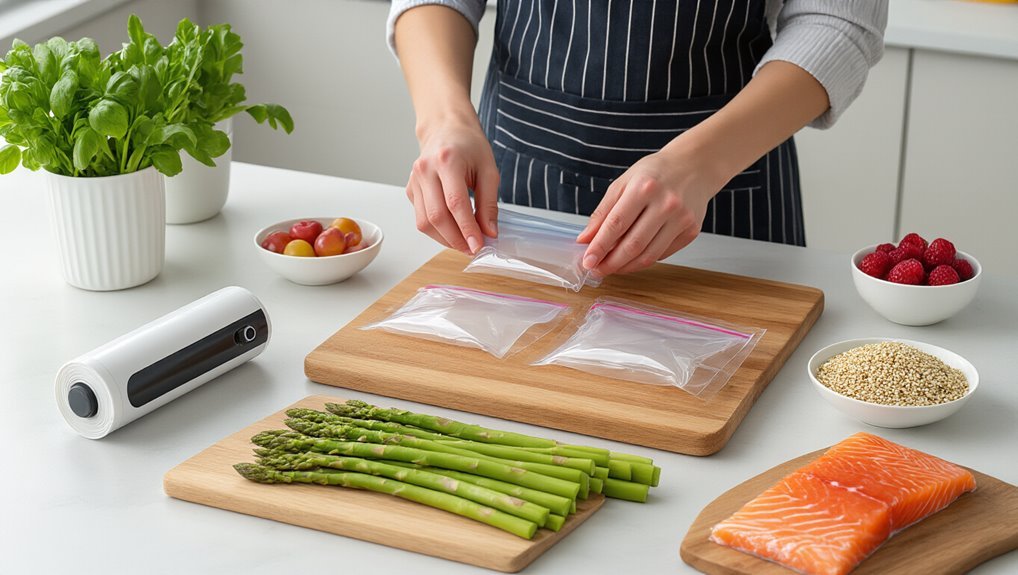
Since the success of your vacuum sealing largely depends on the bags you choose, I can’t stress enough how important it’s to select the right ones for your FoodSaver Handheld Sealer Attachment.
Additionally, always consider sealer compatibility across your bag options to avoid leaks.
The bag materials really matter—I’ve learned this the hard way! You’ll want to stick with specialized vacuum storage bags or compatible silicone ones designed specifically for airtight sealing techniques.
For best results:
- Verify compatibility with your FoodSaver model to prevent frustrating leaks
- Choose the appropriate size for your food (too big is actually better than too small)
- Don’t overfill the bags—you need room for a proper seal
- Ensure bags are clean and dry before sealing to avoid compromising the vacuum
Trust me, the right bag makes all the difference in freshness!
Step-by-Step Sealing Process for Beginners
When I first started using my FoodSaver handheld sealer, proper positioning was definitely my biggest challenge. You’ll want to make sure that green squishy part makes full contact with your bag.
If you’re experiencing leaky seals, it’s usually because you didn’t apply enough pressure or kept the sealer in one spot too long.
I’ve found that using smooth, consistent pressure and keeping the bag completely flat against the sealing mechanism works best for creating those perfect airtight seals every time. Remember that achieving an airtight barrier is key to minimizing pesticide exposure during storage.
Proper Positioning Techniques
Properly positioning your FoodSaver handheld sealer is essential for achieving that perfect airtight seal every time. I’ve found that mastering the proper bag alignment makes all the difference in seal technique success.
Here’s how I position mine for best results:
- First, I remove the cover completely to expose that green, squishy sealing mechanism—it needs direct contact with the bag.
- Then I lay the bag’s edge completely flat and smooth against the sealer—wrinkles are definitely the enemy of a good seal!
- I position the green part directly on the bag’s edge, making sure it’s making full contact.
- Finally, I apply even, moderate pressure for several seconds—not too hard, not too soft—just right for the perfect seal.
Troubleshooting Common Issues
Even the best FoodSaver handheld sealers can occasionally give you trouble, especially if you’re just getting started. While the aesthetic design is sleek, function matters more than form here.
I’ve found that most sealing problems happen because the green squishy part isn’t making solid contact with the bag.
First, check if you’ve turned the dial to handheld mode. If it’s still not working, remove the cover and inspect the sealing mechanism.
You know, sometimes I forget to press firmly enough on the sealing circle! Also, make sure your bag is wrinkle-free where it seals.
Battery life can be another culprit—if the unit seems sluggish, it might need recharging.
Trust me, there’s nothing more frustrating than a half-sealed bag of expensive steaks!
Troubleshooting Common Sealing Problems
Despite your best efforts, sometimes your FoodSaver handheld sealer just won’t cooperate. When that happens, I’ve found there are usually simple fixes to get back to preserving ingredients and enhancing flavors.
Here’s what I check when mine isn’t working properly:
- Check the seal contact – Make sure that green, squishy sealing part is making complete contact with the bag. If it’s not, you’ll never get a proper seal.
- Apply enough pressure – You need to press down firmly and evenly on the sealing circle.
- Verify power supply – Low batteries are often the culprit, believe me!
- Confirm proper positioning – Double-check that the open bag end is correctly aligned under the green sealing component.
Additionally, understanding that many sealing issues stem from improper contact or pressure is reinforced by the broader principle of temperature control emphasized in sous vide desserts.
Tips for Perfect Vacuum Seals Every Time
While getting a perfect vacuum seal might seem mysterious at first, I’ve discovered it’s all about mastering a few simple techniques.
Additionally, ensure you choose compatible bags because bag compatibility with your sealing accessories is crucial for a true vacuum.
The most important tip I can share is ensuring that green, squishy sealing part makes firm contact with the bag – it’s absolutely essential for consistent results.
Before you begin, check your bag compatibility with your sealing accessories.
I’ve found that turning the device to handheld sealer mode before pressing down makes all the difference!
Apply steady pressure when pushing the sealing circle – not too hard, but firm enough to remove all that air.
Oh, and always double-check that the bag edge is wrinkle-free.
Finally, I always label my sealed bags right away.
Trust me, you don’t want to play the “what’s this mystery food?” game later!
Using the Attachment for Sous Vide Cooking
I’ve found that using my FoodSaver handheld attachment for sous vide cooking gives me perfect temperature control while keeping all those amazing flavors locked inside the meat.
You’ll love how the vacuum-sealed bags keep your steaks completely submerged, eliminating those pesky air pockets that can cause uneven cooking.
If you’re watching your budget, the reusable silicone bags compatible with the handheld sealer are a game-changer – I’ve used the same ones dozens of times for my weekend sous vide sessions.
Note how a vacuum-sealed setup supports consistent temperatures in sous vide sous vide cooking.
Sous Vide Sealing Benefits
When it comes to sous vide cooking, you’ll find the FoodSaver handheld sealer attachment is nothing short of revolutionary.
I’ve discovered it creates the perfect airtight environment for flavor infusion while giving me excellent portion control for meal planning.
The benefits I’ve experienced are substantial:
- The vacuum seal removes virtually all air, which means heat transfers evenly through the food – no more inconsistent cooking!
- I never worry about water seeping in during those long cooking sessions, keeping my food safe and delicious.
- My steaks retain all their natural juices and flavors, resulting in the juiciest results I’ve ever achieved.
- The reliable seal extends freezer life dramatically, so I can prep multiple sous vide packs in advance.
Perfect Temperature Control
After mastering the basics of vacuum sealing, I’ve found that perfect temperature control is where the FoodSaver handheld attachment truly shines for sous vide cooking.
When I’m preparing steaks, I make sure the green squishy part firmly contacts my silicone bags to create an airtight seal. This is essential for water immersion—you definitely don’t want leaks compromising your temperature stability at 130°F!
I’ve learned that properly sealed bags maintain precise temperature throughout the entire 1 hour and 30 minute cooking process.
What I love most about this setup is how the vacuum seal preserves all the flavors and moisture. The result? Incredibly tender, evenly cooked steaks every time.
And when there are leftovers, I just reseal the bags—it’s perfect for controlling portions and keeping everything fresh for later.
Reusable Bag Options
The perfect temperature control we’ve discussed becomes even more valuable when paired with the right reusable bags. I’ve found that silicone bags are my go-to for sous vide cooking since they’re completely compatible with the FoodSaver handheld attachment.
The bag material matters tremendously – silicone withstands high temperatures while being environmentally friendly.
When using reusable bags with my attachment, I follow these steps:
- Position the green squishy part of the attachment over the bag’s valve
- Press firmly to activate the vacuum seal
- Wait for the sealing speed to complete (usually about 10 seconds)
- Check the edges for complete closure before submerging
Trust me, a proper seal is essential!
Water leakage ruins not just your meal but, well, potentially your whole day of cooking.
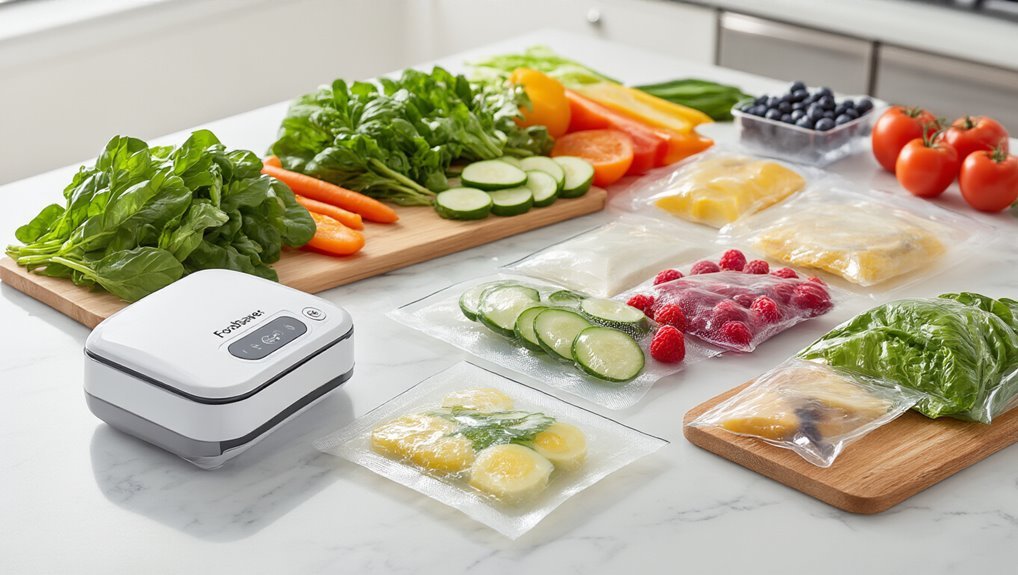
Extending Food Freshness With Proper Sealing Techniques
How effectively you seal your food makes all the difference between freshness that lasts for weeks and disappointing spoilage after just a few days.
I’ve found that applying firm pressure with the green squishy part of the handheld sealer is essential for creating that perfect seal freshness we’re all looking for.
Always use manufacturer-recommended bags to prevent leaks and prolong the sealer’s life recommended bags.
Make sure you’re using bag compatibility to your advantage—the FoodSaver system works best with its own bags, but I’ve had success with certain silicone options too.
Get optimal freshness by pairing your FoodSaver with compatible bags—brand-name options work best, though select silicone alternatives can deliver solid results too.
Don’t forget to label everything immediately after sealing! Trust me, you might think you’ll remember what’s what, but three months later, everything looks the same in the freezer.
The green contact point must fully press against the bag—it’s like, um, giving it a good handshake—firm and complete.
Cleaning and Maintaining Your Handheld Sealer
Keeping your handheld sealer clean isn’t just about aesthetics—it’s essential for maintaining that perfect seal I’ve been raving about. In my experience, establishing regular cleaning routines makes all the difference in how long your FoodSaver attachment lasts.
Here are my top maintenance tips that I never skip:
- Wipe down the green sealing part with a slightly damp cloth and mild soap after each use
- Only clean accessible components—never submerge the whole device (learned that the hard way!)
- Remove and clean the sealing mechanism according to manufacturer’s guide about once a month
- Thoroughly dry everything before reassembly to prevent mold
I always check for tears or debris on the sealing surface too. These little maintenance habits might seem tedious, but trust me, they’re worth it for consistent sealing performance.
Regular maintenance also reinforces the broader benefit of vacuum sealing for maximizing shelf life.
Creative Uses Beyond Basic Food Storage
While most folks think of FoodSaver attachments as purely kitchen gadgets, I’ve discovered they’re actually versatile tools for organizing nearly every corner of my home. I’ve been using mine for DIY projects and creative arts supplies that would otherwise get lost or damaged.
This concept aligns with precision cooking, a hallmark of sous vide technique that underpins reliable results.
| Item Type | Benefit | Creative Use |
|---|---|---|
| Craft Supplies | Prevents tangling | Store beads and buttons |
| Travel Items | Stops leaks | Seal toiletries in silicone bags |
| Small Collections | Extends life | Preserve seeds or spices |
| Pantry Goods | Maintains freshness | Reseal snack bags |
| Valuables | Protects from moisture | Custom bags for photos or documents |
You know, I think the handheld attachment is actually more versatile than the main unit for these non-food uses – it’s perfect when you need a quick seal without the bulk!
Frequently Asked Questions
How to Use Foodsaver Vacuum Sealer Handheld Vacuum Sealer?
I remove the cover, press the green part firmly against my bag, and turn on the handheld setting. This vacuum sealing technique preserves my food by creating an airtight seal.
How to Use Foodsaver Accessory?
I attach my FoodSaver accessory to the main unit, set it to vacuum seal, insert the bag, and press firmly on the green part. It’s my favorite food storage sealing technique!
Why Is My Foodsaver Handheld Sealer Not Sealing?
Isn’t it amusing how I trusted this device? Check for common sealing glitches: incorrect pressing technique, poor bag positioning, or simply power issues with your FoodSaver that need addressing.
How Do You Use the Mini Bag Sealer?
I always remove the cover first to access the sealing area. For best food storage tips, I press firmly on the green part until sealed. These sealing techniques guarantee my bags stay airtight.