I’ve gotta say, sous vide cooking transformed my kitchen game completely. When I first looked at temperature charts, I was overwhelmed—all these precise degrees for different meats? But trust me, once you understand how heat affects proteins over time, it’s actually simple. I’ve found that nailing the right temperature (like 129°F for that perfect medium-rare steak) makes more difference than fancy ingredients. Want to know the secrets I wish someone had told me before I started?
Sous Vide Temperature Charts: The Complete Guide by Cut and Doneness
Ever wondered how to achieve that perfect medium-rare steak every single time? I’ve been obsessed with sous vide cooking since I updated my Time Temp Charts back in 2022, and I’m excited to share what I’ve learned.
For steaks, I target 129°F (54°C) for exactly 1 hour 30 minutes – no more, no less.
That’s where data visualization becomes essential – seeing the relationship between time and temperature changes everything.
Chicken breast needs longer – 3 hours 30 minutes at 145°F, then a quick sear for that beautiful finish.
Equipment calibration is something most people overlook, but it’s actually essential.
If your circulator is off by even a few degrees, you might end up with pork chops that aren’t that perfect rosy pink at 135°F.
Trust me, those 45 minutes of patience will be worth it!
The modern sous vide method owes much of its development to Georges Pralus, whose early work in the 1970s helped shape how we cook precise, evenly finished proteins today.
Why Sous Vide Times Vary: Thickness, Texture, and Tenderness Explained
The thickness impact can’t be overstated – a half-inch protein needs about 30 minutes minimum, but anything thinner or thicker?
Thickness rules the sous vide game – it’s the critical variable that determines whether your protein reaches perfection or misses the mark.
You’ll need to adjust accordingly.
I’ve found that texture tenderness improves dramatically with longer cooking times.
In my experience, giving proteins at least 2 hours in the water bath creates that perfect balance of tenderness while maintaining your desired doneness.
Remember that finishing with a quick sear can raise internal temperature by 5-10 degrees, which definitely affects final texture.
It’s kind of like adding the finishing brushstrokes to a painting – that last step transforms the entire experience.
Wait, let me clarify – thickness, cooking duration, and finishing method all work together to determine your final result.
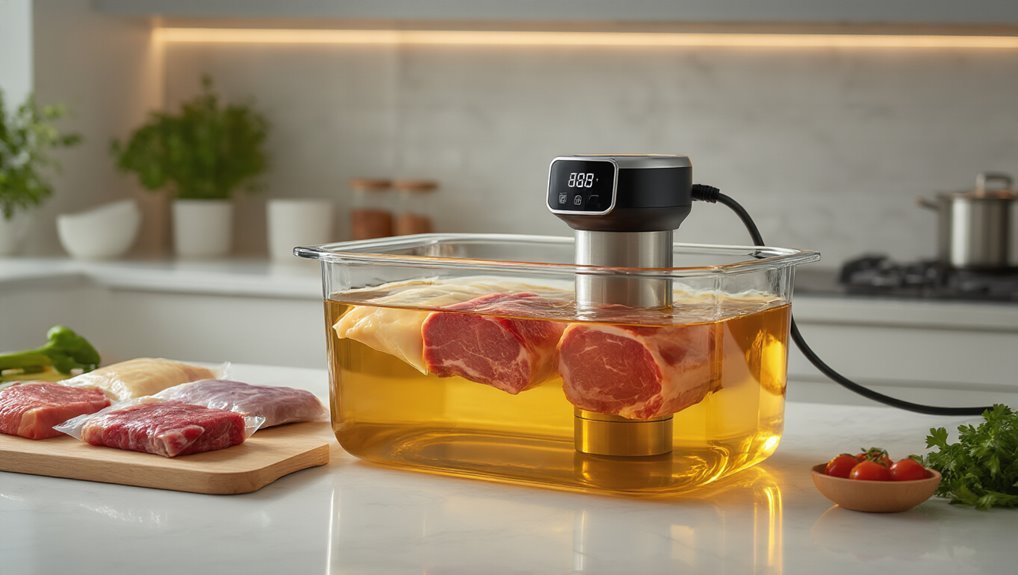
This approach also benefits from vacuum sealing to ensure even heat distribution and minimize air pockets.
Beef Mastery: Precise Temperature Settings From Rare to Well-Done
How precisely can you control the perfect steak?
With sous vide, it’s down to the degree—literally.
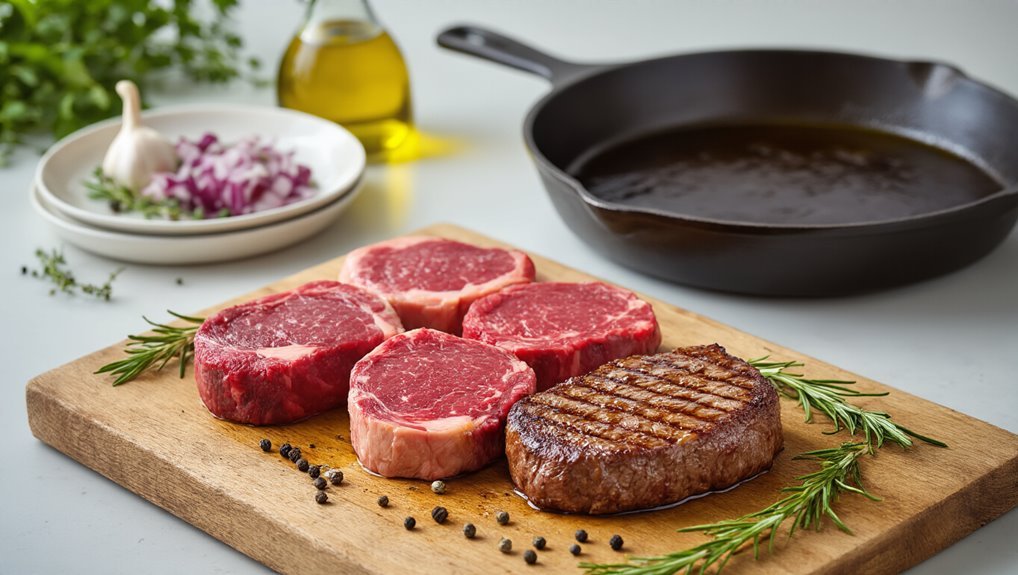
I’ve found that premium cuts like Filet Mignon, New York Strip, Ribeye, and T-bone all follow the same temperature guidelines: 120-128°F for rare, climbing up to 156°F for well-done.
But here’s what many overlook: aging effects and marbling profiles dramatically influence your cook times.
A well-marbled ribeye might need longer at medium-rare (129-134°F) than a leaner filet to break down those beautiful fat pockets—generally 1-3 hours depending on thickness.
Vacuum sealing enhances heat distribution and preserves natural flavors vacuum sealing.
Poultry, Pork, and Lamb: Safe Temperatures for Perfect Results
I think it’s because they’re actually less forgiving than beef when it comes to temperature control.
After years of testing, I’ve found these proteins require precise temps for both delicious results and storage safety.
Here’s my foolproof guide:
- Chicken breast: 145°F (63°C) for 3.5 hours, then sear skin-side down (prevents cross contamination by ensuring proper doneness)
- Pork chops: 135°F (57°C) for exactly 45 minutes, finished with butter
- Lamb steaks: 129°F (54°C) for 1.5 hours for perfect medium-rare
- All proteins: Always vacuum-seal completely—air pockets, um, they’re basically the enemy of even cooking
Remember to cool leftovers quickly to prevent bacterial growth!
This approach showcases how precise temperature control drives safe, tender results even for tricky proteins.
Finishing Your Sous Vide Meat: Essential Searing Techniques for Each Cut
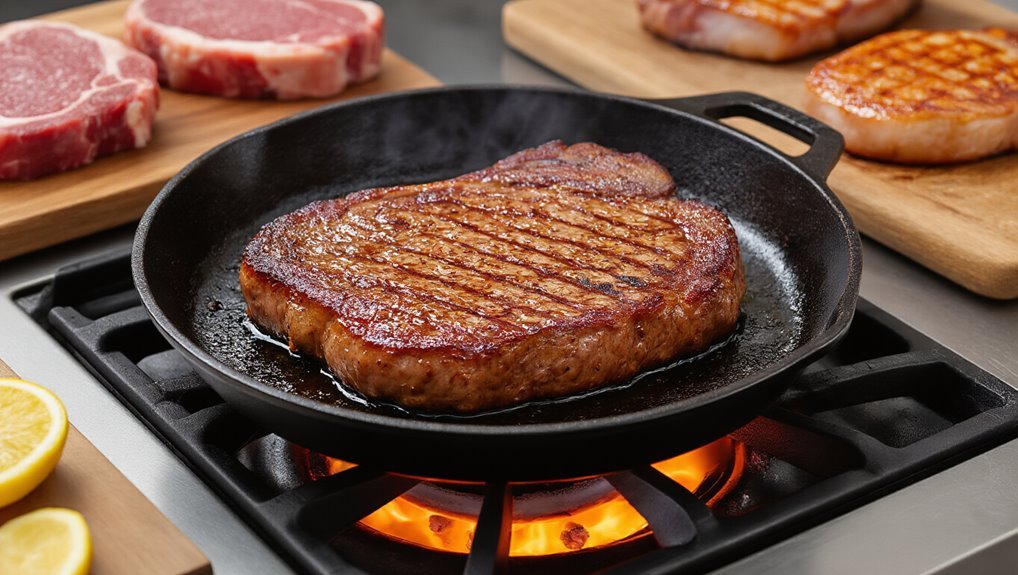
Once you’ve cooked your meat to perfection using sous vide, you’re only halfway to a restaurant-quality result.
The essential final step? A proper sear for crust development that’ll transform your meal.
For chicken breast, I always pat it super dry before placing it skin-side down in a moderately hot pan with vegetable oil.
Steaks and pork chops need similar treatment – thorough drying followed by a quick, hot pan sear with butter and oil to develop that mouthwatering crust.
Sausages? They’re a bit different.
I find they benefit from a gentler pan sear with butter that gradually builds color while keeping them juicy.
If you’re using a broiler instead, remember your meat’s internal temperature will rise about 5-10 degrees, so account for that.
And don’t forget to flip halfway!
Frequently Asked Questions
Can I Use Frozen Meat in Sous Vide Without Thawing?
Yes, I can use frozen meat directly in sous vide. Despite thawing myths, it works well—just add cooking time. I avoid temperature pitfalls by ensuring my water bath reaches appropriate levels throughout the process.
How Do Salt and Marinades Affect Sous Vide Cooking Times?
I find that salinity impact is minimal on cooking times, but marinades affect flavor diffusion. I’d still maintain my standard timing since neither substantially changes the core temperature progression during sous vide cooking.
Is It Safe to Leave Sous Vide Food in the Water Bath Overnight?
Picture a warm, cozy bath—that’s what your sous vide enjoys. I’d say it’s safe overnight if you maintain temperature stability above 131°F. Lower temps create bacterial breeding grounds despite the vacuum seal.
Can I Reuse Sous Vide Water for Multiple Cooking Sessions?
Yes, I reuse my sous vide water for multiple sessions. I recommend changing it after 3-4 uses to minimize contamination risk, especially if cooking raw proteins. Clean your container regularly too.
What Should I Do if My Vacuum Seal Bag Floats?
If your bag floats, I’d adjust the seal to remove trapped air bubbles affecting bag buoyancy. You can also weigh it down with a spoon or use a rack to keep it submerged.