To excel at vacuum sealing, it's essential to maintain a clean workspace and clean hands. Opt for sturdy, BPA-free bags and leave 2-3 inches of space at the top when filling them. For delicate items, consider partially freezing them before applying gentle pressure. After sealing, store the food in the fridge or freezer to prevent spoilage and freezer burn. Remember to label each bag with the date and contents for easy identification. Avoid overfilling the bags and make sure to use the correct settings on your sealer. These practices not only prolong the shelf life of your food but also help preserve its flavor and save you money. Looking to enhance your vacuum sealing skills?
Cleanliness and Preparation
When you're preparing to vacuum seal food, always start by washing your hands to maintain cleanliness. This simple step is important in preventing any contamination. Cleanliness doesn't stop there, though. Make sure all utensils, cutting boards, and counters are thoroughly cleaned. This guarantees that no bacteria or contaminants come into contact with your food during the preparation and sealing process.
One of the key Vacuum Sealing Tips is to keep the sealing area of your vacuum sealer spotless. Any residue or crumbs can prevent the machine from creating a proper and secure seal, which could impact the food's freshness. Regularly wipe down the sealing area and inspect it for any debris before using it.
Proper food preservation relies on these cleanliness practices. Once you've vacuum sealed your food, store it in the refrigerator or freezer. This keeps it fresh and prevents bacterial growth. Remember, even though vacuum sealing extends the shelf life of food, improper storage can still lead to spoilage.
Choosing the Right Bags
Selecting the right vacuum sealing bags is vital for ensuring the longevity and safety of your stored food. When choosing vacuum seal bags, prioritize options that are durable and puncture-resistant. This guarantees that the bags can withstand the rigors of food storage without tearing or leaking, preserving the quality of your food.
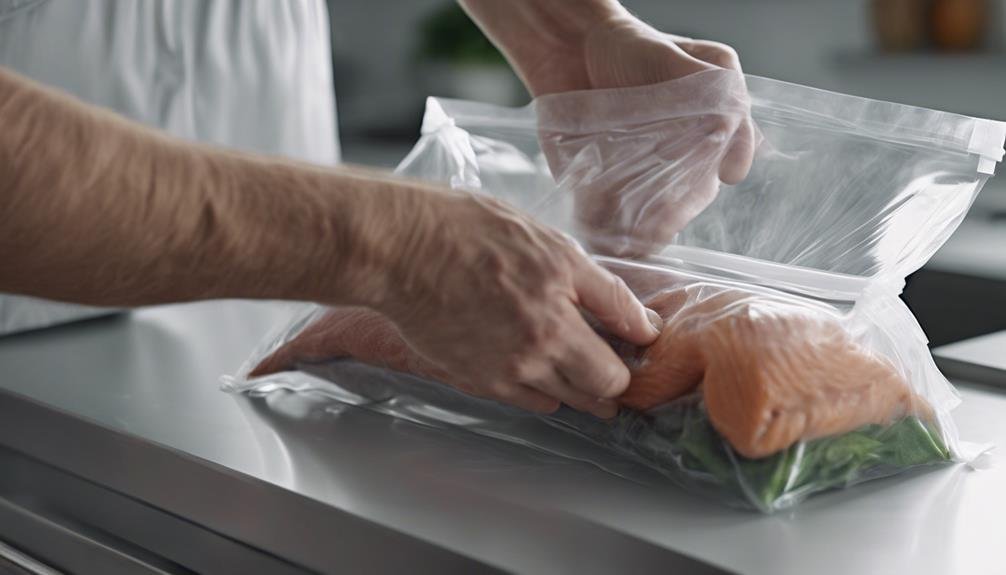
Always opt for BPA-free bags to prevent harmful chemicals from leaching into your food. This step is essential for maintaining food safety, especially when storing items for extended periods or using the bags for sous-vide cooking.
Consider getting bags in various sizes to match different food quantities and storage needs. This versatility helps in minimizing waste and making your food storage more efficient. You can choose between pre-cut bags for convenience or rolls for a more cost-effective solution that lets you customize the size.
For items with sharp edges, like bones or pasta, thicker bags are a smart choice. These thicker bags offer extra protection against punctures during the sealing process, ensuring that your food remains fresh and uncontaminated.
Proper Bag Filling Techniques
Filling vacuum seal bags correctly is just as important as choosing the right ones to guarantee your food stays fresh and uncontaminated. By using proper bag filling techniques, you'll make sure the sealing process is efficient and effective. Here are some tips to help you get it right:
- Leave Headroom: Make sure you leave 2 to 3 inches of headroom in the bag. This space is essential for proper sealing and prevents food residue from interfering with the vacuum sealing process.
- Create a Clean Cuff: Fold the top 2 inches of the bag to create a clean cuff before filling. This keeps the sealing area clean. Unfold the cuff before sealing to avoid any contamination along the seal line.
- Flatten and Arrange: Flattening the bags and arranging food items flat inside saves space and allows for easier stacking and organization in your freezer. This technique also ensures even cooking or thawing later on.
- Portion Control: Seal small portions in each bag to promote easy portion control. This makes it convenient to thaw or cook only what you need, reducing food waste.
Storing Vacuum Sealed Foods
Properly storing vacuum sealed foods guarantees they remain fresh, flavorful, and safe for extended periods. When you vacuum seal food, it can be stored in the freezer for up to 2-3 years without losing quality or taste. This greatly extends the shelf life compared to traditional storage methods. By removing excess air, vacuum sealing protects against freezer burn, ensuring your food retains its nutrients and texture.
Another benefit is the efficient use of storage space. Vacuum sealed food packs are compact, allowing you to maximize the space in your freezer. This can make a difference when you're trying to store large quantities of food. Additionally, vacuum sealing reduces the risk of cross-contamination. Without air, bacteria and other pathogens find it harder to multiply, keeping your food safer.
In the fridge, vacuum sealed foods can last up to 5 times longer. This means less food waste and more savings in the long run. Whether you're storing meats, vegetables, or leftovers, vacuum sealing is a game-changer. So, if you want to extend your food's shelf life and preserve its quality, vacuum sealing is unquestionably the way to go.
Sealing Fragile Items
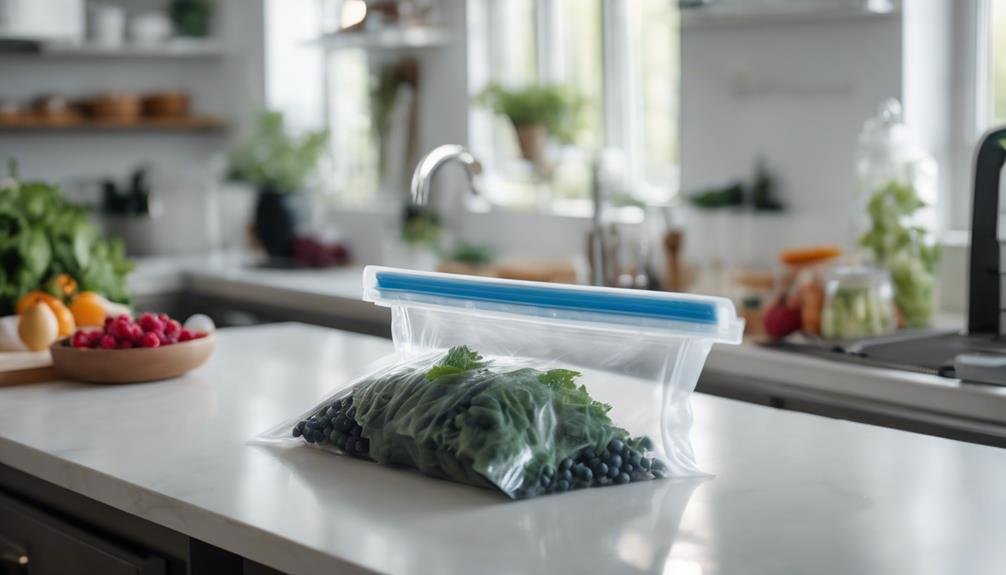
When vacuum sealing delicate items like berries or pastries, it's important to take extra precautions to prevent damage. Fragile items can easily get crushed or punctured if not handled properly, so careful techniques are essential.
First, partially freeze delicate items like berries or fish before vacuum sealing. This helps maintain their shape and prevents them from being crushed under the vacuum's pressure.
Second, use gentle pressure during the sealing process. Avoid excessive vacuuming which can squish fragile items like bread or pastries. Adjust the settings on your vacuum sealer to apply the minimum force necessary.
Third, consider double-sealing fragile items. This means sealing the bag once, then creating another seal a bit further down. This provides extra protection against punctures and ensures a secure seal.
Fourth, place a paper towel or cloth inside the bag, between the item and the sealing area. This will absorb any excess moisture, which can interfere with the sealing process and compromise the integrity of your vacuum-sealed package.
Handling Sealed Liquids
To handle sealed liquids effectively, freeze them beforehand to prevent spillage and guarantee a secure seal. This simple step is vital when dealing with items like sauces and soups. By freezing these liquids first, you make sure they remain solid during the vacuum sealing process, which helps avoid any messy leaks and ensures that the seal is tight and reliable.
Using a paper towel as a barrier inside the vacuum seal bag is also a smart move. The paper towel will absorb any residual moisture, protecting the sealing area from liquids that could compromise the seal. This is particularly useful for items like soups and sauces, which can be quite fluid even when partially frozen.
For added convenience, consider pre-making bags of frozen drinks. This technique is especially handy for party preparation, allowing you to have beverages ready to go without the hassle of last-minute mixing.
If you're sealing delicate items like berries, flash freeze them first to maintain their shape and avoid crushing. Pressing and sealing sauces and soups before vacuum sealing ensures they stay leak-free and ready to use whenever you need them. Follow these steps, and you'll master the art of handling sealed liquids.
Labeling and Organization

Labeling and organizing your vacuum-sealed bags guarantees you can quickly find and use what you need without any hassle. To maintain cleanliness and efficiency during the sealing process, follow these simple steps:
- Label Before Filling: Write the contents and date on each bag before filling it. This prevents messy writing on filled bags and guarantees legibility.
- Create a Cuff: Fold the top 2 inches of the bag to form a cuff before filling. This keeps the sealing area clean and free from food residue, ensuring a proper seal.
- Leave Room in Bags: Allow enough space in each bag to avoid overcrowding. This prevents food residue from affecting the sealing process and makes it easier to flatten bags.
- Flatten and Stack: Flatten the bags before sealing to make them stackable. This maximizes storage space and helps keep your freezer organized.
Proper labeling and organization not only save you time but also help maintain cleanliness throughout the sealing process. By following these steps, you'll secure your food stays fresh and easily accessible, making your vacuum sealing efforts both effective and efficient.
Conclusion
To master vacuum sealing, focus on cleanliness, use the right bags, and fill them properly. Store your foods correctly and handle fragile items and liquids with care. Don't forget to label and organize. Imagine vacuum sealing a fresh salmon fillet. By cleaning it thoroughly and using a suitable bag, you guarantee its quality for months. Following these best practices guarantees your food stays fresh and flavorful, making meal prep a breeze.