I remember the first time I tried sous vide cooking—my steak came out perfectly pink edge-to-edge, something I’d never achieved with traditional methods. If you’ve been intimidated by those fancy vacuum-sealed bags and precision water baths, don’t be. I’m going to break down this cooking technique so simply that, well, you’ll wonder why you haven’t tried it before. The beauty of sous vide isn’t just in its results, but in how little attention it actually needs from you.
What Equipment Do You Need for Sous Vide Cooking?
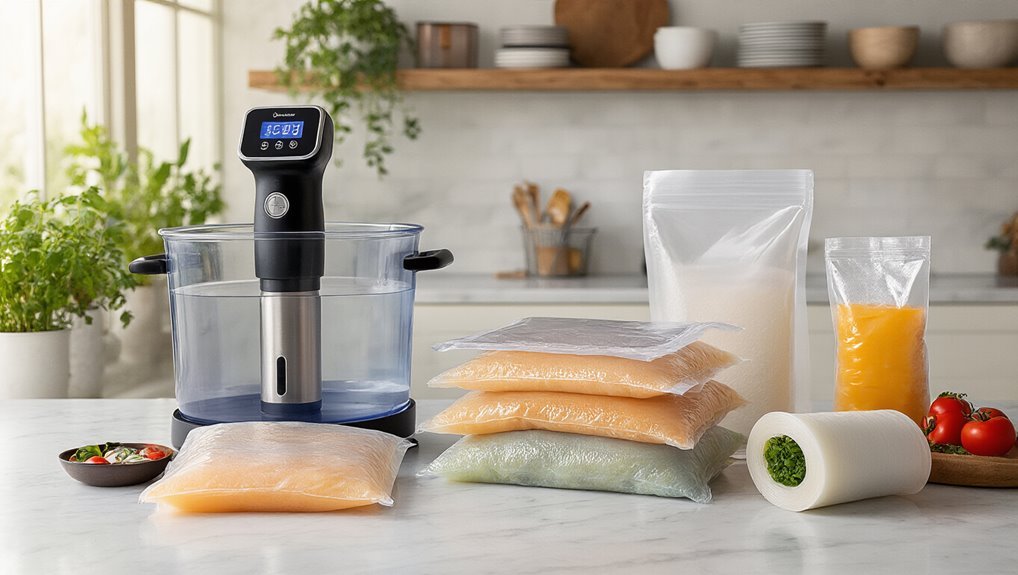
While diving into sous vide cooking might seem intimidating at first, I’ve found that the essential equipment is actually quite straightforward.
At the heart of your setup is an immersion circulator—I recommend either the Anova Precision Cooker or Joule Turbo, though keep in mind their noise levels and power consumption can vary.
You’ll need a heat-proof container (I love my Cambro 8-quart), some food-safe bags, and honestly, that’s about it to start!
While vacuum sealers are nice, regular freezer bags with the water displacement method work just fine for beginners.
Well, at least that’s what I used for months.
For longer cooks, I’d suggest grabbing a lid to reduce evaporation and maybe a stand for your circulator.
Trust me, it’s simpler than it looks!
A consistent temperature control is essential for perfect results with sous vide.
How Sous Vide Works: The Water Bath Cooking Method
How exactly does sous vide transform a simple water bath into culinary magic?
I’m convinced it’s all about precision.
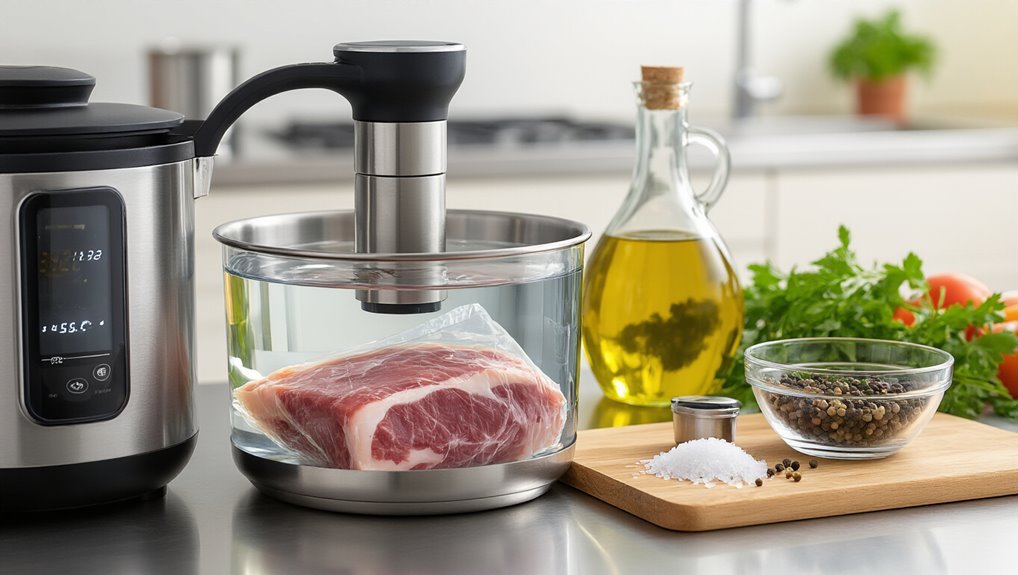
You place your food in a vacuum-sealed bag (or just squeeze the air out), then fully submerge it in a water bath at a precisely controlled temperature.
The water quality matters here – I always use filtered water for better heat transfer.
What’s amazing is that the food cooks evenly all the way through.
Unlike traditional cooking where heat blasts from the outside in, sous vide surrounds your food with consistent warmth.
Bath calibration is essential – even a degree or two can make a difference in doneness!
After enough time (which depends on what you’re cooking), the food reaches perfect doneness edge-to-edge.
Finish with a quick sear, and you’ve got restaurant-quality results.
This is made possible by precise temperature control, which locks in moisture and ensures even doneness.
Step-by-Step: Setting Up Your First Sous Vide Cook
Remember that vacuum sealing helps maintain quality by preventing spoilage, contributing to Extended shelf life.
Sous Vide Temperature Charts for Meat, Fish, and Vegetables
I’ve found temperature selection to be the most critical decision you’ll make in sous vide cooking, since it directly determines both the doneness and texture of your final dish.
Vacuum sealing helps ensure consistent heat distribution throughout the cooking process.
Looking at my temperature charts, you can see that beef ranges from 130°F for a perfect medium-rare to 175°F for those traditional slow-cooked textures, while fish and pork have their own unique sweet spots.
When you’re planning your cook, remember that these temperatures aren’t just about safety but about creating that precise edge-to-edge consistency that makes sous vide worth the effort.
Ideal Doneness Temperature Ranges
Precisely what temperature should you set for perfect sous vide cooking? I’ve found that understanding target temperatures is the key to mastering the doneness scale in sous vide cooking.
For beef, I aim for 130-139°F when I want medium-rare, or 140-145°F for medium. If you’re cooking pork, well, 135-145°F gives you incredibly juicy results that traditional cooking just can’t match.
Fish is trickier – I like mi-cuit style at 104°F for that silky texture, but maybe you’d prefer the more traditional 122-132°F range.
Don’t forget vegetables! They actually need higher temperatures – carrots at around 183°F concentrate their flavor beautifully. Think of these temperatures as your roadmap to sous vide success.
Pasteurization Time Guidelines
Why do so many sous vide beginners focus only on temperature while overlooking the essential time factor? I think it’s because we’re used to conventional cooking where hitting a specific temperature means “done.” But in sous vide, both temperature AND holding time matter for safety.
I’ve learned that pasteurization isn’t instant—it’s a combination of temperature effect and how long you maintain it. The lower your cooking temp, the longer your holding time needs to be.
Here’s a quick reference I use constantly:
| Food Type | Temperature | Pasteurization Holding Time |
|---|---|---|
| Chicken | 136°F (57.7°C) | ~63 minutes |
| Beef (medium-rare) | 130°F (54.5°C) | ~2 hours |
| Fish | 122°F (50°C) | ~40 minutes |
Texture-Driven Temperature Selection
While getting the correct temperature for sous vide cooking is important, what I’ve found most exciting is how temperature selection gives you precise control over texture.
I call this “tenderness mapping” – selecting the exact temperature that breaks down collagen at the rate you want for your specific dish.
For example, here’s what I’ve learned works best:
- Beef at 130-139°F creates that perfect medium-rare where the collagen breakdown is just right – not too mushy, not too tough
- Pork at 135-145°F transforms tough cuts into buttery-tender meat that’s still juicy and pink
- Vegetables like carrots need higher temps (around 183°F) to soften their structure completely
It’s amazing how just a few degrees can completely change your eating experience.
I’m still perfecting my personal temperature preferences for each ingredient.
Finishing Techniques: From Searing to Smoking
Although your sous vide cooking has brought your proteins to the perfect internal temperature, it’s the finishing techniques that truly transform your dish from precisely cooked to absolutely mouthwatering.
I’ve found the searing step to be critical—it’s where magic happens in just 1-2 minutes per side.
You want a super hot surface to create that gorgeous crust.
Personally, I’m a fan of pan-searing, but torching strategies work brilliantly for hard-to-reach areas or when you don’t want to heat up a pan.
For something different, try smoking methods after sous vide.
Or maybe experiment with the Mayo Sear—sounds weird, I know, but a thin layer of mayonnaise promotes even browning like nothing else.
Trust me, that Maillard reaction is what’ll make your guests ask for seconds!
5 Foolproof Sous Vide Recipes for Beginners
I’ve found that starting your sous vide journey with foolproof recipes builds confidence faster than anything else.
A key factor behind reliable results is temperature control, which keeps the bath steady and the meat evenly cooked.
Try my perfect steak recipe that guarantees edge-to-edge medium-rare every time, or experiment with chicken breasts that’ll make you wonder how they ever turned out dry before.
For something unexpected, my carrot-forward glazed vegetables showcase how sous vide transforms humble ingredients into something restaurant-worthy without any fussy techniques.
Perfect Steak Every Time
Why is it so difficult to cook the perfect steak using traditional methods?
It’s all about timing precision.
One minute too long and your beautiful, fat marbling starts breaking down instead of melting into juicy perfection.
I’ve found sous vide eliminates this anxiety completely.
Here’s why sous vide steak is foolproof:
- Set your bath to 130°F for medium-rare and you’ll get edge-to-edge consistent doneness – no more gray bands!
- Cook time is forgiving – 1 hour for thin steaks, 3 hours for thick cuts, and you actually can’t overcook it
- The quick post-bath sear (just 1-2 minutes per side) creates that amazing crust without affecting the interior
I think the best part is how relaxed I feel during the process.
No more hovering over the grill, second-guessing myself.
Impossibly Juicy Chicken Breast
When you’ve given up on trying to cook juicy chicken breasts using traditional methods, sous vide will completely change your game.
I’ve discovered the secret to perfect breast tenderness is cooking at lower temperatures—around 140-155°F—for longer periods instead of rushing to that dry 165°F finish line.
Here’s my favorite texture trick: set your circulator to 145°F and cook for 2-3 hours.
The chicken gets fully pasteurized (so it’s safe!) but stays ridiculously moist.
It’s like… well, imagine chicken that cuts like butter but isn’t undercooked.
After sous vide, I always finish with a quick sear—30 seconds per side in a smoking hot pan.
You’ll never believe this used to be the same boring protein you avoided cooking!
Carrot-Forward Glazed Vegetables
Chicken isn’t the only food that transforms with sous vide magic.
Let me tell you, glazed carrots become something extraordinary at 183°F. I think it’s honestly the perfect beginner recipe because it’s nearly impossible to mess up, and the results taste professional.
The carrot glaze creates this mirror-like finish that’s just beautiful, and the sweetness notes get concentrated in a way that regular boiling can’t touch. Here’s what happens:
- The sealed environment traps every bit of carrot flavor
- Your veggies cook in their own juices—no flavor loss
- After cooking, that liquid reduces to a glossy, intensified glaze
When I serve these, people always ask what I added. The answer? Nothing fancy! It’s just the carrots’ natural sweetness, amplified by the technique.
Frequently Asked Questions
Is Sous Vide Cooking Safe for Pregnant Women and Children?
90% of foodborne illnesses come from improper cooking. I’d say sous vide is safe for pregnant women and children when you follow pregnancy guidance and minimize pediatric risk by reaching proper temperatures completely.
Can You Reuse Sous Vide Bags or Are They One-Time Use?
Yes, you can reuse sous vide bags if they’re made of durable bag material. I recommend washing them thoroughly and inspecting for damage first to guarantee reuse safety for your food.
How Much Does Electricity Cost When Running Sous Vide Equipment?
Did you know sous vide uses about 1/5 the energy of an oven? I typically spend just $0.30-$0.50 per cooking session. Check your appliance’s power rating to calculate your specific electricity costs.
What Happens if the Power Goes Out During Cooking?
If your power goes out, I’d recommend a power backup system. For safety, restart cooking only if outage was brief. Otherwise, discard food that remained in danger zone too long.
Can You Sous Vide Frozen Food Without Thawing First?
Ever cooked straight from the freezer? Yes, you can sous vide frozen food without thawing first. I’d just add 50% more cooking time to guarantee proper heating. Thawing necessity isn’t an issue, though texture outcomes remain excellent.