Last week, I almost threw out $50 worth of meat because I didn’t know how to properly store it long-term. That’s when I realized my FoodSaver vacuum sealer had been sitting in its box for months. I’ve since discovered that using this kitchen tool isn’t nearly as complicated as I’d feared. If you’ve been avoiding your vacuum sealer because of confusing instructions or uncertainty about the process, I’ll show you how this time-saving device can actually be remarkably straightforward to operate.
Getting to Know Your FoodSaver Machine
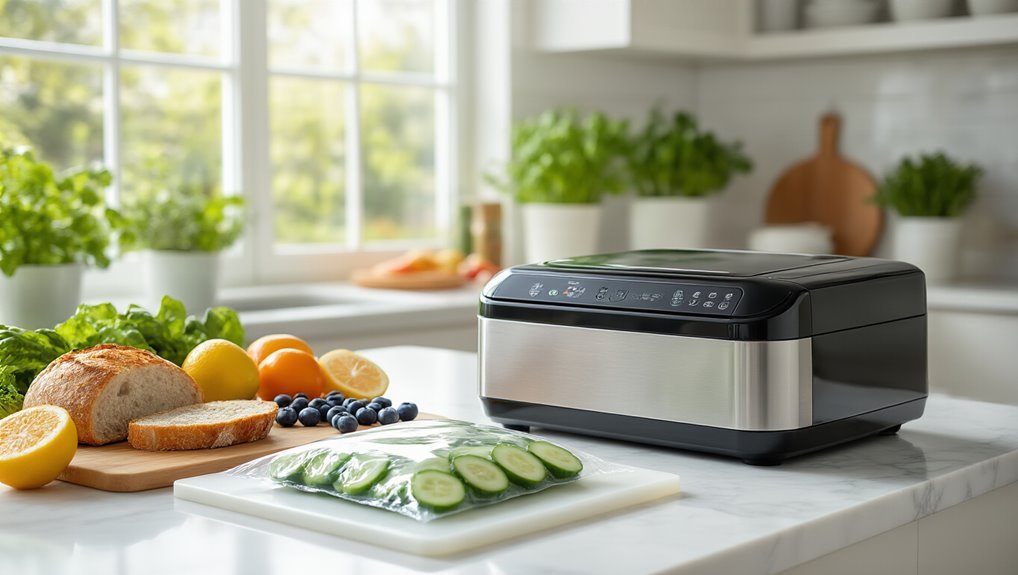
When you first unbox your FoodSaver machine, it might look a bit intimidating with all those buttons and switches, but I promise it’s actually pretty straightforward once you get the hang of it.
Don’t be intimidated by your FoodSaver at first glance—it’s actually quite simple to master with a little practice.
The control panel features simple buttons like on/off, seal, and dry/moist settings that you’ll use regularly.
The vacuum chamber is where the magic happens—it’s where you’ll insert the open end of your bag for air removal.
The sealing width is actually pretty generous, which means you can seal bags of different sizes depending on what you’re storing.
I think the built-in cutter is particularly handy because it lets you customize bag length by pulling the plastic to the white line and, well, giving it a quick slice.
With consistent practice, mastering vacuum sealing can dramatically extend the shelf life of your foods.
Setting Up Your Vacuum Sealer for First Use
I’ll get you started with setting up your new FoodSaver right out of the box. First, find a stable, flat surface near an outlet where you can place your machine – trust me, you don’t want it wobbling around during operation.
Consider using durable vacuum storage bags to maximize seal quality and protect contents while you set up.
Before connecting it to power, I recommend doing a quick check of all the controls and switches to make sure nothing was damaged during shipping.
Unboxing and Placement
Before diving into the vacuum sealing process, you’ll need to properly set up your FoodSaver machine.
Let’s start with some unboxing essentials – carefully remove your vacuum sealer from its packaging and check that all components are there. I always double-check for the power cord and any accessories before discarding packaging.
For placement tips, I’d recommend finding a flat, stable surface in your kitchen that’s close to an electrical outlet. You don’t want to struggle with cord length when you’re in the middle of sealing something!
Once positioned, open the lid and make sure the vacuum and sealing bars are clean and clear of any packaging materials.
Then, plug it in, switch it on, and familiarize yourself with the control panel. You’re almost ready to start preserving!
Initial Control Check
Now that your FoodSaver is properly positioned, it’s time to run through an initial control check.
Before attempting your first seal, you’ll want to make sure everything’s ready to go. I always check the vacuum chamber to ensure it’s clean and free of any packaging materials that might affect sealing strength.
Here’s what you need to verify:
- Make sure your unit is plugged in and powered on – sounds obvious, but I’ve forgotten this step more than once!
- Test all control panel buttons (on/off, seal, cancel) by pressing each one briefly.
- Check that the vacuum and seal functions are in their default positions.
- Confirm the open bottom switch works properly for inserting bags or plastic roll.
Don’t forget to adjust the moist/dry setting based on what food you’ll be sealing first.
Creating Custom-Sized Bags From Plastic Rolls
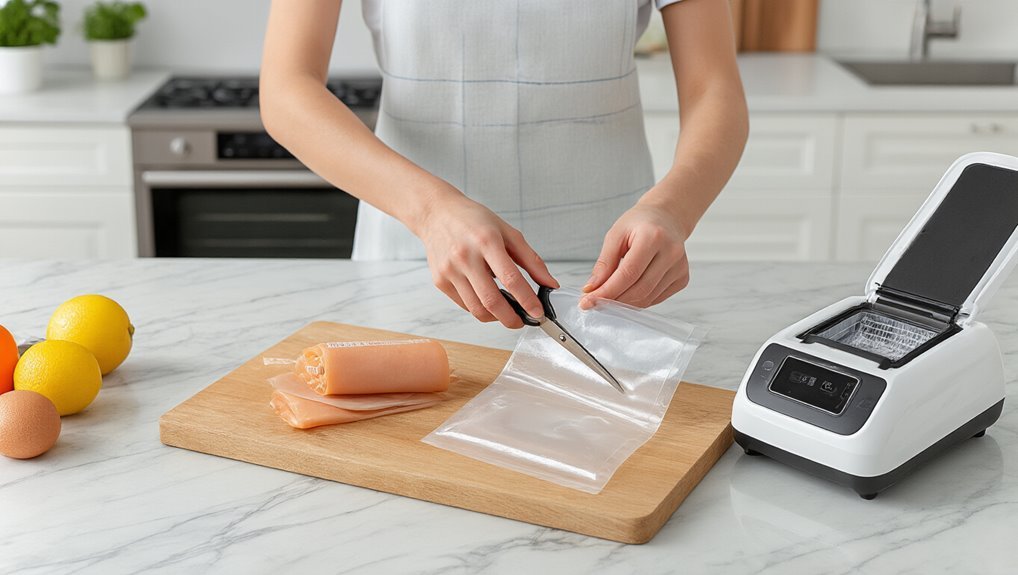
When you’re ready to make custom-sized bags, the plastic rolls that come with your FoodSaver are incredibly versatile. I find this feature super convenient because it lets me create bags perfectly sized for whatever I’m storing.
Start by inserting the plastic roll into the bottom switch and closing it to begin the sealing process.
Then, pull the plastic to your desired length—just make sure you don’t go past the white line marker.
Once you’ve got the right length, use the built-in cutter to trim it.
Now, seal the open end by pressing the switch again, and voilà—you’ve got a custom bag!
You can repeat these steps as many times as needed.
I usually make several different sizes in one session to have them ready.
Vacuum sealing also optimizes heat distribution during long cooks like sous vide, making vacuum sealing a core technique.
Step-by-Step Vacuum Sealing Process
The actual vacuum sealing process couldn’t be simpler once you’ve got your bag ready. I find it’s almost therapeutic watching the air disappear and knowing I’m preserving the flavor infusion potential of whatever I’m packaging.
For long-term preservation, vacuum sealing can complement other methods by maintaining freshness without heat processing.
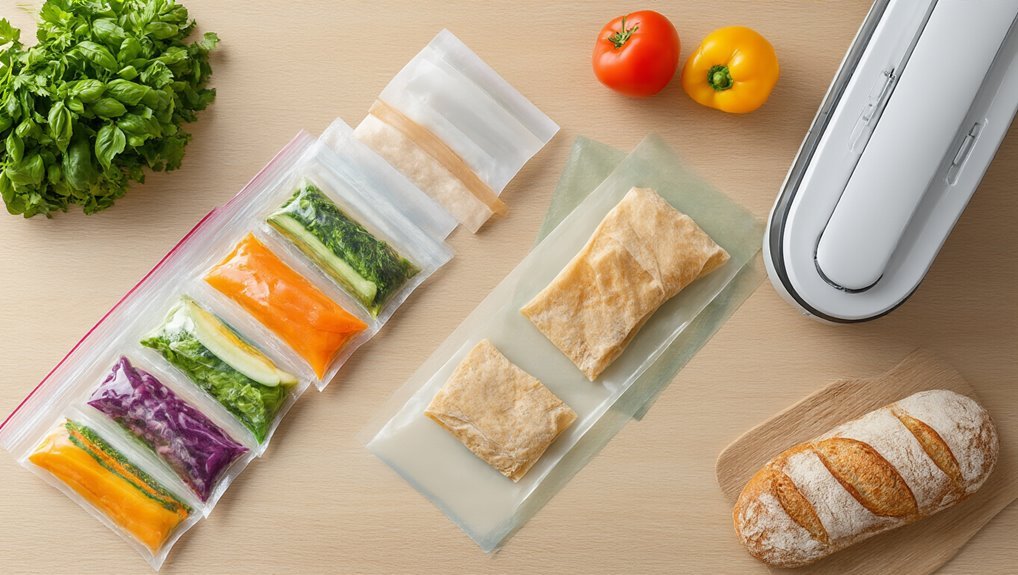
Place your food in the bag with about 3 inches of space at the top—trust me, you’ll need that extra room for a proper seal.
Leave enough headroom when packing—those 3 inches at the top are non-negotiable for achieving that perfect, airtight seal.
- Insert the open end into your FoodSaver’s sealing chamber and close the lid firmly
- Press the vacuum button and watch as it pulls all the air out (it’s pretty satisfying!)
- The machine will automatically seal when it’s done—no guesswork required
- Wait for the indicator light before opening—patience pays off in vacuum packaging!
Using Pre-Made Bags vs. Custom Rolls
When choosing between pre-made bags and custom rolls, I’m often torn between the convenience of grab-and-seal bags versus the cost savings and flexibility of rolls.
Pre-made bags are my go-to for quick jobs since they’re already sealed on one end and ready for immediate use.
I’ve found that custom rolls, while requiring an extra sealing step, actually save me money in the long run and let me create the perfect size bag for oddly-shaped foods.
Properly selecting and using rolls can maximize extended shelf life.
Pre-Made Convenience Benefits
Choosing pre-made bags for your FoodSaver might be one of the smartest time-saving decisions you’ll make in the kitchen. I’ve found these ready-to-use options eliminate the whole cutting and measuring dance that comes with rolls.
When I’m trying to get dinner prepped quickly, these pre-sealed bags are my go-to sealing alternative.
- They’re instantly ready to use—just open, fill, and seal.
- Come in various sizes so you don’t waste plastic on small items.
- One end is already sealed, which means less work for you.
- Create less mess since there’s no cutting involved.
In my experience, these bags are perfect for batch cooking storage tips—I can quickly package multiple portions without the hassle of customizing each bag size.
Custom Roll Cost-Efficiency
Many FoodSaver users discover that custom rolls offer significant cost savings compared to pre-made bags, especially for frequent users. When I do the math, the difference is pretty significant over time.
I can customize each bag length to fit my food perfectly—no more wasting bag material on small items!
While pre-made bags win on sealing speed (they’re already sealed on one end), I’ve found the bag material durability is identical between rolls and pre-made options.
The initial investment in a bulk roll might seem higher, but you’ll actually get more bags per dollar. Think of it like buying toilet paper—the big pack costs more upfront but saves money long-term.
If you’re sealing foods frequently like I do, rolls are definitely worth considering for their cost-efficiency.
Selecting Best Option
Now that you understand the cost benefits of custom rolls, it’s time to figure out which option makes the most sense for your specific needs.
I’ve found material durability is comparable between both choices, but your storage organization might influence your decision.
Here’s what I consider when choosing:
- Pre-made bags save time – perfect when I’m in a hurry and don’t want to mess with cutting
- Custom rolls reduce waste – I can cut exactly what I need for odd-shaped items
- Storage organization is simpler with pre-made bags since they’re ready to use
- Material durability isn’t really a factor since both are made of the same stuff
In my experience, I keep both on hand.
For everyday quick sealing, I grab pre-made bags.
For bulkier items or batch prep, rolls give me the flexibility I need.
Adjusting Settings for Different Food Types
While your FoodSaver might look intimidating at first glance, I’ve found that understanding the different settings is actually pretty straightforward. Let me walk you through it.
For dry items like bread or your favorite seasonal foods, just hit that “dry” setting. It’ll give you a perfect seal without trapping unwanted moisture.
When I’m dealing with marinades or soups—which honestly changes with my dietary preferences throughout the year—I always switch to “moist” mode. This prevents liquid from getting sucked into the machine, which, trust me, can be a real mess.
Some FoodSaver models let you adjust vacuum pressure and sealing time too. I’d recommend playing around with these settings before starting the process. It makes a huge difference in preserving quality!
Understanding when to use each setting also highlights air removal as a crucial step in extending shelf life.
Troubleshooting Common Sealing Problems
- Always check that your bag is properly aligned and not stuffed too full—this is probably the most common issue I see.
- Make sure there’s no food debris on the seal bar—even tiny particles can mess with getting that perfect seal.
- If your machine stops mid-cycle, don’t panic! Just release and try again with the lid firmly closed.
- Use the correct moisture setting—I’ve ruined perfectly good seals by using “dry” when I should’ve selected “moist.”
Additionally, regularly cleaning or replacing the air filter can help maintain maximum suction power air filter.
Maintenance and Cleaning Tips for Longevity
Solving those sealing problems is only half the battle—keeping your FoodSaver in tip-top shape is what’ll make it last for years. I always unplug mine before cleaning—safety first, right?
This is why choosing a model with strong vacuum strength matters.
For basic maintenance, I wipe the exterior and lid with a damp cloth and mild soap to remove any food debris. The sealing strip needs special attention; I gently clean it to ensure proper food preservation performance. Don’t forget the drip tray! I wash mine with warm, soapy water about once a month.
For the vacuum chamber, I use a soft cloth—never harsh chemicals that might damage internal components.
Trust me, proper kitchen organization includes maintaining your appliances. With these simple habits, your FoodSaver will keep your food fresh and your kitchen efficient for years to come.
Frequently Asked Questions
How to Use the Vacuum Sealer Foodsaver?
I insert the roll into the slot, pull to white line and seal. After placing food in, I vacuum the air out by pressing the bar. Good vacuum sealing techniques guarantee proper bag sealing tips.
Can I Use Ziploc Bags in My Vacuum Sealer?
No, standard Ziploc bags won’t work in your vacuum sealer. I recommend using compatible bag types specifically designed for vacuum sealing. Some reusable bag options are available with proper vacuum-sealing construction.
Which Side of the Foodsaver Bag Goes Down?
Place the perfectly pressed, sealed flat end down into the sealing strip. Proper bag orientation guarantees sealing consistency. I’ve found this keeps the open end positioned correctly for vacuum suction and prevents leaks.
Why Is My Foodsaver Not Vacuuming?
Your FoodSaver might not be vacuuming due to debris blocking the seal, improper bag placement, or maintenance issues. I’d check the sealing strip, make sure the lid’s fully closed, and verify your pump’s working properly.