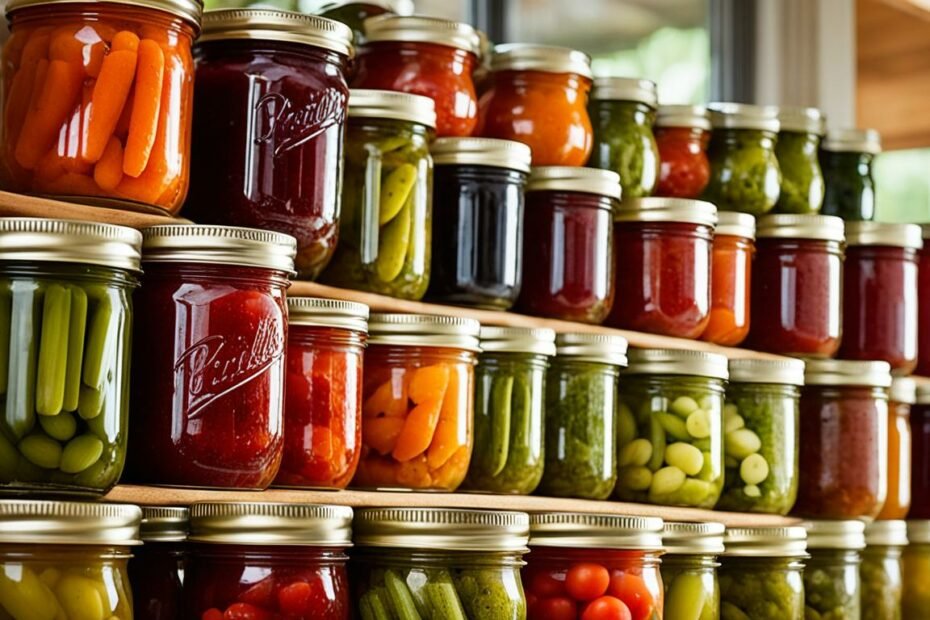
Ever noticed how your grandmother’s pantry had colorful jars full of tasty fruits and veggies? That’s because of the old but gold practice of home canning. It’s a way of preserving food that’s lasted for many years. With all our modern tech, you might ask, “Is canning still a big deal today?”
Home canning actually has some great perks over vacuum sealing. First off, canned food lasts a long time, up to 18 months without going bad. Some things can even be safe to eat for years. This beats vacuum-sealed food, which needs to be kept cold or frozen.
Canning can be used on lots of stuff, like veggies and meals ready to eat. It’s not only useful but also saves money. The canned food business buys lots of items cheaply when they’re in season. Then, they sell them for less. This helps you save money too.
I will show you the good sides of canning compared to vacuum sealing in this guide. We’ll talk about how to do it, what you need, and the right way to make long-lasting food. You might be new to canning, or you might already know a lot. Either way, you’ll see why it’s a great art to keep preserving food in our time.
Understanding Canning and Vacuum Sealing Methods
I’ve looked at many ways to keep food longer, and two stand out. Canning and vacuum sealing are great for saving food and making sure it stays fresh. Let’s take a closer look at both and see what they do best.
The Canning Process
Canning keeps food in jars and heats them to kill germs. It has two main kinds:
- Water bath canning works for foods with lots of acid, like fruits.
- Pressure canning is better for foods low in acid, like veggies and meats.
Pressure canning uses high heat, which is key for those low-acid foods. It keeps them safe by avoiding the risk of botulism. This way, it works well with many different types of food.
Vacuum Sealing Principles
Vacuum sealing is about getting air out of the bag, not about heat. It helps food last by slowing down how fast it spoils. It’s not a way to get rid of germs like canning is, but it’s good for saving food for a bit.
Key Differences
There are a few things that make canning different from vacuum sealing:
| Aspect | Canning | Vacuum Sealing |
|---|---|---|
| Storage Temperature | Room temperature | Refrigeration or freezing |
| Shelf Life | 1-5 years | 1-3 weeks (fridge), 1-3 years (freezer) |
| Food Safety | Heat sterilization kills bacteria | Slows bacterial growth |
| Versatility | Wide range of foods | Limited to certain food types |
Both canning and vacuum sealing are useful in their own ways. Which one you pick depends on what kind of food you have, how much room you have, and how long you need it to stay fresh.
Benefits of Canning as an Alternative to Vacuum Sealing
Canning is a great way to keep food fresh. It’s perfect for making food last a long time. Let’s look at why canning is better than vacuum sealing for some things.
Long-Term Food Preservation Without Refrigeration
Canned food stays good without needing a fridge. If you do it right, you can keep canned food for a year or more. This is perfect for saving money on storing food and using less energy.
Enhanced Food Safety Through Heat Sterilization
Heat sterilization in canning makes food safer to eat. It kills harmful germs, like those from Clostridium botulinum, found in some foods. These germs can cause a serious illness called botulism, which has has happened in many cases between 1996 and 2014.

Versatility in Preserving Various Food Types
Canning works for many kinds of foods. Let’s see which types of canning are good for what foods:
- Water bath canning: For high-acid foods like fruits, jams, jellies, and pickles
- Pressure canning: For low-acid foods such as vegetables, meats, poultry, and soups
Cost-Effectiveness and Reduced Energy Dependence
Starting canning might cost you some money at first. But, it saves a lot later because canned food doesn’t always need a fridge. This is a good way to use less electricity and save money in the long run.
To sum up, canning is a wonderful choice for keeping food fresh. It’s good for making food safe, saving you money, and using less energy. It’s a smart move for people who love to preserve food at home.
Essential Equipment and Supplies for Home Canning
Having the right canning equipment is key to success. I’ll guide you through the necessary tools. They’re essential for this fun hobby.
- Canning jars with lids and rings
- Large pot for water bath canning
- Pressure canner for low-acid foods
- Jar lifter
- Canning funnel
- Bubble remover and headspace tool
- Tongs
- Clean cloth for wiping jar rims
When picking a pressure canner, check if it’s USDA approved. It should fit 4 quart jars and have a 5, 10, and 15-pound pressure gauge.
For water bath canning, a large pot with a rack is necessary. It’s perfect for canning high-acid foods like fruit and pickles.
Let’s talk about the key gear needed for canning and what they do:
| Equipment | Use | Type of Canning |
|---|---|---|
| Canning jars | Store preserved food | All types |
| Water bath canner | Process high-acid foods | Water bath |
| Pressure canner | Process low-acid foods | Pressure canning |
| Jar lifter | Safely remove hot jars | All types |
| Canning funnel | Fill jars without spills | All types |
Buying quality canning tools is a smart move. It leads to safer, more efficient, and better results. This is why I stand by it for all my home canning projects.
Step-by-Step Guide to Successful Home Canning
Home canning is a great way to save fresh food. You can make tasty meals at home. I will guide you through the steps, including the recipes and safety rules.
Preparing Your Ingredients and Jars
First, get fresh ingredients for your recipes. Next, clean your jars and lids well in hot, soapy water. Rinse and keep them warm until you use them.
Filling and Processing Jars
Now, add your ingredients to the jars. Leave the right space at the top, depending on your recipe. Clean the jar edges, put on the lids, and process the jars. Follow the guidelines for water bath or pressure canning.
Cooling and Storing Canned Goods
After canning, let the jars cool for 12-24 hours. Then, check the lids by pressing on them to make sure they’re sealed. Keep the jars in a cool, dark place for later.
Safety Guidelines and Best Practices
To keep your food safe and tasty, follow these tips:
- Use tested canning recipes from reliable sources
- Adjust processing times for your altitude
- Inspect jars for signs of spoilage before use
- Use proper canning equipment and techniques
- Don’t reuse lids, always use new ones for each batch
| Canning Method | Best For | Processing Time |
|---|---|---|
| Water Bath Canning | High-acid foods (fruits, pickles, jams) | 10-85 minutes |
| Pressure Canning | Low-acid foods (vegetables, meats, soups) | 20-100 minutes |
Stick to these steps and safety tips for great home canning. It’s okay if you’re not perfect at first. Learning will make you better at preserving your favorite recipes.
Conclusion
Canning is a great way to store food, standing above vacuum sealing in many ways. It shines for preparing long-term meals that are shelf-stable and safe to eat. Its benefits include keeping food safe through sterilization and creating a variety of preserved foods.
The real beauty of canning is its versatility, preserving everything from high-acid fruits to low-acid veggies. This flexible method, together with being cost-effective and needing less energy, makes it ideal for a lasting food supply.
Even though getting into canning means buying some gear and learning how to do it properly, it’s worth it. Following safety tips and the best ways to can makes it both useful and fulfilling. As the years go by, canning remains a key skill for anyone interested in storing food at home.