I’ve been cooking sous vide for years, but I didn’t start with fancy equipment—just a pot, thermometer, and ziplock bags. When I first heard about the technique, I thought I’d need to spend hundreds, but that’s not true at all. You can actually build your own setup for less than $30 using stuff you probably already have in your kitchen. Want to know how I make restaurant-quality steaks and impossibly tender chicken without breaking the bank?
How to Start Sous Vide Cooking Without Special Equipment?

Why spend hundreds on fancy sous vide equipment when you probably already have most of what you need at home? One of the biggest equipment myths in cooking is that you need expensive circulators to try sous vide. In reality, I’ve found that budget hacks work surprisingly well.
Sous vide isn’t about expensive equipment—it’s about creativity with what’s already in your kitchen.
Even with budget hacks, you can still aim for even heat distribution to avoid hot or cold spots.
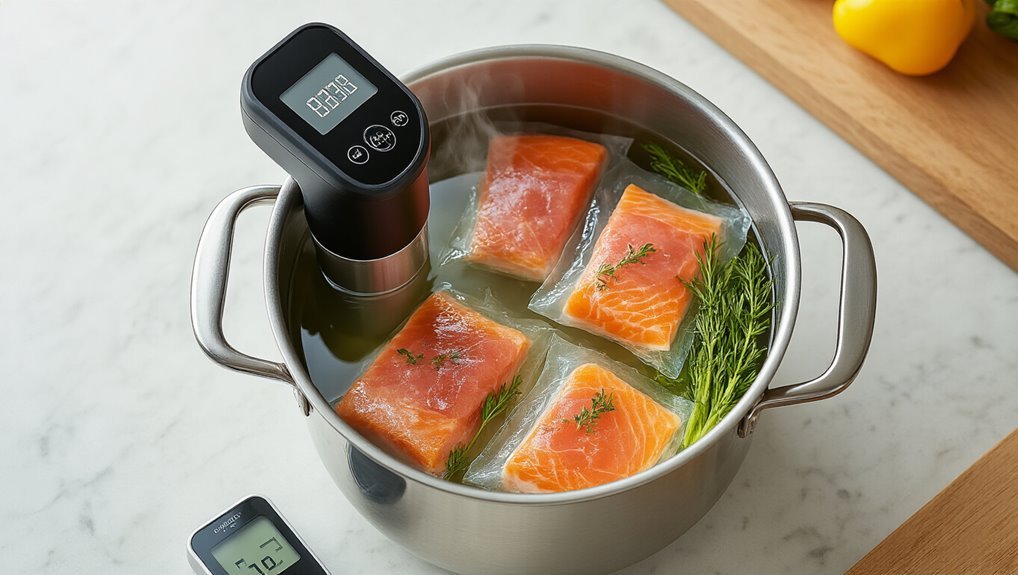
Start with a digital thermometer and any large pot you already own. I clip mine to the side with a wooden skewer—nothing fancy!
For the food, just use freezer bags with the air pushed out (I dip mine in water before sealing to force air out).
You know what works great as a DIY water bath? A cooler or even a rice cooker.
Add a small fountain pump for circulation—probably costs under $10—and you’re cooking like the pros!
The Water Displacement Method: Your Alternative to Vacuum Sealers
While I’ve been cooking sous vide for years, I’ve never actually owned a vacuum sealer—and guess what?
This low-cost method aligns with the extending shelf life goal you can achieve with proper sealing.
The water displacement method works just as well for most home cooking.
I think of it as working with air dynamics rather than fighting them.
Here’s how I do it:
- Slowly submerge your zip-top bag in water, letting water pressure naturally push air out
- Use a drinking straw as an air channel to draw out stubborn air pockets
- Double-bag particularly valuable ingredients for extra security
- Combat bag buoyancy by removing as much air as possible before sealing
- Try a small manual pump with the double-bag method for even better results
The trick is getting the bag just submerged enough while keeping the opening above water. It’s not rocket science, but it does take a bit of practice!
0-$30 Setup: Turn Your Kitchen Pot Into a Sous Vide Bath
I’ve found that turning a regular kitchen pot into a sous vide bath is surprisingly easy when you use the water displacement method to seal your food.
Using Vacuum sealing your bag helps preserve freshness and prevents freezer burn.
You’ll want to monitor your water temperature closely—I like to clip my digital thermometer to the side of the pot with a wooden skewer so I can check it at a glance.
Once you’ve got your water heated to the target temperature, just clip your food bag to the edge of the pot, making sure it’s fully submerged, and you’re cooking just like the fancy restaurants do.
Water Displacement Sealing Method
The water displacement method is my go-to technique when I don’t have a vacuum sealer handy.
It’s surprisingly effective for creating that near-vacuum seal needed for sous vide cooking without spending money on fancy equipment.
I’ve found maintaining bag integrity is essential—cheap bags can leak and ruin your dish.
To properly use the water displacement method:
- Fill a container with water and place your food in a zip-top bag
- Gradually lower the bag into water with the top unzipped
- Let water pressure push air out naturally
- Seal the bag just before the top goes underwater
- For marinades, minimize liquid levels to prevent leakage
Trust me, this method works amazingly well for most home cooks.
I’ve done everything from steaks to vegetables this way, and the results are nearly indistinguishable from using an actual vacuum sealer.
Temperature Control Without Circulators
Many home cooks believe sous vide cooking requires expensive equipment, but you can actually create a perfectly functional setup with items already in your kitchen.
For bath stability, I’ve found that a large pot with plenty of water works wonders.
The extra volume means fewer temperature fluctuations—think of it like a thermal flywheel.
Mount a good thermometer on the side (I prefer digital ones) and check it regularly.
For heater customization, you don’t need anything fancy.
I’ve used everything from a rice cooker to—well, actually just my regular stovetop works fine too.
The trick is getting to your target temperature first, then making tiny adjustments.
If the water gets too hot, I just add a bit of cold water.
Simple but effective!
DIY Thermometer Mounting Techniques
Now that you’ve got your heat source figured out, let’s tackle proper thermometer placement—perhaps the most overlooked aspect of DIY sous vide setups.
I’ve found that smart probe placement makes all the difference between perfectly cooked food and a frustrating experience.
Here are my favorite mounting techniques:
- Skewer method: Thread a bamboo skewer through the thermometer clip and rest it across the pot’s rim
- Binder clip hack: Attach a large binder clip to your pot’s edge as a makeshift clamp choice for the probe
- Lead management: Keep the thermometer lead outside the pot, secured with tape to prevent accidental tugs
- Float approach: Let the thermometer float in a ziplock bag with air (just keep the probe submerged)
- Dual thermometer setup: Use a second thermometer to verify your primary one isn’t lying to you!
30-$75 Setup: Repurpose Slow Cookers and Rice Cookers
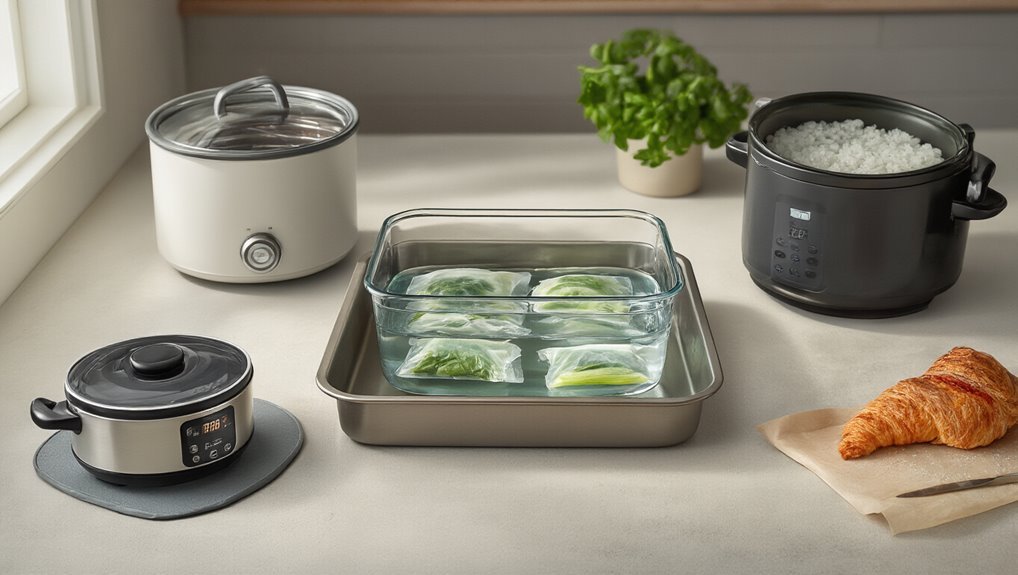
When I first started with sous vide, I discovered that controlling temperature in a repurposed slow cooker is actually pretty simple if you add a SousVideMagic controller—it’s like giving your basic kitchen equipment a brain upgrade.
This lineage of temperature control innovations explains why these hacks work, tracing back to Georges Pralus’ sealed-pouch technique.
For air removal, you don’t need fancy vacuum sealers; I’ve had great results using the water displacement method where you slowly lower a zip-top bag into water, letting the pressure push air out before sealing.
These little hacks transformed my $75 setup into something that performs nearly as well as equipment costing hundreds more, especially when paired with a good digital thermometer to verify those temps are holding steady.
Temperature Control Tricks
How can you achieve professional-level sous vide results without breaking the bank? After setting up your repurposed cooker, the key is maintaining precise temperatures. I’ve found that sensor calibration is essential—always verify your controller’s reading with a reliable thermometer to combat thermal lag. Here are my favorite tricks for temperature stability:
- Use a slow cooker with a SousVideMagic controller for ±1°F precision
- Add a rack or splash guard to improve water circulation around your bags
- Install a small aquarium pump—it’s a game-changer for eliminating hot spots
- Increase thermal mass with extra water volume to dampen temperature swings
- Always pre-heat your setup and let it stabilize before adding food
I think these simple hacks will transform your budget setup into a surprisingly effective sous vide machine!
Air Removal Hacks
Perfect temperature control is just half the sous vide equation. Let’s talk about keeping air out of your bags without dropping hundreds on a vacuum sealer.
I’ve found the straw technique works surprisingly well—just seal most of your zip-top bag, insert a straw, suck out the air, then quickly finish sealing. It’s not perfect, but hey, it gets the job done!
For better bag compression, try the water displacement method. Submerge your open bag in water (keeping the zipper above the waterline), and watch as water pressure pushes air out naturally.
When I’m feeling fancy—well, as fancy as a $75 setup allows—I’ll use a small handheld pump with double-bagging. Or sometimes I just ask my butcher to vacuum seal my meat. Works like a charm!
Temperature Control Hacks for Consistent Cooking Results
Although mastering sous vide cooking begins with getting the right equipment, I’ve found that the real secret lies in temperature control.
When I upgraded my setup, I realized proper sensor placement and monitoring for temperature drift were game-changers for consistent results.
Here’s what works best in my experience:
- Circulate your water bath using a rack or aquarium pump to eliminate those frustrating hot spots
- Keep your bath temperature within 1-2 degrees of target—I check and adjust after things stabilize
- Use a digital thermometer (plus a backup for calibration) to catch any drift over time
- Choose a larger container like a roasting pan when you need more stable temperatures
- Stick with Celsius when possible—it’s what most recipes use anyway, and I’ve noticed better consistency
For even greater seal integrity, consider a setup with Dual sealing bars to minimize leaks during long cooks.
Beginner-Friendly Sous Vide Recipes With Foolproof Timing Charts
Starting your sous vide journey doesn’t need to be intimidating, especially with reliable recipes and timing charts that take the guesswork out of cooking.
Understanding the origin of sous vide origin of sous vide helps frame why precise control matters.
I’ve found that establishing consistent timing rituals is key to success.
For instance, a 1-inch steak at 136°F for 1-3 hours delivers perfect medium-rare results every time.
The magic happens when you match your texture targets to precise temperatures.
Want that ideal 135°F medium-rare?
Keep your bath within a degree or two of target.
I think it’s worth investing in a good digital thermometer—trust me, it makes all the difference.
When prepping, just seal your food with a bit of oil in freezer bags (no fancy vacuum sealer needed) and plan your finishing sear for right before serving.
That way, er, that guarantees you’ll preserve the doneness you’ve worked so carefully to achieve.
Solving Common DIY Sous Vide Temperature and Sealing Problems
When DIY sous vide cooking goes awry, it’s usually because of two culprits: temperature fluctuations or inadequate sealing.
Precise temperature control and proper sealing make the difference between sous vide success and soggy disappointment.
I’ve learned through many kitchen experiments that maintaining seal integrity is essential—nothing’s worse than finding water in your food bag halfway through cooking!
Regular maintenance should include seal bar maintenance to prevent leaks.
To troubleshoot common problems, try these fixes:
- Use a digital thermometer and aim for ±1-2°C of your target temp
- Check for drift calibration against a reference thermometer (I prefer Celsius—it’s often more precise)
- Remove air completely using the straw technique or manual pump
- Guarantee water circulates evenly (an aquarium pump works great in a pinch)
- Watch for and smooth out bag creases that compromise seals
Start with whatever equipment you have—even a slow cooker with a clip-on thermometer can work beautifully while you build your setup.
When and How to Upgrade Your Homemade Sous Vide Setup
Once you’ve mastered the basics of DIY sous vide cooking, you’ll likely find yourself itching for equipment upgrades that deliver more precise results.
The key is knowing when to take the next step in your upgrade timing.
I recommend starting with a budget-friendly CrockPot plus controller setup (under $200), then carefully calibrating your thermometers in Celsius before adding anything else.
You know, temperature stability is essential, so adding circulation with an aquarium pump is actually a smart intermediate step.
For budget pathways that make sense, I’ve found phasing your upgrades works best.
Start with that basic setup, then maybe move to an immersion circulator when you’re ready.
Eventually, you might want multiple circulators for different tasks—I can’t tell you how useful this is for larger meals!
Don’t forget about finishing tools.
A good torch will transform your results.
This is especially effective when you leverage vacuum sealing to promote uniform heat distribution and moisture retention.
Frequently Asked Questions
How to Sous Vide Without Special Equipment?
I use a pot, digital thermometer, and freezer bags with air removed. I maintain temperature stability with my crockpot or cooler. This DIY approach gives me consistent results without special equipment.
What to Use if You Don’t Have a Sous Vide Machine?
Like MacGyver in the kitchen, I’d transform your rice cooker, deep fryer, or insulated cooler into a water bath. Monitor temperature with a digital thermometer and use the immersion technique with ziplock bags instead.
What Are Common Sous Vide Mistakes?
I’ve seen five big mistakes: poor bag sealing that allows water in, ignoring temperature drift from uncalibrated thermometers, not circulating water, skipping the finishing sear, and guessing at cooking times rather than researching.
Do Ziploc Bags Work for Sous Vide?
Yes, I’ve found ziploc bags work well for sous vide if you choose freezer-grade ones for better bag durability. Just guarantee proper seal integrity by removing air completely before cooking.