When I first stumbled onto sous vide cooking, it felt like discovering a secret passage in my own kitchen. I’ve spent years perfecting ways to achieve that precise, edge-to-edge doneness without dropping hundreds on special equipment. The technique completely transformed how I prepare proteins at home, especially for weeknight dinners that need to impress without constant attention. Want to know how your stockpot can rival results from fancy immersion circulators?
Essential Kitchen Items for Homemade Sous Vide Cooking
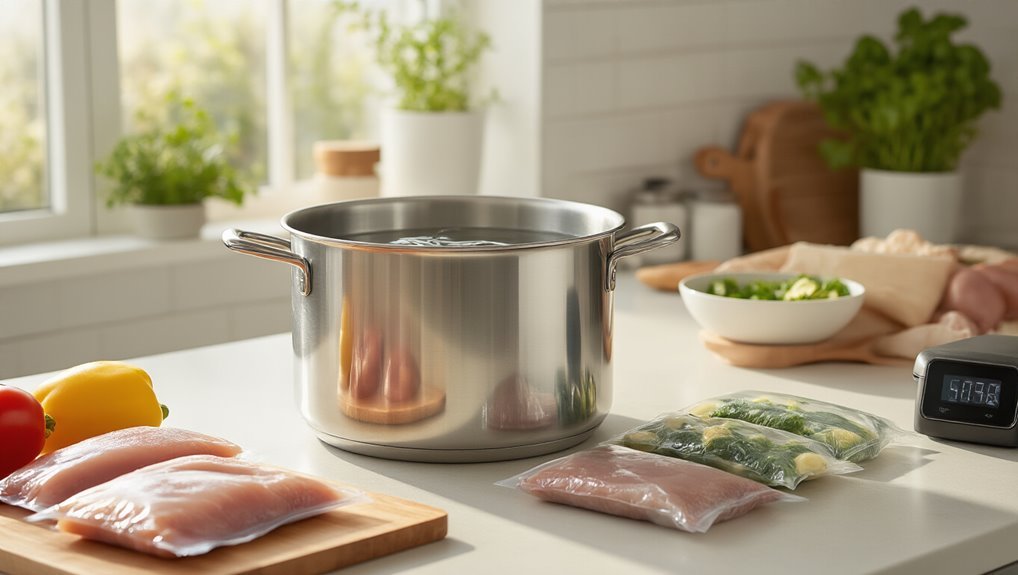
The world of sous vide cooking doesn’t require fancy, expensive equipment to get started. In fact, I’ve found that a basic kit setup can be assembled from items you probably already have in your kitchen.
If you want even more consistent results, consider vacuum sealing to guarantee even heat distribution.
The heart of your DIY sous vide system is a large stockpot or deep pot that allows water to circulate freely around your food.
For storage safety, I recommend using freezer-grade zip-lock bags—they’re perfect for the water displacement method.
(that’s when you slowly submerge the bag to push air out).
You’ll definitely need a reliable digital thermometer to monitor water temperature,
and some way to mount it—I usually just use a wooden skewer or binder clip.
Oh, and don’t forget a timer! Without precise timing, you might overcook those perfect steaks you’ve been dreaming about.
How to Create and Maintain Precise Water Temperature
Now that you’ve gathered your basic sous vide equipment, mastering water temperature control is what’ll make or break your cooking results.
I’ve found that proper thermometer calibration is absolutely critical—don’t skimp on this step! When I maintain my water bath, I focus on creating gentle circulation patterns by stirring occasionally to eliminate hot spots.
Here’s my tried-and-true process:
- Start with medium heat, then reduce as you approach target temperature
- Stir regularly in a figure-eight pattern to guarantee even heat distribution
- Monitor constantly with a digital thermometer, keeping within 0.7°C of target
- Make gradual adjustments by adding small amounts of hot water if temperature drops
For longer cooks, I prefer using a larger pot—it’s like having temperature insurance against sudden changes.
In addition to these steps, vacuum sealing before cooking is a key factor in pork quality and safety.
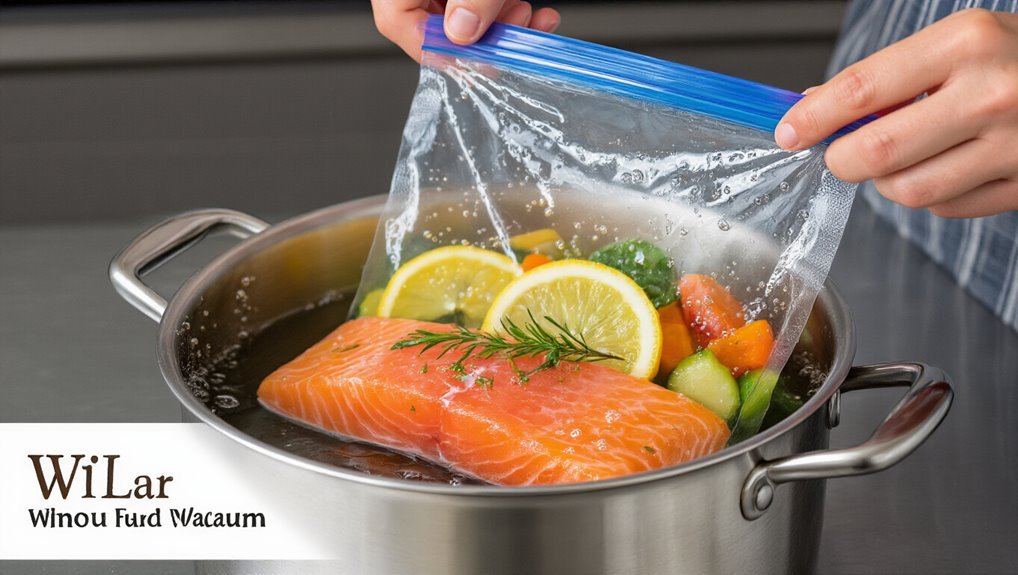
The Water Displacement Method: Sealing Food Without a Vacuum
While fancy vacuum sealers might seem essential for sous vide cooking, I’ve discovered that you don’t actually need one to get started.
The water displacement method—what I call the “zipper technique”—works amazingly well with regular freezer-safe Ziploc bags.
Skip the fancy equipment—regular freezer bags and the “zipper technique” give professional sous vide results through simple water displacement magic.
Here’s my approach: place your seasoned food in the bag but don’t seal it yet.
Slowly lower it into water while keeping the zipper part above the waterline. The water pressure naturally forces air out—that’s the air expulsion magic happening!
Once most air is pushed out, seal the zipper.
I’ve found this creates excellent contact between food and seasonings.
After sealing, I always refrigerate until my water bath reaches temperature.
It’s not perfect like vacuum sealing, but honestly, the results are nearly indistinguishable for most home cooking needs.
This technique minimizes air exposure compared to traditional methods, promoting better flavor retention.
Best Foods for DIY Sous Vide and Their Cooking Times
After mastering the zipper technique for sealing your food, you’re probably wondering what to cook in those perfectly water-displaced bags.
I’ve found that certain proteins really shine with sous vide cooking, giving you restaurant-quality results at home.
Here are my go-to recommendations with their ideal timing:
- Pork tenderloin – 140-145°F for 1-4 hours creates the juiciest pork you’ll ever taste
- Steak (1-inch thick) – 136°F for 1-3 hours delivers perfect medium-rare beef texture every time
- Boneless chicken breast – 140-160°F for 45 minutes to 4 hours, depending on your preferred doneness
- White fish fillets – 140°F for about 25 minutes yields delicate, flaky results
The beauty of sous vide is consistency—once you find your sweet spot, you’ll nail it every time! This method hinges on temperature control, a core principle that keeps proteins evenly cooked.
Finishing Your Sous Vide Creations With the Perfect Sear
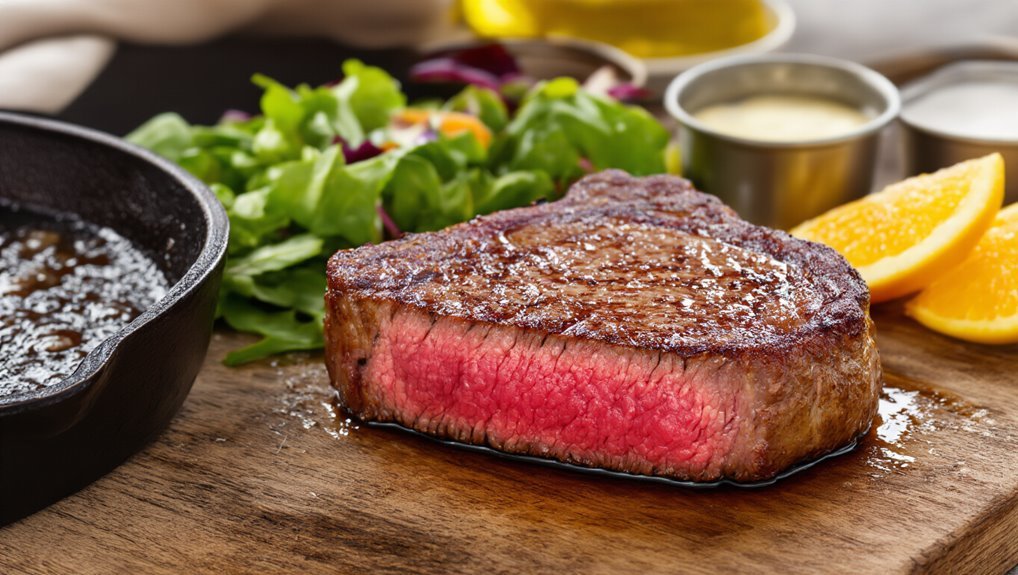
The magic of sous vide cooking doesn’t end when you remove your food from its warm water bath—it’s only halfway complete! This approach mirrors the ideas of vacuum sealing for portion control portion control. For that perfect finishing touch, I’m obsessed with achieving stunning crust formation through a quick, hot sear. I always pat my meat completely dry first—this might seem like a small step, but it’s essential for proper browning.
Here’s my go-to searing guide:
| Searing Method | Time Per Side | Tips for Best Aroma Development |
|---|---|---|
| Cast Iron Pan | 45-60 seconds | Use clarified butter or avocado oil |
| Torch | 30-45 seconds | Move constantly to prevent burning |
| Grill | 60 seconds | Lid open, highest possible heat |
Let your creation rest for just a minute after searing. Trust me, this brief pause allows juices to redistribute while preserving that beautiful crust you worked so hard for.
Frequently Asked Questions
How to Sous Vide Without Special Equipment?
I maintain a water bath in a pot using my stove, monitoring temperature with a thermometer. I’ll seal food in bags using the water displacement technique, then cook it to perfection.
What Can You Use Instead of a Sous Vide Machine?
I’d use improvised methods like a large pot with a digital thermometer, a cooler with occasional hot water top-ups, or homemade devices utilizing aquarium pumps for circulation.
Do You Need Special Equipment for Sous Vide?
No, I don’t need special equipment for sous vide. That’s one of the biggest equipment myths! I can use budget substitutes like a pot, thermometer, and ziplock bags for basic sous vide cooking.
What Is the Downside of Sous Vide?
Precision comes at a price. I find sous vide’s time investment frustrating—hours for what takes minutes traditionally. There’s also safety concerns with improper bags leaching chemicals into your food during extended cooking.