I’ve got to tell you, sous vide cooking transformed my weekly meal prep routine. I’m not exaggerating when I say it’s the perfect solution for my chaotic family schedule. Instead of rushing through dinner every night, I now batch-cook proteins on Sunday that taste freshly made when reheated. The beauty is in the consistency—my kids actually eat what I serve them! Wondering which recipes work best for make-ahead meals without sacrificing quality? Let me show you my fail-proof system.
5 Ways Sous Vide Meal Prep Saves Time for Busy Families
Juggling family life while trying to put nutritious meals on the table can feel like an impossible balancing act.
That’s where sous vide meal prep has completely transformed my morning routines.
I’ve found batch cooking several protein-vegetable combos on Sunday afternoon means I’m not scrambling during weeknight dinner chaos.
The beauty is in the “set it and forget it” nature—I can help with homework while dinner cooks itself to perfect doneness.
No more hovering over the stove!
And talk about budget hacks—those vacuum-sealed bags mean practically zero food waste since everything stays fresh longer.
When Thursday rolls around and we’re exhausted, I just drop a pre-portioned bag into warm water for 15 minutes.
The results? Well, they taste almost freshly made, not like typical leftovers.
Game-changer for busy families!
Vacuum sealing also enhances meal prep efficiency by reducing waste and preserving flavors for longer storage oxidation prevention.
Quick-Start Guide: Essential Equipment and Basic Techniques
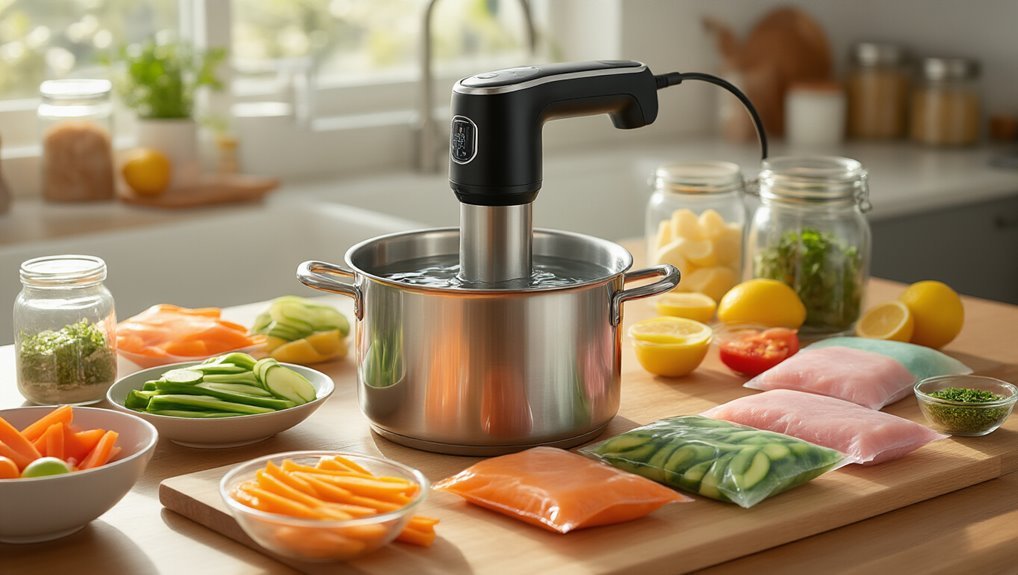
I started my sous vide journey with just the basics – a FoodSaver V4440 2-in-1 vacuum sealer and some compatible rolls and bags.
You’ll want to master vacuum sealing fundamentals first, making sure to form bags large enough for your proteins with several inches of material on all sides.
Once you’ve got your equipment set up, I recommend printing out a timing and temperature chart to keep handy in your kitchen – it’ll save you from constantly looking things up on your phone with messy hands.
Mastering vacuum sealing also gives you air-tight packaging that locks in moisture and flavors during cooking.
Essential Starter Equipment
The right equipment makes all the difference when you’re diving into sous vide meal prep. I’ve found that the FoodSaver® V4440 2-in-1 Automatic Vacuum Sealing System is absolutely essential for beginners. It’s a game-changer for preserving freshness and preventing spoilage.
| Equipment | Purpose | Vacuum Maintenance | Seal Integrity |
|---|---|---|---|
| V4440 Sealer | Removes air | Clean after each use | Check for wrinkles |
| Vacuum Seal Bags | Storage | Replace when worn | Press firmly |
| Zipper Bags | Quick access | Hand-wash only | Test before cooking |
| Containers | Batch storage | Dry completely | Inspect rubber gasket |
In my experience, proper vacuum maintenance provides consistent results. I always check seal integrity before submerging—nothing worse than a leaky bag ruining dinner! This system lets me prep multiple proteins with different flavors, making weeknight dinners a breeze.
Vacuum Sealing Fundamentals
Once you’ve got your starter equipment ready, mastering vacuum sealing fundamentals becomes your essential step for sous vide success.
I’ve found that proper air elimination is critical for even cooking and extended freshness.
My FoodSaver V4440 has been a game-changer for my family’s meal prep routine.
To achieve perfect seal integrity every time:
- Leave several inches of bag material on all sides when sizing your pouches
- Place protein with seasonings in the center, avoiding liquids near the seal area
- Press firmly during the sealing process to guarantee all air is removed
- Check for wrinkles or gaps that might compromise your seal
- Chill sealed bags completely before freezing to maintain texture
Trust me, these simple steps will transform how you approach meal prep—and save you tons of time during busy weeknights!
Timing and Temperature Charts
Now that you’ve mastered the art of vacuum sealing, let’s get down to the heart of sous vide cooking success—knowing exactly how long and at what temperature to cook your favorite proteins.
In my experience, temperature mapping is essential for perfect results every time.
I keep it simple: NY Strip steak at 125°F for about an hour, chicken breast at 160°F for roughly 2.5 hours, and salmon at 130°F for just 30 minutes.
These aren’t random numbers—they’re the sweet spot for texture and safety.
Timing optimization matters too, especially for busy families.
When I’m batch prepping, I vacuum seal individual portions, then refrigerate or freeze them.
Later, I’ll either thaw before cooking or, if I’m in a hurry, add a bit more time to the bath.
Works like a charm!
15-Minute Prep Chicken Recipes That Last All Week
I’ve found that chicken breasts are truly the MVP of my sous vide meal prep strategy for busy weeks.
With just minutes of actual hands-on time, I can prepare perfectly juicy chicken that’s ready to be finished with a quick sear whenever my family needs a meal. You’ll love how these one-bag wonders simplify your weeknight routine while still delivering restaurant-quality results that even picky eaters will devour.
The key technique, vacuum sealing, enhances flavors, shelf life, and meat quality.
Perfect Prep-Ahead Poultry
How can busy families fit wholesome cooking into chaotic schedules?
I’ve discovered that sous vide prep-ahead chicken is my secret weapon.
With proper safety handling and attention to texture retention, you can enjoy restaurant-quality poultry all week from just 15 minutes of prep work.
Here’s why I’m obsessed with this method:
- Vacuum-sealed chicken breasts stay incredibly juicy, unlike dry meal-prep chicken
- Each bag becomes a flavor infusion chamber with herbs and butter
- The 160°F bath temperature eliminates any food safety worries
- Quick ice bath after cooking extends fridge life to a full week
- One bag can contain a complete meal with protein and sides
Trust me, once you try this system, you’ll never go back to Sunday night panic cooking!
One-Bag Chicken Wonders
While juggling soccer practice, work deadlines, and everything in between, the last thing you need is complicated meal prep. That’s why I’m obsessed with the one-bag chicken technique. It’s seriously revolutionized my weeknight cooking!
Here’s what makes this approach magical: you combine chicken, veggies, herbs, and a simple chicken marinade in a vacuum-sealed bag, cook once, and eat all week. I think the butter makes all the difference—it creates this incredible sauce that flavors everything.
| Ingredient | Amount | Prep | Notes |
|---|---|---|---|
| Chicken breast | 1.5 lb | Whole | Season generously |
| Butter | 2 tbsp | Cubed | Creates silky sauce |
| Herbs | To taste | Fresh | Sage and thyme work well |
| Vegetables | 1-2 cups | Chopped | Broccoli holds up nicely |
Hassle-Free Family Favorites
Now that you’ve mastered the one-bag chicken technique, let’s expand your repertoire with some hassle-free family favorites that’ll make weeknight meals a breeze.
I’ve found that even picky eaters can’t resist these versatile chicken preps that stretch your grocery budget further than you’d think.
- Lemon-pepper rubbed chicken breasts with a golden sear for taco night
- Herb-infused sous vide chicken sliced over pasta with the reserved butter sauce
- Shredded chicken mixed into creamy soups (a great way to sneak in veggies!)
- Diced chicken tossed in stir-fries with whatever vegetables are on sale
- Chicken salad sandwiches made with the juiciest meat you’ve ever had
Trust me, these budget hacks will revolutionize how your family experiences meal prep chicken.
No more dry, flavorless meals!
Kid-Friendly Beef Dishes With Make-Ahead Convenience
Preparing dinner for kids when you’re juggling a busy schedule can feel like mission impossible, but I’ve discovered that sous vide cooking is a game-changer for families on the go.
Tender ribeye steaks vacuum-sealed with herbs and butter can be prepped days ahead and finished with a quick sear when you’re ready to serve.
I’m obsessed with one-bag meals like sous vide steak with roasted peppers and onions.
You can adjust portion sizes for growing appetites and experiment with different marinade options depending on what your kids enjoy.
The smoked brisket is probably my family’s favorite—I batch cook it, then portion and freeze.
When dinner time rolls around, even my teenagers can reheat it themselves!
Store these beef dishes in the fridge for 3-4 days or freeze for those really hectic weeks.
Vacuum sealing also supports portion control by pre-portioning meals for consistent servings.
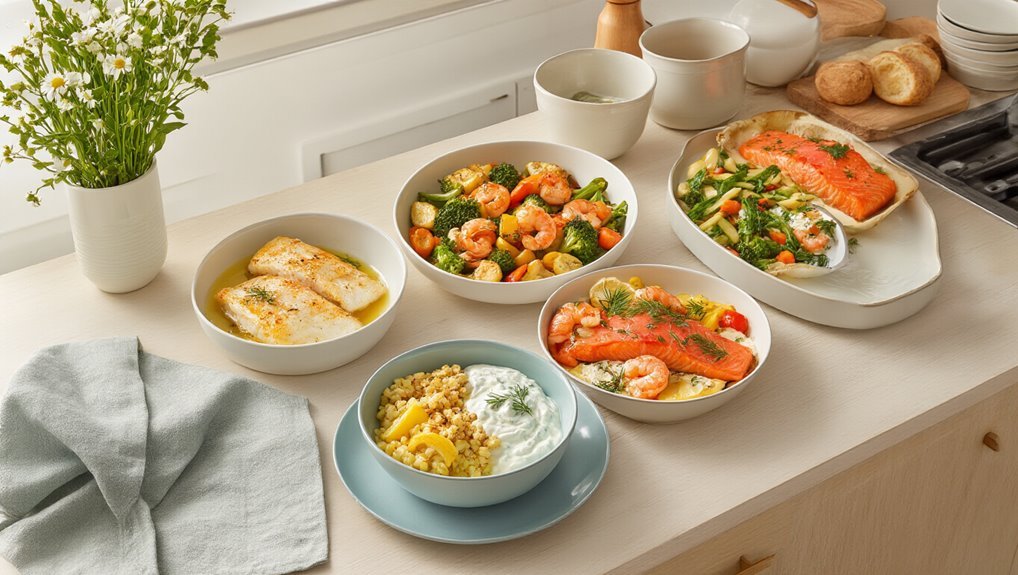
No-Fail Fish and Seafood Recipes That Reheat Perfectly
The biggest myth about seafood I’ve had to overcome is that fish doesn’t reheat well.
With sous vide, particularly salmon, I’ve mastered a reheat-ready meal that preserves restaurant-quality flavor.
My 1½ lb salmon filets with basil, butter, lemon, and garlic cook perfectly at 130°F for 30 minutes.
For texture preservation, follow these reheat guidelines:
- Store cooked salmon in its vacuum bag for moisture retention
- Reheat in a sous vide bath at the original 130°F cooking temperature
- Thaw frozen bags before reheating (or add 30-60 minutes if heating from frozen)
- Pat dry and give a quick sear in a hot skillet for that perfect finish
- Finish with a drizzle of olive oil and fresh lemon zest to brighten flavors
Trust me, your family won’t believe it’s leftover fish!
This approach hinges on precise temperature control to preserve moisture and texture during reheating.
One-Bag Complete Meals for Minimal Weeknight Cleanup
I’ve found that certain protein-veggie combinations work remarkably well in one-bag meals, with my personal favorite being salmon with green beans and lemon zest for that bright, fresh flavor. Vacuum sealing not only locks in flavors but also extends shelf life by reducing exposure to air. When you’re thinking about flavor profiles, consider how herbs and spices will infuse during the sous vide process—rosemary with steak and sweet potato creates an aromatic meal that needs just a quick sear to finish.
You’ll notice that combining complementary ingredients like chicken with broccoli and garlic in olive oil gives you a complete, balanced meal with virtually no weeknight cleanup.
Protein-Veggie Combos Worth Trying
Why struggle with multiple pots and pans when you can create delicious, complete meals in a single sous vide bag?
I’ve tested dozens of protein pairings and veggie textures, and honestly, it’s changed my weeknight dinner game completely.
These vacuum-sealed combinations marry flavors perfectly while saving you from a sink full of dishes.
Here are my favorite combos to try:
- Chicken breast with broccoli florets, minced garlic, and a drizzle of olive oil
- Tender salmon fillets alongside crisp green beans and bright lemon zest
- Juicy steak paired with sweet potato chunks and fresh rosemary sprigs
- Turkey breast with colorful carrot medallions and warming curry powder
- Pork tenderloin with apple slices and a sprinkle of cinnamon
Flavor Profiles That Shine
How do flavors truly come alive when cooking sous vide style?
I’ve found that magic happens when complementary ingredients share space in a vacuum-sealed bag.
The citrus brightness of lemon zest transforms salmon and green beans from simple to spectacular, while umami depth develops when you pair steak with rosemary and sweet potato.
In my experience, the vacuum environment does something special—it’s like it forces flavors to mingle and get to know each other, you know?
I think the key is balancing aromatics with proteins.
When chicken cooks alongside broccoli and garlic, they don’t just cook together; they become something greater than their parts.
After the sous vide bath, don’t skip that quick sear!
It creates a beautiful crust that, well, locks in all those amazing flavors you’ve developed.
Vegetable Sides and Vegetarian Mains Worth Batch-Cooking
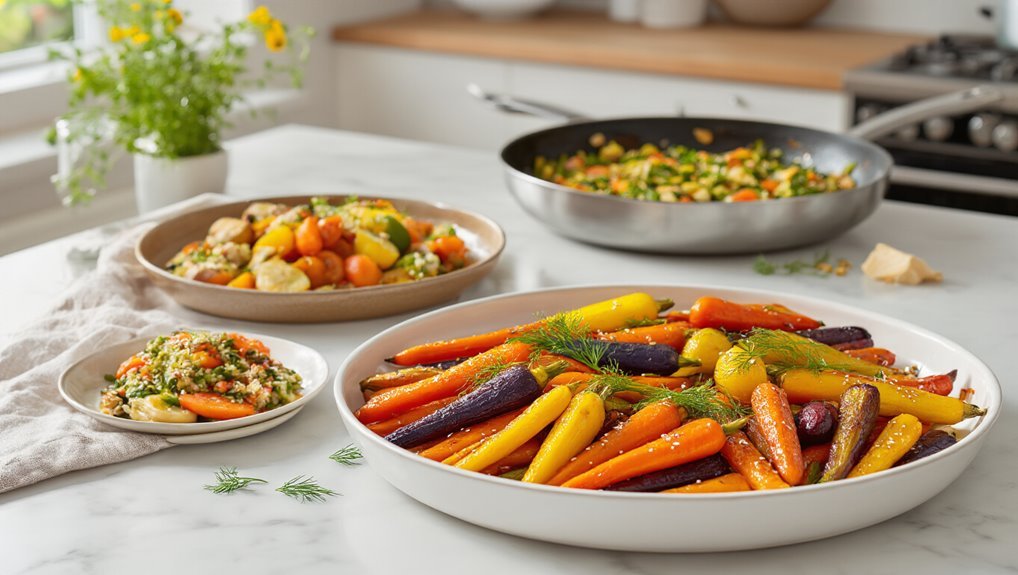
While many home cooks overlook vegetables as sous vide candidates, I’ve found that batch-cooking veggies might be the biggest time-saver in my weekly meal prep routine.
At a precise 181.4°F, I can transform colorful vegetables into consistently tender sides that reheat beautifully—perfect for those chaotic weeknights when I’m scrambling to get dinner on the table.
My favorite seasonal pairings create amazing texture contrasts when cooked this way:
- Baby purple turnips with fresh thyme and a touch of lemon zest
- Spring fava beans sealed with mint leaves and olive oil
- Heirloom carrots with a light honey glaze
- Mixed root vegetables with rosemary and black pepper
- Summer squash medley with basil and a splash of balsamic
You can even turn these sides into complete vegetarian mains by adding complementary proteins in the same bag!
This precision relies on temperature control to ensure even cooking.
From Breakfast to Dessert: Sweet and Savory Make-Ahead Options
When I first discovered that sous vide cooking extends far beyond dinner options, my meal prep routine completely transformed.
I’m now obsessed with breakfast batching using those egg white bites with kale and feta—they’re protein-packed lifesavers on hectic mornings.
Just reheat and go!
The overnight bacon technique is, well, life-changing. It renders the fat so beautifully that a quick finish in a hot pan gives you perfect crispy bacon in minutes.
For dessert prep, I think sous vide crème brûlée might be the smartest make-ahead trick I’ve learned. You can prepare several at once, refrigerate them, and just torch the sugar top when you’re ready to impress.
Even risotto—which I’d never considered for breakfast—becomes a versatile base you can customize throughout the week.
Professional kitchens also rely on precise temperature control to nail textures across dishes, including desserts, which is a core advantage of the sous vide method.
Smart Storage: Refrigeration and Freezing Timelines for Different Meals
- Refrigerated bags last up to 7 days—perfect for weekly meal planning
- Frozen meals stay good for 2-3 months (6 months for chicken!)
- Never, ever refreeze something you’ve already thawed—it’s just asking for trouble
- Store bags flat in your freezer—trust me, your future self will thank you
- Label everything with dates—I’ve learned this lesson the hard way!
Incorporating vacuum sealing can further maximize shelf life extension when combined with proper cooling.
Reheating Your Sous Vide Creations Without Losing Quality
Frequently, the biggest challenge of sous vide meal prep isn’t the cooking—it’s the reheating without sacrificing that perfect texture you worked so hard to achieve.
In my experience, the best approach is to use the same water bath temperature you initially cooked with.
This simple step is essential for texture retention when bringing those meals back to life.
For longer storage before reheating, consider vacuum sealing portions to improve freezer burn prevention.
If you’ve frozen portions (which I often do), you’ll need about 30-60 extra minutes in the bath.
—or better yet, thaw overnight first.
I’ve found refrigerated leftovers deliver the best reheat quality, especially when you finish with a quick sear in a scorching hot pan.
Let the meat rest briefly after reheating, and remember, never refreeze already thawed portions.
Trust me, your family won’t believe they’re eating leftovers!
Frequently Asked Questions
Can I Sous Vide in Regular Zip-Top Bags Instead of Vacuum-Sealed?
Yes, you can use regular zip-top bags. I’d recommend freezer bags for better durability. Just guarantee they’re BPA-free to avoid safety concerns when exposed to heat during cooking.
How Do You Prevent Sous Vide Bags From Floating During Cooking?
While bag buoyancy frustrates many sous vide cooks, I’ve mastered it. I prevent floating by using clips to secure bags to the container’s edge or employing weighting options like spoons, heavy plates, or binder clips.
Will Reheated Sous Vide Meals Taste as Good as Freshly Prepared?
In my experience, reheated sous vide meals retain most of their flavor, though you might notice slight texture changes. I find proteins like chicken and steak hold up remarkably well compared to conventional reheating methods.
What’s the Minimum Time Needed Between Batch Cooking and Serving?
I’ve found that 72% of sous vide users maintain batch timing of just 2-3 days before serving. You’ll need 0 minutes if held at proper holding temp—serve immediately after cooking!
How Can I Sous Vide Multiple Proteins at Different Temperatures Simultaneously?
I manage multiple proteins through temperature zoning—using separate water baths or creating zones within one container. I’ll coordinate batches starting with higher-temp items first, adding lower-temp ones later for simultaneous finishing.