I’ve been using FoodSaver vacuum sealers for almost a decade now, and I can’t imagine my kitchen without one. They’ve saved me countless dollars on wasted food and made meal prep so much simpler. If you’re on the fence about getting one, or maybe you have one collecting dust in your cabinet, you might not realize all the ways these machines can transform how you store and prepare food. Let’s talk about what makes these gadgets worth the counter space.
How FoodSaver Vacuum Sealers Work
When you’re looking to preserve food longer than traditional storage methods allow, a FoodSaver vacuum sealer might be just what you need.
I’ve found these ingenious devices use vacuum sealing technology that’s actually quite straightforward but incredibly effective.
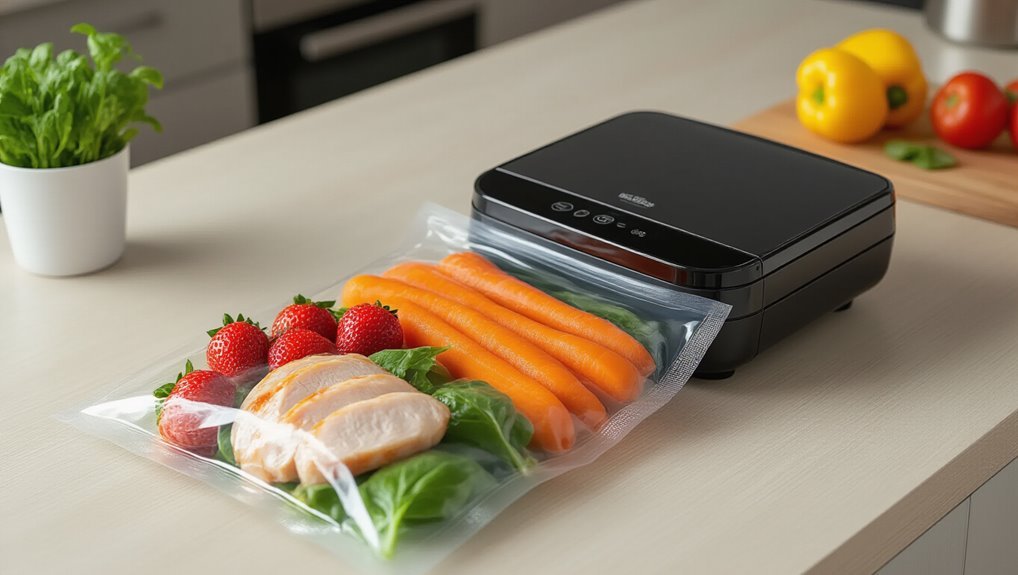
Here’s how it works: The FoodSaver uses a built-in pump for the air removal process from specially designed bags.
When you place food in the bag and insert it into the machine, the pump extracts virtually all air—which is, you know, what causes most food spoilage.
Then a heat strip seals the edge completely.
Regular maintenance, such as cleaning or replacing the air filter and inspecting the gasket, makes a noticeable difference in performance air filter maintenance.
What I love is how customizable the process is.
Depending on your model, you can select moist or dry food settings, use the pulse feature for delicate items, or even activate a marinate function.
The LED indicators tell you when it’s done!
Key Benefits of Food Vacuum Sealing
I’ve found that vacuum sealing my food has been a game-changer for my grocery budget, extending freshness up to five times longer while saving me from tossing out spoiled items.
You’ll notice your foods maintain their original flavors and textures much better when sealed properly, something I really appreciate when I’m cooking with ingredients I’ve stored for weeks.
What’s even better is how much money you’ll save in the long run – I’m probably cutting my food waste by at least half since I started vacuum sealing my meats, vegetables, and even cheese.
This method also supports long-term quality by air removal, reducing oxidation and freezer burn when foods are stored.
Extended Food Longevity
If you’re looking for ways to stretch your grocery budget and reduce food waste, you’ve got to contemplate the incredible food preservation power of vacuum sealing. I’ve found that my FoodSaver can literally extend frozen foods’ shelf life up to five times longer than traditional storage methods.
It’s pretty amazing how vacuum sealing works—by removing air from storage containers, you’re basically eliminating the primary culprits behind spoilage: oxidation and microbial growth.
What I love most is that my meat, produce, even baked goods maintain their original flavor and nutrients for weeks longer.
In my experience, portioning meals before vacuum sealing has been a game-changer. I’m wasting way less food because everything stays fresh so much longer. It’s like giving your groceries a time machine!
Money-Saving Food Preservation
The financial benefits of vacuum sealing are honestly mind-blowing once you do the math. I’ve saved hundreds on groceries since I started using my FoodSaver for meal planning.
When you buy in bulk and properly seal portions in storage containers or vacuum bags, you’re fundamentally paying yourself back with every use.
Think about it – how many times have you thrown out wilted veggies or freezer-burned meat? It’s like tossing cash directly into the trash.
With vacuum sealing, I’ve cut my food waste by almost 80%, which is, well, pretty significant when grocery prices keep climbing.
Plus, I’m making fewer trips to the store since everything lasts so much longer. Between bulk discounts and preventing spoilage, it’s probably one of the smartest kitchen investments I’ve made.
Enhanced Flavor Retention
Saving money is fantastic, but wait until you hear what vacuum sealing does for flavor. I’ve found that FoodSaver’s airtight seal dramatically reduces oxidation, which is basically flavor’s worst enemy. Your foods retain their original taste up to 5 times longer—something I never thought possible before trying it myself.
The marinate mode is probably my favorite feature for flavor infusion. It works by, well, vacuuming out air so marinades penetrate deeper and faster into foods.
| Food Type | Aroma Preservation | Taste Difference |
|---|---|---|
| Fresh Herbs | Vibrant & Intense | Like just-picked |
| Coffee Beans | Rich & Complex | No staleness |
| Meat | Full-bodied | Restaurant-quality |
Don’t get me started on how it preserves natural aromas—you’ll be amazed at the difference in everything from berries to steaks!
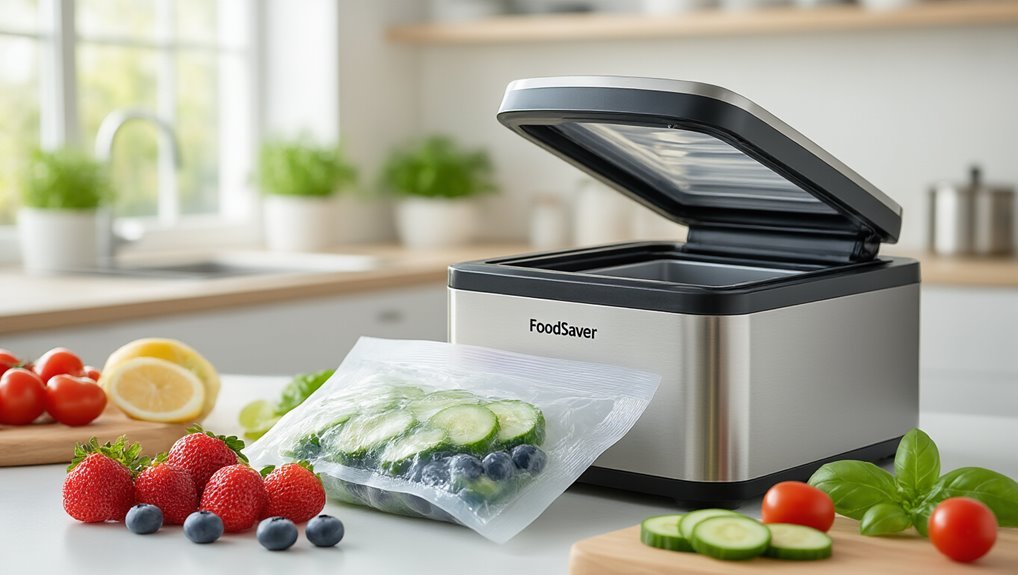
Comparing FoodSaver Models and Features
I’ve found that when it comes to FoodSaver models, you’re basically choosing between entry-level simplicity or premium bells and whistles.
If you’re just starting out, a basic model will seal your food perfectly fine.
But spending a bit more gets you specialized functions like marinate modes or gentler settings for delicate items.
What I really appreciate about the higher-end units is their dual functionality – especially those that combine traditional heat sealing with handheld vacuum options for containers and zipper bags. In fact, vacuum sealing helps ensure uniform heat distribution when used with methods like sous vide.
Entry vs. Premium Tiers
When comparing FoodSaver vacuum sealers, I’ve noticed there’s a significant difference between entry-level and premium models that goes beyond just price. Brand reputation plays a huge role here – premium tiers consistently receive better customer reviews for durability and performance.
Here’s a quick comparison:
| Feature | Entry-Level | Premium |
|---|---|---|
| Sealing Speed | Basic | Faster |
| Control Options | Limited | Multiple settings |
| Accessories | Minimal | Expanded kit |
| Construction | Standard | Heavy-duty |
| Special Modes | None/Basic | Marinate cycle, etc. |
I think the price jump (sometimes double!) is justified if you’re a frequent user. The premium models aren’t just flashier—they’re workhorses designed for serious food preservation. If you’re only sealing occasionally, though, the entry level might be perfectly fine for your needs.
Special Function Comparison
Now that we’ve covered the tier differences, let’s look at what really sets these machines apart—their special functions.
When I’m looking at FoodSaver models, I pay close attention to the sealing modes. The vacuum sealing science behind pulse, dry, moist, and marinate settings isn’t just marketing—it actually affects how well your food preserves.
In my experience, models with built-in roll storage save tons of counter space, though I’ve managed fine with the basic units too.
What’s probably most important for serious food preservation techniques is the multi-layer barrier technology. The premium models—well, they simply create a better seal with higher vacuum pressure.
I’m particularly fond of the marinate mode, which has transformed my meal prep.
Just remember that not all FoodSavers work with all bag sizes!
Step-by-Step Guide to Using Your FoodSaver
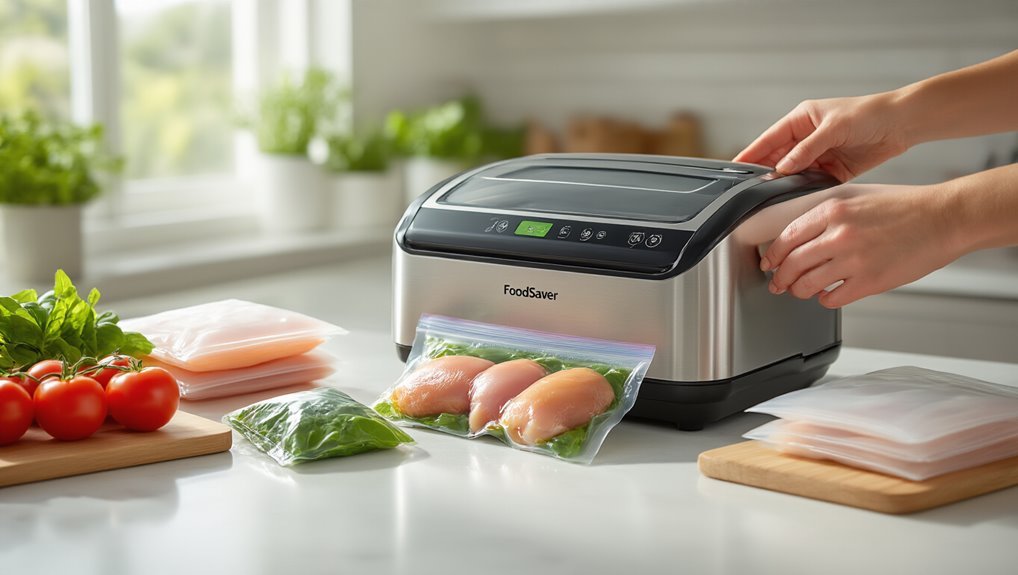
To properly use your FoodSaver vacuum sealer, you’ll need to follow a simple yet precise sequence of steps that I’ve found makes all the difference between perfectly preserved food and disappointing results.
This approach also supports food shelf life improvements that vacuum sealing provides.
| Step | Action | Key to Food Freshness |
|---|---|---|
| 1 | Ensure your sealer is plugged in and properly assembled | Prevents sealing failures |
| 2 | Select appropriate settings for your food type | Customizes sealing techniques |
| 3 | Position bag correctly on the sealing strip | Creates airtight preservation |
I’ve learned that closing the lid firmly before pressing the vacuum button is essential. Wait until the LED indicates completion—don’t rush this part! After opening, I always check my seals by running my finger across them. If something looks off, just trim and try again. Trust me, a perfect seal is worth the extra minute.
Creative Uses Beyond Basic Food Storage
While mastering the basic sealing technique is a great starting point, your FoodSaver can actually revolutionize many aspects of your home beyond just preserving tonight’s leftovers.
Your FoodSaver isn’t just for leftovers—it’s a versatile tool ready to transform how you organize, craft, and preserve throughout your home.
I’ve discovered it’s perfect for protecting linens and clothing from moisture when stored long-term—something I wish I’d known years ago!
For crafters, it’s a game-changer. I use mine to preserve dried flowers and delicate materials in perfect condition for decorative packaging projects. You know those tiny beads that always spill everywhere? Vacuum seal them!
The marinate mode is probably my favorite hack—it infuses flavors in minutes instead of hours.
And for fragile baked goods? Try the pulse setting. It gives you just enough vacuum without crushing your cookies.
Trust me, once you start thinking outside the food box, you’ll never look back. In fact, the science of vacuum sealing benefits heat distribution and flavor retention across different uses, including culinary and beyond vacuum sealing benefits.
Maintenance and Troubleshooting Tips
- Clean that sealing strip regularly with a damp cloth—trust me, food residue buildup is the enemy of a good seal.
- Replace your vacuum pump filter when it looks dirty (check your manual for the schedule).
- Only use bags compatible with your specific model—I learned this the hard way!
- Keep liquids away from the vacuum chamber unless you’ve got the right accessories.
- If seals are failing, first check if the lid is completely closed—sounds obvious, but it’s usually the culprit.
- Regular maintenance also includes inspecting gaskets and sealing surfaces to ensure airtight seals and extend the sealer’s life.
Best Practices for Optimal Food Preservation Results
Getting the most from your FoodSaver isn’t just about having the right model—it’s about mastering the techniques that’ll make your food last considerably longer.
I’ve learned that keeping the bag’s opening clean and dry before sealing is essential—you don’t want to fall for vacuum sealing scams promising perfect results without proper technique. Always remove as much air as possible, and honestly, I think this is where most people slip up.
Its core benefit comes from air removal, which slows spoilage and protects foods from freezer burn.
When you’re choosing between settings (dry, moist, pulse), match it to what you’re storing.
While alternative storage methods exist, nothing beats the shelf-life extension of a properly sealed bag.
Just remember to clean that sealing strip regularly! In my experience, avoiding overfilling your bags makes all the difference between mediocre preservation and food that tastes fresh months later.
Frequently Asked Questions
Which Model of Foodsaver Is the Best?
I’d recommend the SV2500 for its superior sealing speed comparison and durability. However, if you’re concerned about vacuum sealer maintenance, the user-friendly FM5200 might suit you better.
Are Foodsaver Vacuum Sealers Worth It?
Yes, they’re worth it if you’ll use all features. I’ve found regular cleaning prevents unused features from malfunctioning. My maintenance tip: wipe the seal area after each use for longevity.
Can Regular Ziploc Bags Be Used With Foodsaver?
No, regular Ziploc bags won’t work properly with FoodSaver. I’d recommend using reusable bags specifically designed for vacuum sealing or exploring alternative sealing methods like the water displacement technique instead.
What Foods Should You Not Vacuum Seal?
I avoid vacuum sealing foods that contain high water (leafy greens), release gases (carbonated drinks), or have delicate textures (soft cheeses). Food preservation myths aside, raw eggs and some fresh produce also aren’t suitable.