To address suction issues in your vacuum sealer, start by checking the sealing bar for any debris or misalignment. Regularly clean and replace it if necessary. Inspect and clean the gaskets, replacing worn or torn ones. Ensure bags are properly positioned, avoiding overfilling and ensuring alignment. Thoroughly clean the vacuum channel to remove any blockages. Verify the power source to ensure consistent power supply. If these steps do not resolve the problem, refer to the manufacturer's guide for more detailed troubleshooting and maintenance tips.
Inspect the Sealing Bar
To resolve suction problems in your vacuum sealing machine, start by inspecting the sealing bar for any debris or misalignment. Often, food particles can get lodged on or around the sealing bar, leading to an improper seal. Carefully examine the bar for any leftover food or other debris that might be obstructing it. Even small particles can disrupt the sealing process, causing weak suction.
Next, confirm the sealing bar is properly aligned. Misalignment can prevent the machine from creating a secure seal, which is essential for maintaining excellent suction. Adjust the bar if necessary to make sure it's sitting correctly.
Regular cleaning of the sealing bar is important. Wipe it down after each use to remove any food particles or residue. This simple step can prevent buildup and maintain your machine's performance.
Additionally, inspect the sealing bar for signs of wear or damage. Over time, the bar can deteriorate, affecting its ability to seal effectively. If you notice any cracks or significant wear, it might be time to replace the sealing bar.
Check the Gaskets
Begin by examining the gaskets for any signs of tears, wear, or damage that could compromise the vacuum sealer's suction power. Gaskets are important components that guarantee your vacuum sealer maintains an airtight seal, preventing air leakage during the sealing process. Even minor damage to the gaskets can significantly reduce suction performance.
Make sure to:
- Inspect the gaskets regularly: Look for visible signs of wear and tear.
- Clean the gaskets: Remove dirt, debris, or food particles that could obstruct the seal.
- Replace damaged gaskets: If you find any tears or significant wear, it's crucial to replace them to maintain peak performance.
- Ensure proper fit: Verify that the gaskets fit snugly without any gaps.
- Use manufacturer-recommended parts: Always opt for gaskets recommended by your vacuum sealer's manufacturer to guarantee compatibility.
Proper care and maintenance of the gaskets are vital for the efficient operation of vacuum sealers. Regular inspection and cleaning can help you identify issues before they become major problems, ensuring your machine works at its best. If you find that cleaning doesn't resolve the suction issue, replacing the gaskets is a straightforward and cost-effective solution. By keeping your gaskets in top shape, you'll ensure your vacuum sealer performs effectively and reliably.
Position the Bags Correctly
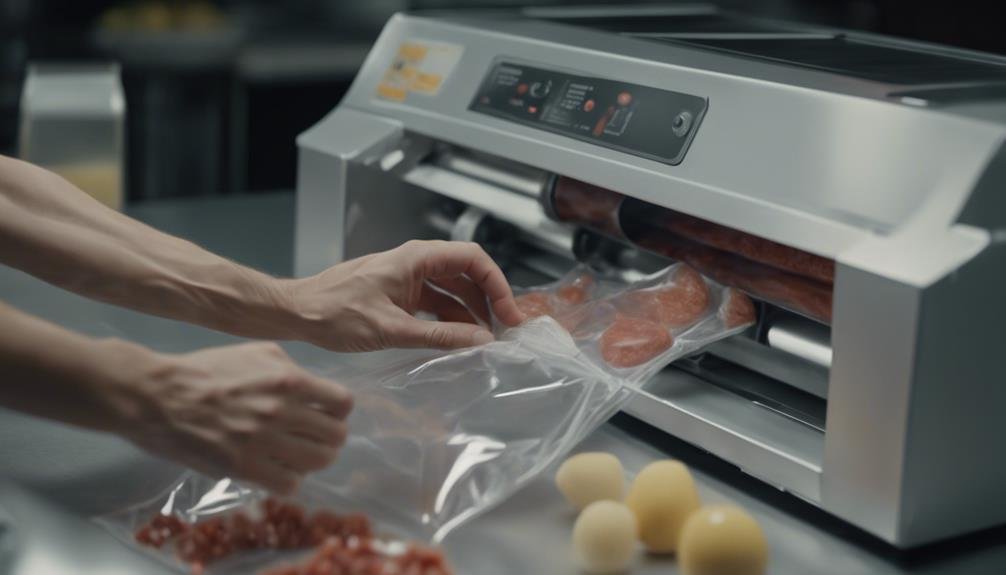
Position the bags correctly in the vacuum sealing machine to maximize suction efficiency. Start by using the colored line inside the sealing chamber as your guide. Make sure the edge of the bag aligns with this line. This step is important because if the bag extends past the designated line, it can compromise the machine's suction power, leading to inefficient sealing.
When placing food items in the bag, avoid overfilling. An excessively large bag in the chamber can hinder the vacuum process. Trim the bag to a size that comfortably fits within the chamber, allowing enough space for proper sealing. Remember, a smaller, well-positioned bag will achieve better suction than an oversized one.
Be mindful of dirt accumulation between the lid and the machine, as it can interfere with the sealing process. However, the primary focus here is the position of the bag. Making sure it's correctly placed will help maintain the vacuum's integrity and ensure your food items are sealed efficiently.
Clean the Vacuum Channel
Maintaining the vacuum channel regularly guarantees that your vacuum sealing machine maintains peak suction power. Cleaning the vacuum channel is important because dirt and debris can severely hinder suction, leading to sealing issues. A dirty channel prevents proper air removal, reducing the effectiveness of the vacuum seal and compromising the airtight integrity of your bags or rolls.
To clean the vacuum channel, follow these steps:
- Remove any visible debris with a soft brush or cloth.
- Use a damp cloth to wipe down the channel, ensuring all residues are removed.
- For stubborn dirt, use a mild detergent solution, but make sure to rinse thoroughly afterward.
- Check for blockages and use a small, non-abrasive tool to dislodge any trapped particles.
- Dry the channel completely before reassembling the machine to prevent moisture damage.
Regular cleaning ensures your vacuum channel remains free of obstructions, allowing your machine to perform at its best. This simple maintenance task helps you achieve a strong and airtight seal every time, optimizing the efficiency of your vacuum sealing machine and prolonging its lifespan. Don't underestimate the importance of a clean vacuum channel for efficient sealing.
Verify the Power Source
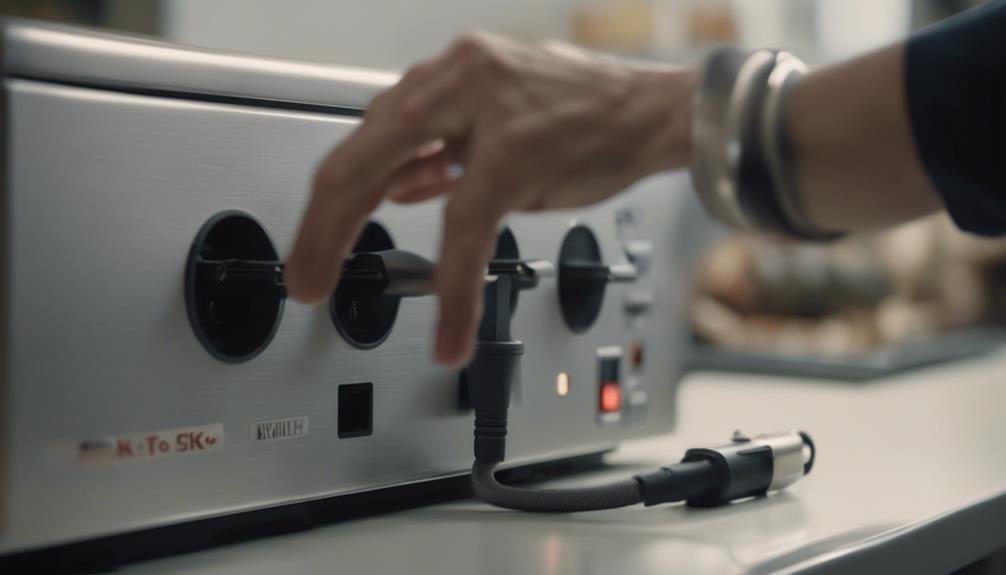
Make sure your vacuum sealing machine is plugged into a working power outlet to avoid any suction issues. A reliable power source is essential for your vacuum sealer to function effectively. First, check if the machine is properly connected and that the power cord isn't damaged or frayed. A damaged cord can disrupt the power supply, leading to weak or inconsistent suction.
Next, verify that your vacuum sealer is receiving a consistent flow of electricity. Fluctuations or interruptions in power can hinder the machine's ability to create a proper seal. Addressing these power source issues promptly can save you time and frustration.
Here's a quick checklist to help you ensure your vacuum sealer is powered correctly:
| Task | Status | Comment |
|---|---|---|
| Check power outlet | Ensure it's operational | |
| Inspect power cord for damage | Look for frays or cuts | |
| Confirm consistent power flow | Use a voltage tester if necessary | |
| Address power source promptly | Prevent suction problems |
Consult the Manufacturer's Guide
For resolving suction problems, always refer to the manufacturer's guide first. The guide is your best resource for specific instructions tailored to your vacuum sealer. It outlines detailed steps to troubleshoot and resolve common suction issues.
Here's what you should look for in the manufacturer's guide:
- Proper Bag Placement: Make sure the bag is correctly positioned in the vacuum sealer. Incorrect placement can prevent proper suction.
- Dirt Buildup: Check for any dirt or debris that might be obstructing the vacuum sealer's sealing area. Clean it thoroughly to maintain peak performance.
- Bag Size Extension: Verify that the bag isn't too large or extending too far into the sealing chamber. Excessive bag material can hinder suction.
- Identifying Issues: The guide helps you identify specific problems, such as an excessive amount of bag in the sealing chamber, which may block the suction process.
- Efficiency Guidelines: Follow the outlined guidelines to ensure your vacuum sealer operates at peak efficiency.
Referring to your vacuum sealer's manufacturer's guide is essential for effectively resolving suction problems. By following these detailed instructions, you'll ensure your machine runs smoothly and maintains its sealing efficiency.
Conclusion
You've got the tools to tackle suction problems in your vacuum sealing machine. Remember, a quick inspection can save up to 40% of the time you'd spend troubleshooting. Keep those gaskets clean, position the bags right, and don't forget to check the power source. If all else fails, your manufacturer's guide is your best friend. With these tips, you'll guarantee your machine runs smoothly, preserving your food's freshness for longer.