Preserving the garden's bounty is a noble pursuit, and vacuum sealing is a valuable tool in the fight against food waste. By following a meticulous approach, you can ensure that your vegetables stay fresh for longer. The first step is to carefully select the right vegetables for vacuum sealing. Look for vegetables that are firm, without any signs of wilting or spoilage.
Blanching is a crucial technique that stops the aging process in its tracks. It involves briefly immersing the vegetables in boiling water, followed by a quick plunge into ice water. This helps retain their color, flavor, and nutrients. Blanching times vary depending on the vegetable, so be sure to research the specific blanching times for each type of vegetable you plan to seal.
Once the blanching process is complete, it's time to prepare the vacuum sealer and its companion bags. Make sure the sealer is clean and in good working condition. Select the appropriate size of bag for your vegetables, leaving enough room for them to expand slightly during the sealing process. Place the blanched vegetables into the bags, making sure to remove any excess air before sealing.
Now, it's time to seal the bags. Follow the instructions for your specific vacuum sealer model, as they can vary. In general, you'll want to place the open end of the bag into the sealer, making sure it's positioned properly. Press the sealing button, and wait for the sealer to remove the air and create a tight seal. Once sealed, carefully remove the bag from the sealer and check for any leaks.
Properly sealed bags should be airtight and free of any leaks. If you notice any leaks, reseal the bag or transfer the vegetables to a new bag. Label each bag with the date of sealing and the type of vegetable inside. This will help you keep track of their freshness and use them in a timely manner.
To store the vacuum-sealed vegetables, find a cool, dark place such as a pantry or cellar. Avoid storing them in direct sunlight or near heat sources, as this can cause the vegetables to spoil more quickly. When you're ready to use the vegetables, simply open the bag and remove the desired amount. Reseal the bag tightly and return it to storage.
By vacuum sealing your vegetables, you can extend their shelf life and reduce food waste. It's a simple yet effective way to ensure that your garden's bounty stays fresh and delicious for longer. With a little practice, you'll master the art of vacuum sealing and enjoy the benefits of preserved freshness in your culinary creations. So go ahead, give it a try and experience the difference it can make in your kitchen.
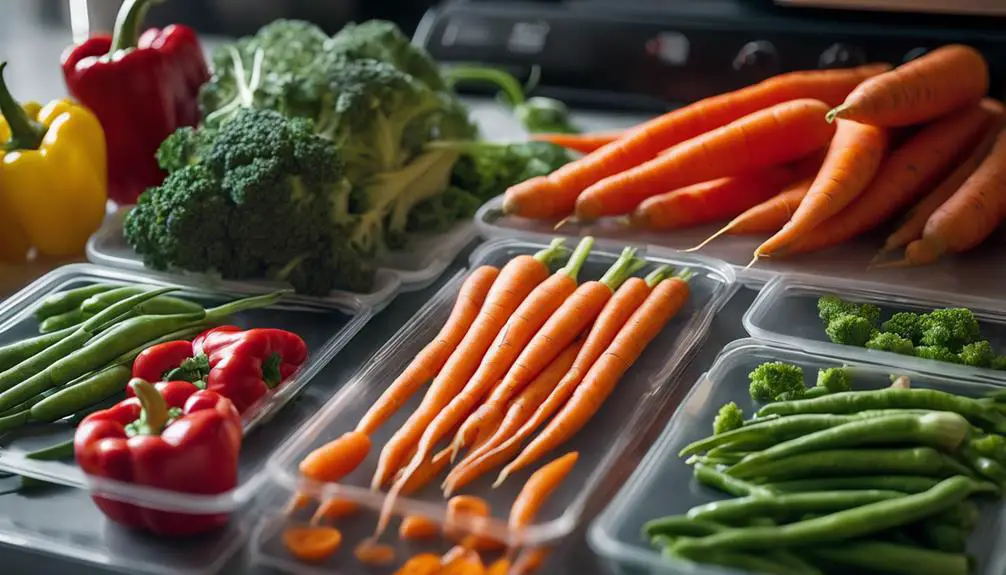
Choosing the Right Vegetables
Choosing the Right Vegetables
When it comes to vacuum sealing vegetables, selecting the perfect ones can make a huge difference in terms of freshness and flavor. Through my own experience, I've learned that not all veggies are created equal for this process. It's important to find the right balance between ripeness and firmness to ensure optimal results.
I always look for vegetables that are at their peak freshness. This means they should be ripe but not overly so, as overripe vegetables can deteriorate quickly even when sealed. It's best to choose firm vegetables like carrots, peas, and green beans, as they hold up well under the vacuum seal without getting crushed.
Moisture content is another crucial factor to consider. Vegetables with lower moisture content, such as root vegetables, are perfect candidates for vacuum sealing. They don't create excess liquid that could interfere with the sealing process. On the other hand, I avoid vacuum sealing very watery vegetables unless I plan to freeze them immediately. The excess water can form ice crystals and affect the texture of the vegetables.
In my journey, I've discovered that taking the time to choose the right vegetables for vacuum sealing truly pays off in the long run. The end result is beautifully preserved produce that not only retains its taste but also its nutritional value. So, when you're preparing to vacuum seal your vegetables, remember to consider their ripeness, firmness, and moisture content. This will ensure that you have the best possible outcome and can enjoy your preserved produce at a later date.
Preparing Your Vegetables
Once you have selected your vegetables, it's essential to wash and dry them thoroughly to ensure they're free from dirt and pesticides. This step isn't just a quick rinse; it requires a meticulous wash under running water. For root vegetables, you may need to use a soft brush to remove stubborn soil, ensuring every nook and cranny is clean. This attention to detail is crucial for both taste and safety.
After washing, it's equally important to dry the vegetables properly. I recommend using a clean cloth or a salad spinner to ensure they're completely dry. Any moisture left on the vegetables can lead to freezer burn or spoilage, which defeats the purpose of vacuum sealing for long-term preservation. By drying them thoroughly, you can preserve their crisp, fresh taste as if they were just picked from the garden.
Next, it's time to trim the vegetables. Carefully remove any excess stems or leaves that could puncture the vacuum bags. It's a delicate balance between trimming enough and maintaining the integrity of the vegetables. This step is pivotal in preparing the vegetables for a successful vacuum sealing process, ensuring they stay fresh and flavorful for months to come.
Selecting a Vacuum Sealer

When it comes to choosing a vacuum sealer, it's important to find one that meets your needs and fits your budget. This will ensure that your efforts in preserving food pay off in the long run. Selecting the right vacuum sealer goes beyond simply keeping air out of your food; it's about embracing a sustainable lifestyle and preserving flavors that can transform the way you store food.
I've explored the various options, from handheld to automatic models, and I've found that the key is understanding your own kitchen habits. If you frequently seal food in large batches, an automatic countertop model is your best choice. These powerful machines can handle continuous use without overheating and often come with different settings for various types of food.
On the other hand, if you have limited space or only seal food occasionally, a handheld model might be more suitable. These compact sealers are easy to store and surprisingly efficient for their size.
No matter which option you choose, make sure it aligns with your culinary routine and brings you joy every time you use it to lock in the freshness of your beautifully prepared vegetables. Remember, this is an investment in the future of your food, so choose wisely and passionately.
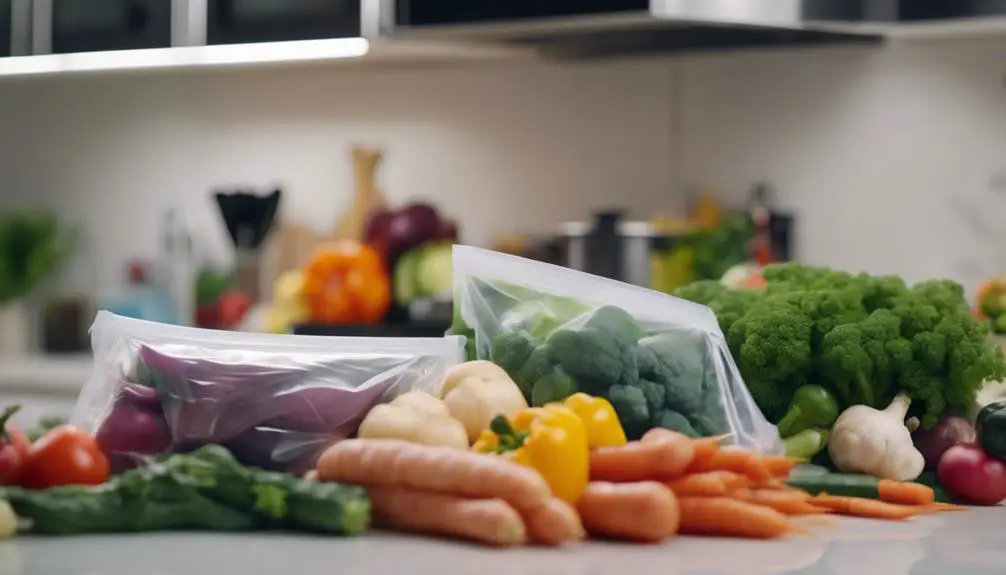
Understanding Vacuum Sealer Bags
Vacuum sealer bags play a crucial role in preserving the freshness and flavor of your vegetables. It's important to choose the right bags that not only provide a tight seal but also protect your produce from freezer burn and dehydration. Here's why selecting the correct vacuum sealer bags matters:
- Material Quality: The quality of the vacuum sealer bags is paramount in determining the shelf life of your vacuum-sealed vegetables. Look for bags made from high-density, multi-layered materials that create a strong barrier against air and moisture. This ensures that your vegetables stay fresh for longer periods.
- Size and Versatility: Vegetables come in different sizes and shapes, so having a variety of bag sizes is essential. Look for brands that offer a range of sizes to accommodate various vegetables, from slender green beans to bulky bell peppers. Some bags are also designed to be boiled or microwaved, making meal prep more convenient.
- BPA-Free Options: For those who are health-conscious, it's important to choose vacuum sealer bags that are BPA-free. BPA is a chemical found in many plastics and can have adverse health effects. Thankfully, many manufacturers now offer BPA-free bags, ensuring that your preserved vegetables are both fresh and safe to consume.
Blanching Techniques Explained
Blanching vegetables before vacuum sealing them is essential for preserving their freshness and maintaining their vibrant color and crisp texture. By quickly dipping the vegetables in boiling water and then immediately plunging them into ice water, blanching stops enzyme actions that can cause loss of flavor, color, and texture. It's like hitting the pause button on the aging process of vegetables.
The blanching time varies depending on the vegetable. For example, leafy greens only need to be blanched for 2 to 3 minutes, while denser veggies like carrots may require up to 5 minutes. It's important to be precise with the timing because over-blanching can make the vegetables too soft, while under-blanching won't effectively halt the enzymes.
Blanching is the crucial step that bridges the gap between garden freshness and long-term storage. When you open a bag of vacuum-sealed green beans in the middle of winter, they'll be as close to garden-fresh as possible, thanks to blanching. Trust me, you'll notice a remarkable difference in the quality and longevity of your preserved produce once you start blanching your vegetables before sealing.
The Vacuum Sealing Process
The Vacuum Sealing Process
Now that your vegetables have been blanched and cooled, it's time to dive into the important step of vacuum sealing. This method not only preserves the amazing flavors of your produce but also extends their shelf life significantly. Let me guide you through the process, ensuring that every seal is a promise of ultimate freshness:
- Preparation: Before sealing, it's crucial to pat the vegetables dry. Any moisture can interfere with the sealing process, so it's important to make sure they're completely free of water. This is where the magic of preservation begins.
- Filling the Bags: With care, place the vegetables into the vacuum seal bags, making sure not to overfill them. Leave enough space at the top to allow for a proper seal. This step requires patience and precision, as the way you arrange the veggies can affect the outcome.
- Vacuum Sealing: Now, place the open end of the bag into the vacuum sealer. It's almost mesmerizing to watch the machine suck out the air and seal the bag. This vacuum environment is what slows down the degradation process, keeping your vegetables fresh for months.
Every time you vacuum seal, it feels like you're capturing a piece of summer in each bag. This method isn't just about preservation, but also about capturing the essence of your garden's bountiful harvest.
Storage Tips and Tricks
When it comes to storing your freshly sealed vegetables, there are a few tips and tricks you should keep in mind to ensure they stay fresh for as long as possible. Not all vegetables have the same storage needs, so it's important to understand the best conditions for each type.
For leafy greens, like lettuce or spinach, it's best to store them in the refrigerator immediately after vacuum sealing. The cold temperature slows down their respiration rate, keeping them crisp and fresh for a longer period. This way, you can enjoy your salads or use them in recipes without worrying about them wilting or going bad.
On the other hand, root vegetables such as carrots and beets have a remarkable shelf life when stored in a cool and dark place. Even after being vacuum sealed, they can be kept in a pantry or cellar. This method not only preserves their texture but also maintains their nutritional value. So if you have a root cellar or a cool, dark corner in your kitchen, these veggies will thrive there.
To help manage your inventory and reduce waste, it's a good idea to label your vacuum-sealed bags with the date of sealing. This way, you can easily identify the oldest vegetables and use them first. It's a simple practice that can make a big difference in minimizing food waste and ensuring you make the most of your preserved produce.
When storing your sealed bags, whether in the refrigerator or pantry, make sure to keep them in a single layer. This allows for even cooling and prevents any accidental punctures that could compromise the freshness of your vegetables. By taking this extra step, you can safeguard your efforts in preserving the vegetables and maximize their shelf life.
Troubleshooting Common Issues
Having trouble vacuum sealing your vegetables? Don't worry, I've got you covered! Let's dive into some common issues and how to troubleshoot them.
- Uneven Sealing: If you notice that the seal on your vacuum-packed vegetables is uneven, excess moisture may be to blame. To solve this, gently pat your vegetables dry before sealing them. If moisture continues to be a problem, try freezing your veggies for a couple of hours before vacuum sealing.
- Bag Doesn't Stay Sealed: This can be a frustrating issue. It usually happens when the sealing area isn't clean or if there's a wrinkle in the bag during the sealing process. To prevent this, always double-check the rim of the bag and the machine's sealing surface for any debris or moisture. Smooth out the bag before sealing to ensure a tight seal.
- Machine Overheating: If your vacuum sealer starts to overheat, it's important to give it a break. Overworking the machine can lead to overheating. To avoid this, allow the machine to cool down for a few minutes between batches. This will help prevent any overheating issues.
Frequently Asked Questions
Can Vacuum-Sealed Vegetables Be Frozen, and if So, How Does It Affect Their Texture Upon Thawing?
Yes, you can freeze vegetables that have been vacuum-sealed, and when you thaw them, you'll find that their texture remains remarkably fresh. The secret lies in the sealing process, which effectively locks in both the flavor and texture of the vegetables, preserving their just-picked taste.
Freezing vegetables using the vacuum-sealing method is a great way to extend their shelf life without sacrificing their quality. By removing all the air from the packaging, the vegetables are protected from freezer burn and oxidation, which can lead to a loss of texture and taste.
When you thaw vacuum-sealed vegetables, you'll be pleasantly surprised by how well they retain their crispness and firmness. Unlike vegetables that have been simply packaged in a regular freezer bag, the vacuum-sealed ones maintain their original texture, giving you a more enjoyable eating experience.
Not only does the vacuum-sealing process help preserve the texture of the vegetables, but it also helps to lock in their flavors. This means that when you thaw the vegetables, they will taste just as fresh and vibrant as the day they were sealed.
To make the most out of vacuum-sealed frozen vegetables, it's important to properly label and date them before placing them in the freezer. This way, you can easily keep track of their freshness and ensure that you use them before they lose their quality.
In terms of specific recommendations, I would suggest investing in a good quality vacuum sealer. Foodsaver is a popular brand that offers reliable and efficient vacuum sealers that are perfect for freezing vegetables. Additionally, consider using high-quality freezer bags or vacuum-sealing bags for maximum preservation.
Are There Any Vegetables That Should Not Be Vacuum-Sealed Due to Safety or Quality Concerns?
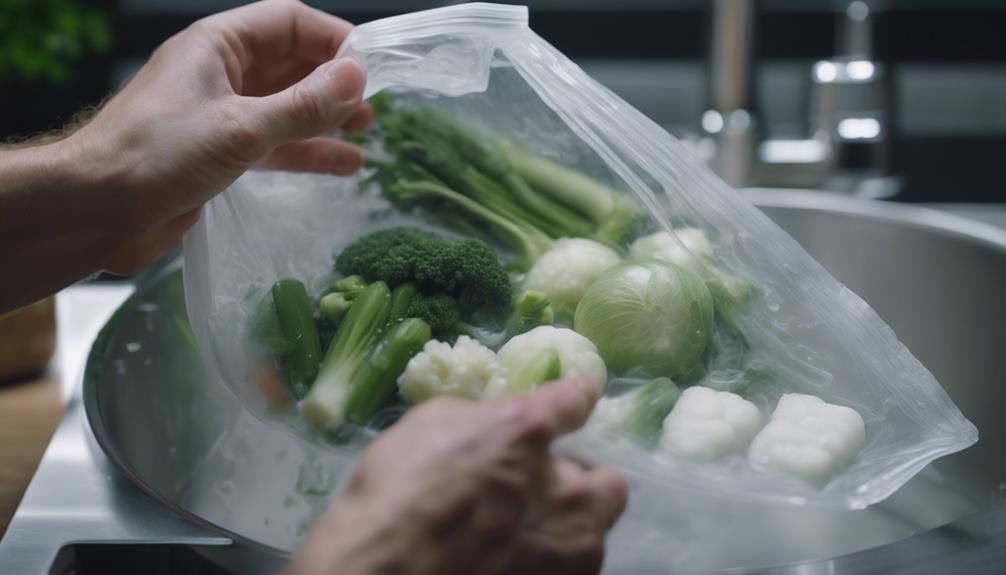
Some vegetables should not be vacuum-sealed for safety and quality reasons. Cruciferous vegetables, such as broccoli and cabbage, can spoil because they release gases. To prevent this, it is recommended to blanch these vegetables before sealing them. Blanching involves briefly immersing the vegetables in boiling water and then immediately cooling them in ice water. This process helps to stop the enzymes that cause spoilage and preserve the quality of the vegetables.
Blanching is important because it helps maintain the flavor, texture, and color of the vegetables. By quickly cooking and cooling them, blanching also helps to kill any bacteria or microorganisms that may be present on the surface of the vegetables, ensuring their safety.
When vacuum-sealing blanched vegetables, it is crucial to make sure they are completely dry before sealing them. Moisture can lead to the growth of bacteria and mold, which can spoil the vegetables and pose a health risk.
In addition to blanching, it is also recommended to divide the vegetables into small portions before vacuum-sealing them. This allows for easier portion control and reduces the risk of having to thaw and reseal an entire bag of vegetables.
Some examples of blanched vegetables that can be safely vacuum-sealed include broccoli florets, cabbage wedges, cauliflower florets, and Brussels sprouts. These vegetables can then be stored in the freezer for an extended period without compromising their quality or safety.
How Does the Nutritional Content of Vegetables Change After Vacuum Sealing and Storing for an Extended Period?
When vegetables are vacuum sealed and stored for an extended period, their nutritional content undergoes some changes. It is important to note that while vitamins like vitamin C may decrease slightly, the benefits of extended freshness and taste outweigh this small trade-off.
Vacuum sealing is a process that removes air from the packaging, creating a tight seal around the vegetables. This helps to preserve their freshness and taste for a longer period of time compared to traditional storage methods. By removing oxygen, vacuum sealing inhibits the growth of bacteria and other microorganisms that can cause spoilage.
However, it is important to be aware that certain nutrients, such as vitamin C, are sensitive to air and heat. When vegetables are vacuum sealed, the absence of air can lead to a decrease in the vitamin C content over time. This is because vitamin C is an unstable nutrient that is prone to oxidation.
Despite this decrease, it is important to remember that vacuum sealing still retains a significant amount of the vegetables' nutritional content. Other vitamins, minerals, and antioxidants are generally well-preserved through this method. Additionally, the extended freshness and taste of vacuum-sealed vegetables can encourage individuals to consume more of these nutritious foods.
To ensure that you still receive an adequate amount of vitamin C, it is recommended to include other dietary sources of this nutrient in your meals. Citrus fruits, strawberries, and bell peppers are all excellent sources of vitamin C. By incorporating these foods into your diet, you can compensate for any potential decrease in vitamin C from vacuum-sealed vegetables.
Can Vacuum-Sealed Vegetables Be Cooked Directly From Their Sealed Bags, and Are There Any Specific Methods Recommended?
Yes, you can cook vacuum-sealed vegetables directly from their bags, especially when using sous-vide methods. This cooking technique is incredibly convenient and results in vegetables that are perfectly cooked and bursting with flavor and nutrients.
Sous-vide cooking involves sealing the vegetables in a vacuum bag and cooking them in a water bath at a controlled temperature for an extended period. This gentle cooking method allows the vegetables to retain their natural flavors and textures while ensuring even cooking throughout.
To cook vacuum-sealed vegetables using sous-vide, you'll need a sous-vide machine or immersion circulator. Simply preheat the water bath to the desired temperature, which will depend on the specific vegetables you're cooking. For example, asparagus is best cooked at around 180°F (82°C), while carrots can be cooked at 185°F (85°C).
Once the water bath reaches the desired temperature, carefully place the sealed bag of vegetables into the water. Make sure the bag is fully submerged, and if necessary, use a weight to keep it from floating. Cook the vegetables for the recommended time, which can vary depending on the type and thickness of the vegetables. As a general guideline, most vegetables will be perfectly cooked within 30 minutes to an hour.
After the cooking time is up, remove the bag from the water bath and carefully open it. Be cautious as there may be hot steam released. You can then either serve the vegetables directly from the bag or give them a quick sear in a hot pan to add some color and caramelization.
It's important to note that while sous-vide is an excellent method for cooking vacuum-sealed vegetables, it's not the only option. You can also steam or boil the vegetables in their sealed bags, but be sure to adjust the cooking times accordingly.
When selecting vacuum-sealed vegetables for cooking, it's worth considering brands that specialize in high-quality frozen produce. For example, companies like Green Giant or Birds Eye offer a range of vacuum-sealed vegetables that are specifically designed for cooking convenience. These brands ensure that the vegetables are frozen at their peak freshness, locking in their nutrients and flavors.
Is It Possible to Vacuum Seal Vegetables With Marinades or Spices, and How Does This Impact Their Shelf Life and Flavor?
Vacuum-sealing vegetables with marinades or spices not only enhances their flavor but also prolongs their shelf life. The marinades and spices seep into the vegetables, infusing them with a delightful savory taste that is sure to please your palate. Additionally, this vacuum-sealing process helps to maintain the vegetables' freshness for a longer period.
By vacuum-sealing vegetables with marinades or spices, you ensure that the flavors penetrate deep into the vegetables, enhancing the taste of every bite. Imagine biting into a perfectly cooked vegetable that bursts with a rich blend of spices, adding a burst of flavor to every mouthful. The marinades and spices work their magic, turning ordinary vegetables into extraordinary culinary delights.
Furthermore, vacuum-sealing extends the shelf life of vegetables. The airtight seal created by the vacuum-sealer prevents the vegetables from being exposed to oxygen, which can cause them to spoil quickly. This preservation technique helps to maintain the vegetables' crispness and freshness, allowing you to enjoy them for a longer period without worrying about them going bad.
When it comes to specific examples of vacuum-sealing vegetables with marinades or spices, there are various options to consider. For instance, you can vacuum-seal Brussels sprouts with a balsamic glaze, infusing them with a sweet and tangy flavor that complements their natural earthiness. Another delicious option is vacuum-sealing asparagus with a garlic and lemon marinade, creating a zesty and aromatic taste that enhances the vegetable's natural flavors.
Conclusion
Vacuum sealing vegetables is a fantastic way to keep them fresh for longer. With just a few simple steps, you can protect the flavor and nutrients of your veggies, ensuring that they stay as vibrant as the day they were picked.
To get started, gather all the necessary tools. You'll need a vacuum sealer machine, vacuum sealer bags or rolls, a marker for labeling, and of course, your fresh vegetables. It's important to note that not all vegetables are suitable for vacuum sealing. Delicate leafy greens, such as lettuce, are best stored using other methods.
Once you have everything ready, it's time to prepare your vegetables. Start by washing them thoroughly to remove any dirt or debris. Trim off any excess stems or leaves, and cut them into the desired size. For example, you can chop carrots into sticks or slice bell peppers into strips.
Next, blanch your vegetables. Blanching is a crucial step that helps preserve the color, texture, and taste of your vegetables. It involves briefly immersing them in boiling water, then quickly transferring them to an ice bath to stop the cooking process. Blanching can vary in timing depending on the vegetable, so be sure to do your research or consult a reliable source for specific instructions.
After blanching, it's time to seal your vegetables. Take a vacuum sealer bag or roll and cut it to the desired length. Place your blanched vegetables into the bag, leaving enough space at the top for sealing. Be careful not to overfill the bag, as this can prevent a proper seal.
Now, insert the open end of the bag into the vacuum sealer machine. Close the lid or clamp it shut, depending on the model you're using. Press the appropriate button to start the vacuum sealing process. The machine will remove the air from the bag, creating a tight seal around your vegetables.
Once the vacuum sealing is complete, use a marker to label the bag with the date and contents. This will help you keep track of what's inside and when it was sealed. It's also a good idea to write down any additional information, like blanching times or cooking instructions.
Finally, store your vacuum-sealed vegetables in a cool, dry place. A pantry or refrigerator is ideal. The sealed bags will protect your vegetables from moisture, air, and potential contaminants, extending their shelf life significantly.
When you're ready to use your vacuum-sealed vegetables, simply open the bag and remove the desired amount. You can cook them directly from the sealed bag by following your favorite recipes or defrost them first if necessary.
By vacuum sealing your vegetables, you're not only preserving their freshness but also reducing food waste. You can enjoy the vibrant flavors of your garden's bounty all year round, knowing that your vegetables are protected and ready to be enjoyed whenever you need them. So grab your vacuum sealer and start preserving the goodness of your veggies today!