Did you know that sous vide infusion can extract up to 30% more flavor compounds than traditional steeping methods? I’ve been experimenting with this technique for years, and I’m still amazed by how it transforms ordinary ingredients into flavor bombs. The precision of temperature control lets you target specific compounds while preserving others that might normally break down. If you’re curious about why your cocktails lack that professional edge, the answer might be sitting in your kitchen right now.
How Sous Vide Infusion Transforms Cocktail Flavors
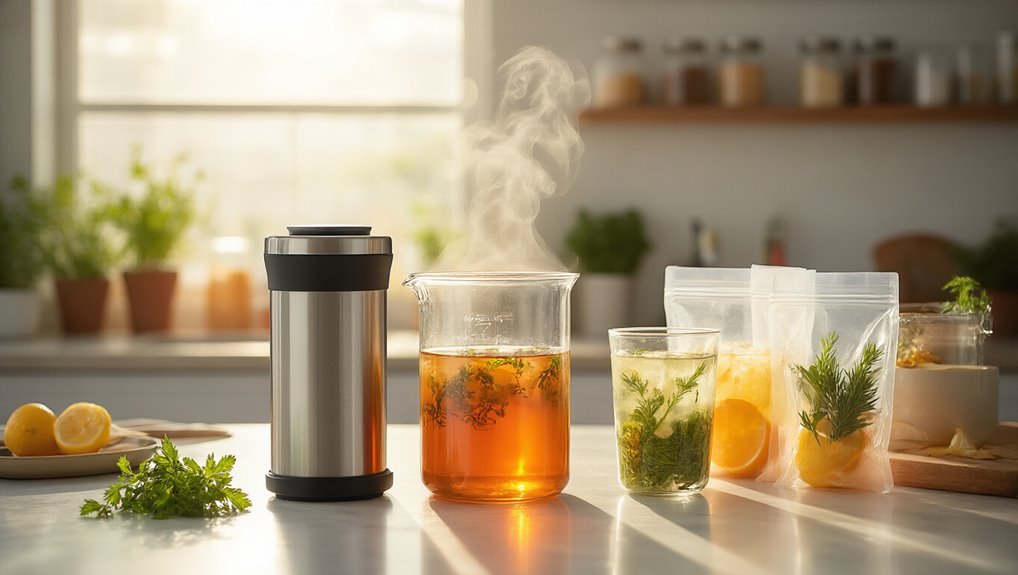
While I’ve been crafting cocktails for years, I’ve never seen anything revolutionize flavor extraction quite like sous vide infusion. What used to take weeks now happens in hours, with a flavor metamorphosis that’s honestly mind-blowing.
I’ve found that precise temperature control—say, keeping things at 131°F for bright citrus notes or pushing to 176°F for deeper spice profiles—gives you incredible control over your final product. The aroma evolution is remarkable too; you’re preserving those volatile compounds that normally cook off.
What I love most? Consistency. Once you’ve dialed in your perfect strawberry-basil vodka or cardamom bourbon, you can replicate it perfectly every time. No more “this batch tastes different” problems that, well, used to drive me crazy with traditional methods.
Vacuum sealing also contributes to Enhanced Heat Transfer, ensuring more uniform heat distribution and even faster infusion.
Essential Equipment for Precision Cocktail Infusions
When I started my sous vide cocktail journey, I quickly learned that choosing the right immersion circulator isn’t just about price—it’s about temperature stability, ease of use, and whether it’ll fit your containers.
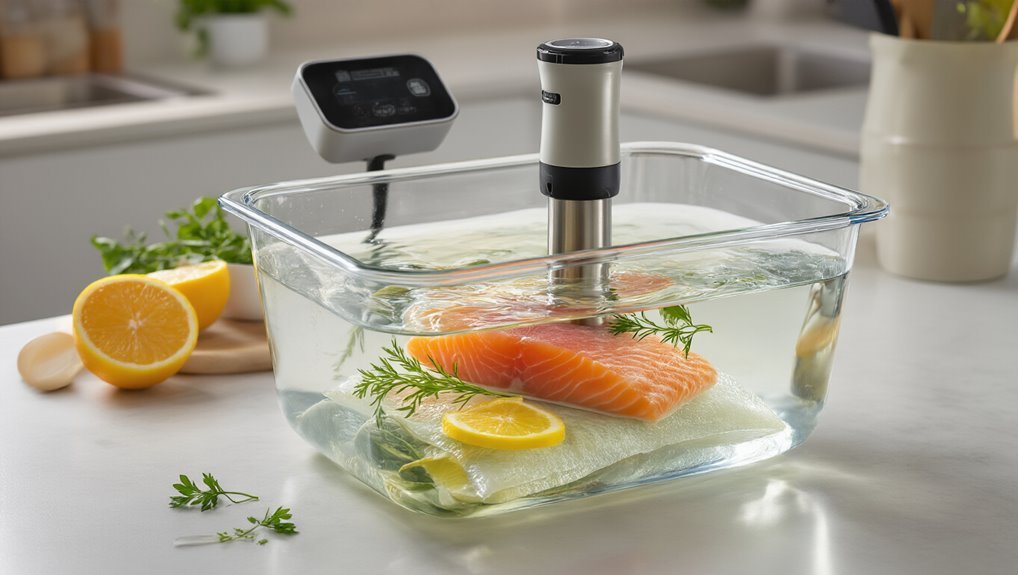
For containment vessels, I’ve found that while vacuum-sealed bags work brilliantly for most infusions, certain delicate ingredients and high-proof spirits actually perform better in mason jars where they’ve room to expand.
You’ll want to take into account not just what holds your ingredients, but what actually enhances the infusion process itself, which is why I typically match my vessel choice to both the ingredient properties and the specific flavor profile I’m targeting.
Additionally, adjustable vacuum levels and pulse vacuuming allow you tailor extraction to delicate ingredients adjustable vacuum levels.
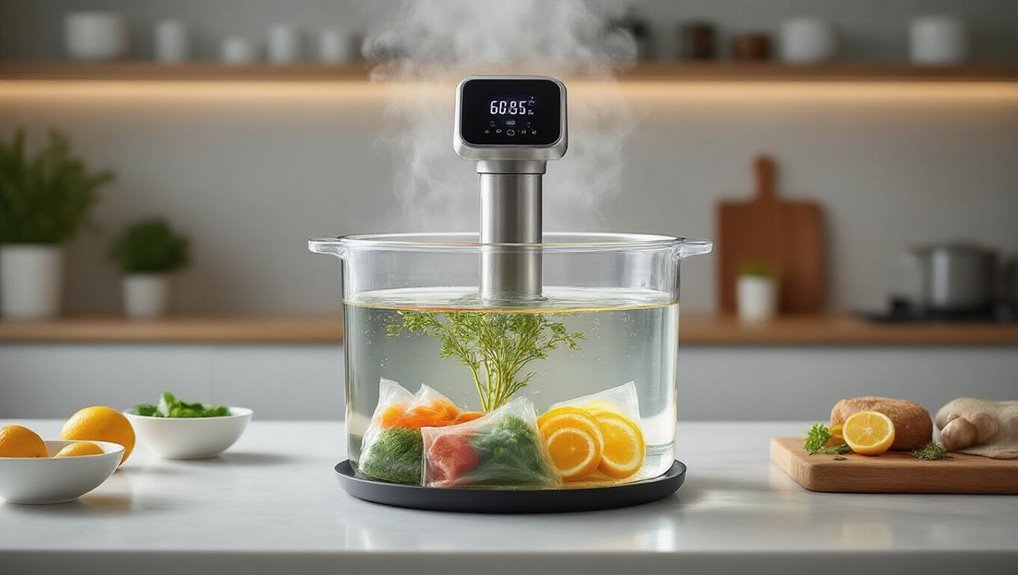
Circulator Selection Factors
The right immersion circulator can make or break your sous vide cocktail infusions, and I’ve learned this the hard way after some early disasters. When comparing options, I focus on accuracy features above all else—temperature stability is essential for repeatable results.
| Selection Factor | Why It Matters |
|---|---|
| Temperature Accuracy | ±0.1°C means consistent flavor extraction |
| Price Considerations | $80-300 range; higher price ≠ always better |
| Volume Capacity | Must handle your batch size |
| Timer Functionality | Prevents over-extraction |
| Temperature Range | Needs to cover 55-80°C for most infusions |
In my experience, it’s worth investing in a circulator with digital controls rather than analog. I once ruined an expensive bourbon infusion because my cheap circulator fluctuated by 2°C—lesson learned!
Containment Vessel Considerations
Proper containment vessels serve as your infusion’s temporary home, and I’ve found that choosing the right one makes all the difference between a mediocre result and a spectacular cocktail. I typically reach for Mason jars or high-quality vacuum bags, both offering excellent seal compatibility with sous vide systems.
When considering material durability, glass jars give you visual access to watch your infusion develop—pretty cool when you’re experimenting with colorful ingredients!
On the other hand, heat-safe polyamide bags rated specifically for sous vide can withstand extended temperature exposure without compromising your creation.
Whatever you choose, make sure it’s appropriately sized. You’ll want your liquid fully submerged with enough room for water circulation. Trust me, I’ve learned the hard way that proper sealing prevents evaporation and maintains those precise ratios we’re after.
Master These Sous Vide Techniques for Perfect Extractions
Mastering sous vide extraction techniques completely transformed how I approach infusions in my kitchen.
The precision of sealed emulsions creates flavor experiences that simply weren’t possible with traditional methods.
I’ve found that understanding particle interactions between your flavoring agents and liquid base is essential for predictable results.
For consistently perfect extractions:
- Maintain bath temperatures between 131-176°F, but stay below 173°F for alcohol to prevent evaporation
- Time your infusions appropriately—1-3 hours for water-based, up to 12 hours for oils
- Always chill completely before straining out solids
- Document everything! I keep notes on weights, times, and temperatures
I think the biggest game-changer was realizing that temperature precision isn’t just helpful—it’s essential for reproducible results.
Proper vacuum sealing is essential for flavor extraction and reproducible results air-tight packaging.
Ingredient-Specific Temperature and Time Guidelines
Why would different ingredients need specific temperature and time combinations?
It’s all about their unique chemical makeup.
Fresh fruits release their delicate flavors at lower temps (around 131-140°F), while tougher dried herbs might need the full 176°F to surrender their essential oils.
I’ve found that viscosity effects play a vital role too—oils require longer exposure (sometimes up to 12 hours) to properly infuse compared to alcohol or water.
When working with spirits, I always keep temps about 20°F below ethanol’s evaporation point, which is, um, around 173°F I think?
The flavor timelines vary dramatically between ingredients.
In my experience, documenting your exact parameters is like creating a flavor roadmap.
You’ll thank yourself later when you need to reproduce that perfect batch!
This is precisely why precise temperature control is essential for reproducible flavor extraction across batches.
Prevent Common Sous Vide Infusion Mistakes
The five most disastrous sous vide infusion mistakes can ruin even the most promising flavor experiments.
I’ve seen countless beautiful ingredients wasted because of simple oversights that could’ve been avoided with proper lab hygiene and labeling protocols.
When I’m teaching infusion techniques, I always emphasize these critical points:
That begins with rigorous temperature control to prevent flavor loss and bitterness during infusion.
- Temperature control – Keep your bath about 20°F below alcohol’s evaporation point (173°F) to prevent flavor loss and bitterness
- Proper sealing – Airtight containment isn’t just good lab hygiene, it’s essential for preventing evaporation
- Post-infusion processing – Chill completely, then strain thoroughly for maximum clarity
- Time management – Stick to your target times—I’ve ruined many batches by thinking “a little longer won’t hurt”
Trust me, maintaining meticulous labeling protocols will save you from that awful moment of realizing you’ve mixed up your creations.
Creating Clear, Fat-Washed, and Aromatic Infusions
How does a perfectly clear, aromatic infusion transform an ordinary cocktail into a sensory revelation?
I’d say it’s all about the delicate balance of fat sourcing and aroma pairing.
In practice, precise temperature control is the secret behind achieving consistent results when infusing fats.
When I use sous vide to fat-wash spirits, I’m careful to select fats that’ll emulsify cleanly—dairy works wonderfully, but I’ve had great results with coconut oil too.
The magic happens between 131°F and 176°F, where the fat releases aromatics without developing those harsh, burnt notes.
After infusion, I’ll chill everything completely, then—this is essential—run it through a fine filter or freeze-filter setup.
What I love most about this technique?
The way it creates this incredibly silky mouthfeel while maintaining perfect clarity.
Trust me, once you’ve mastered fat-washing, your cocktails will never be the same.
Elevate Your Bar Menu With Sous Vide Syrups and Modifiers
I’ve found that sous vide syrup-making has completely transformed how I approach flavor extraction in my bar program.
You’ll get remarkably bright, concentrated profiles in just 1-3 hours, compared to the muddled notes that often result from traditional hot-process methods.
When I’m looking to create consistent batches with minimal effort, I simply seal my ingredients, set my circulator between 131-176°F, and let science do the work while I handle other prep.
Vacuum sealing enhances flavors, shelf life, and meat quality vacuum sealing.
Rapid Flavor Extraction
Transforming your bar program begins with mastering rapid flavor extraction through sous vide techniques. I’ve found that what once took weeks now requires mere hours, while actually preserving more of those volatile compounds. The controlled bath temperature—I typically use between 55-80°C—allows for selective volatile capture without those harsh bitter notes you’d get with traditional methods.
My favorite emulsification strategy involves combining alcohol with fat carriers simultaneously. The results are mind-blowing:
- Bright, fresh fruit notes remain intact instead of cooking away
- Vibrant acidity and clarity shine through in finished syrups
- Multi-layered flavor profiles develop with smoother mouthfeel
- Perfect consistency batch after batch
You’ll immediately notice how these syrups enable faster drink assembly while maintaining standardization across your entire menu—something that’s practically impossible with traditional methods.
Consistent Bright Profiles
Moving beyond extraction techniques, the greatest advantage I’ve found with sous vide syrups is their unbeatable consistency.
When you’re crafting cocktail menus, that flavor uniformity becomes invaluable—your third batch tastes identical to your first.
The magic happens in that sealed water bath.
Without evaporation, your bright citrus notes stay vibrant, and color preservation is remarkable compared to stovetop methods.
I’ve found temperatures between 131-176°F perfect for pulling aromatics while maintaining acidity.
For the brightest profiles, I’ll often infuse directly into unstrained juice-sugar mixtures.
It’s like capturing sunshine in a bottle, honestly.
The key—and I can’t stress this enough—is documenting everything: time, temp, and carrier liquid.
That way, you’re not just creating one perfect batch, but establishing a repeatable bright profile your customers will recognize.
Signature Cocktail Recipes Showcasing Sous Vide Techniques
The world of signature cocktails takes on a fascinating dimension when sous vide techniques enter the mix.
In practice, the principle of even heat distribution in a sealed environment ensures consistent infusion outcomes for cocktails.
I’ve found that precise temperature control creates presentation aesthetics and seasonal palettes that simply can’t be matched with traditional methods.
My favorite approach is crafting acid-adjusted modifiers that maintain vibrant, fresh notes without those unwanted cooked flavors.
Here’s what makes sous vide cocktail components special:
- Speed – Infusions develop in hours rather than days
- Consistency – Sealed environments prevent evaporation, ensuring repeatable results
- Brightness – 60°C (140°F) preserves fresh flavor profiles
- Versatility – Works equally well with syrups, cordials, and spirits
I typically combine equal parts juice and sugar in sealed bags, then let the sous vide do its magic for about 2 hours.
What’s your favorite infusion recipe?
Frequently Asked Questions
How to Sous Vide Infuse?
I combine herbs with liquid in a sealed container, carefully choosing herb pairing that enhances flavor duration. Then I cook at 131-176°F for 1-3 hours before straining and chilling.
What Is the Difference Between Infusion and Extraction?
I’d explain it like this: Infusion is the complete technique where I’m purposefully transferring flavor, while extraction is the actual flavor chemistry process happening when compounds move from ingredient to liquid.
What Are Common Sous Vide Mistakes?
Did you know 70% of sous vide fails happen in the first hour? I’ve seen beginners make temperature errors outside 131-176°F and seal failures that ruin infusions. Watch these critical mistakes!
What Is the Best Temperature for Sous Vide Infusion?
I’d recommend 130-150°F for delicate flavor profiles (fruits, herbs) and 160-176°F for robust ingredients (spices). Temperature consistency is essential—always stay at least 20°F below alcohol’s evaporation point for spirits.