I’ve been cooking sous vide for years, and I’ll tell you—it’s changed how I approach perfect doneness every time. When I first started, I was intimidated by all the equipment and precise temperatures, but honestly? It’s much simpler than it looks. The beauty lies in understanding each step of the process, from proper sealing (which I definitely messed up at first) to that final sear that transforms the texture. Ready to discover why chefs consider this method their secret weapon?
What Is Sous Vide Cooking and Why Try It?
What you’re really getting with sous vide is flavor retention that’s unmatched. Since food cooks in its own juices inside those vacuum-sealed bags, nothing escapes—no moisture, no flavor compounds. It’s like, well, locking everything good inside.
The gentle, low-temperature approach also preserves nutrients while breaking down tough fibers. Maybe the best part? You’ll never overcook anything again. It’s practically foolproof cooking, which is why I’m completely sold on it. That is because vacuum sealing improves heat transfer efficiency by eliminating air pockets.
Essential Sous Vide Equipment: What You Need to Get Started
Now that you’re sold on the magic of sous vide cooking, let’s talk about the gear you’ll need to bring this method into your kitchen. The basic starter kit includes an immersion circulator (I personally love Anova and Joule brands), a large pot or container, and food-safe bags.
Investing in a reliable device helps achieve temperature control, which is crucial for consistent results.
While a vacuum sealer gives you the best results, you can actually get by with zip-top bags using the water displacement method when you’re first starting out. I think that’s a smart way to test the waters—no pun intended!
Don’t forget to cover your water bath with a lid or aluminum foil. This might seem minor, but trust me, it makes a huge difference in maintaining that perfect temperature throughout your cooking process.
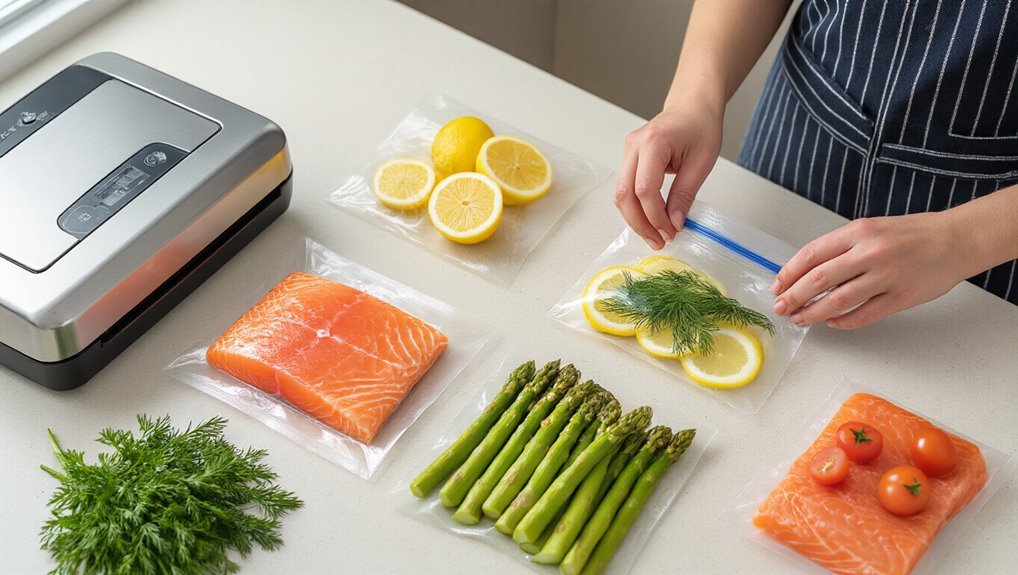
Step 1: Prepare and Vacuum Seal Your Food
I’ve found that proper seasoning before you seal your steak makes all the difference in getting that restaurant-quality flavor—salt is your best friend here.
A key benefit of adjustable vacuum levels is that you can tailor the seal strength to the food’s texture and moisture.
When it’s time to bag your food, you’ll want to remove as much air as possible, whether you’re using a vacuum sealer or the water displacement method with a zipper bag.
For the best results, never use those Allen Brothers vacuum bags directly; instead, reach for heat-safe bags or silicone pouches that are specifically designed for sous vide cooking.
Seasoning Basics Matter
When it comes to sous vide cooking, how you season your food makes all the difference in your final result.
I’ve learned that salt penetration happens best when applied before sealing your meat, not after.
One of the biggest seasoning myths I’ve encountered is that complex spice blends are always better—they’re not.
For high-quality cuts, I prefer simple salting to let the meat’s natural flavors shine through.
Air Removal Techniques
Although vacuum sealing might seem like a technical detail, it’s actually the essential first step that sets you up for sous vide success. I’ve found that proper air expulsion is vital for even cooking and preventing bags from floating. You don’t need fancy equipment—I often use the water displacement degassing method with zipper bags when I’m in a hurry.
| Sealing Method | Best For | My Tip |
|---|---|---|
| Vacuum Sealer | Meats, longer cooks | Worth the investment |
| Water Displacement | Quick meals, vegetables | Leave one corner unsealed |
| Silicone Pouches | Fragile items, fish | Reusable and eco-friendly |
Remember to place everything in a single layer—I made that mistake once and ended up with unevenly cooked chicken. Trust me, taking time with this step pays off in your final dish.
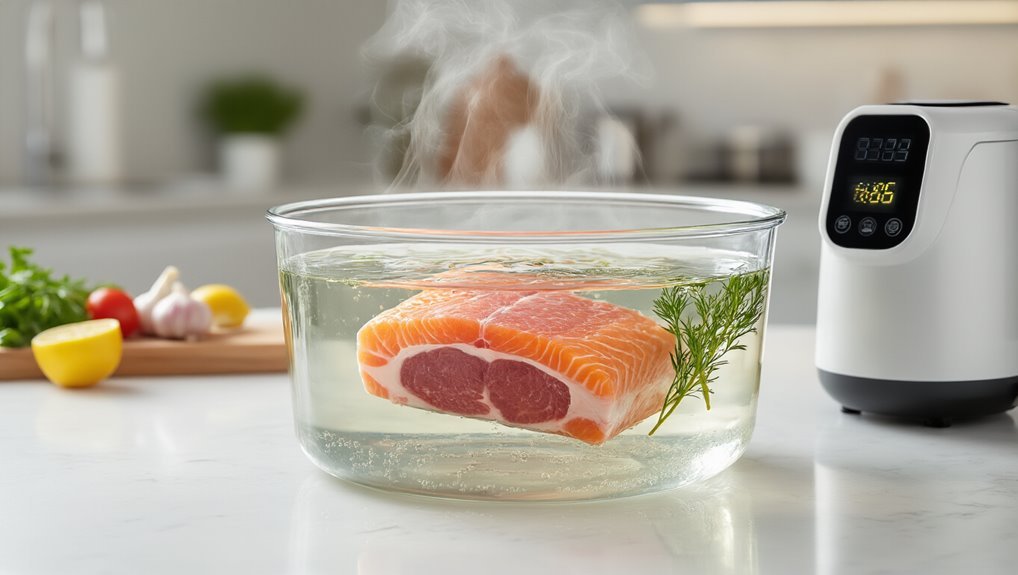
Step 2: Set Up Your Sous Vide Water Bath at the Right Temperature
Once you’ve decided on your dish, setting up the water bath at precisely the right temperature is the heart of sous vide cooking. I can’t stress enough how essential proper temperature calibration is—it’s what separates perfect medium-rare from disappointingly overdone.
Fill your pot with enough water to fully submerge your food pouches without crowding them. I’ve found that bath aeration can sometimes affect temperature consistency, so try to minimize water disturbance once you’ve reached your target temp.
For rare steak, I aim for 125°F, while medium-rare is best at around 131°F. Remember to cover your water bath—I actually use plastic wrap in a pinch if I can’t find my lid! This prevents evaporation and helps maintain that perfect temperature throughout cooking time. For consistent results, invest in a calibrated thermometer and monitor the water bath, because temperature control underpins every successful sous vide cook.
Step 3: Cook Your Food to Perfect Doneness
Now that your water bath is at the perfect temperature, I’ll guide you through the actual cooking process where the magic really happens.
The key to sous vide success is understanding doneness targets and timing precision based on thickness.
Remember that proper sealing is crucial for even cooking and juiciness.
I’ve found that thinner cuts (about 1/2″) finish in just 30 minutes, while thicker 2″ steaks need around 3.5 hours to reach perfection.
- Select your doneness temperature – Remember, rare is 125°F, medium-rare is 131°F, and medium is 140°F.
- Calculate your cooking time based on thickness – Generally, doubling the thickness quadruples the time needed.
- Add 50% more time if you’re cooking from frozen – This guarantees the center reaches your desired temperature completely.
Make sure your pouches aren’t crowded and stay fully submerged throughout cooking.
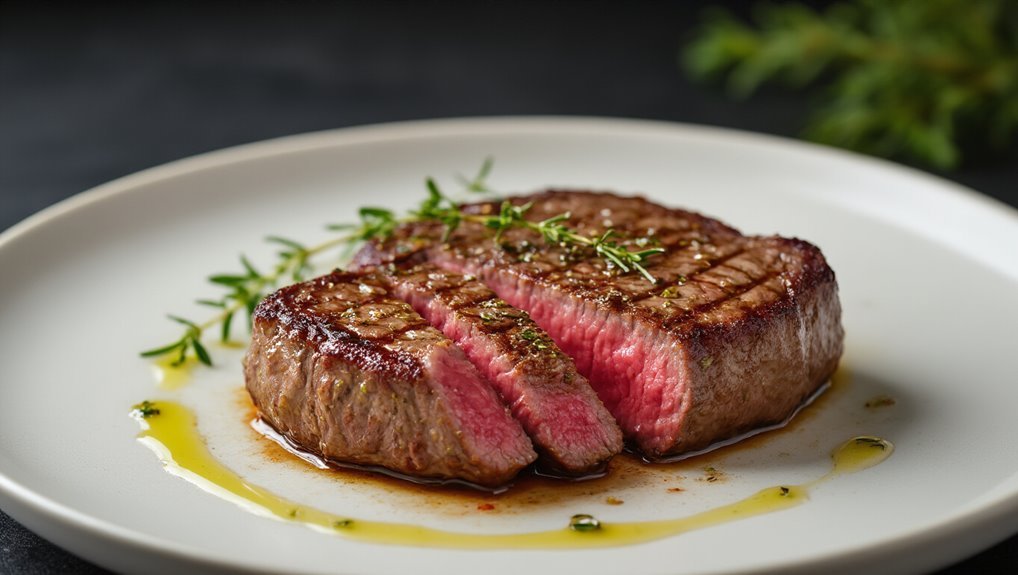
Step 4: Finish With Searing and Other Techniques
Now that your food has reached perfect doneness in the sous vide bath, it’s time to add that mouth-watering finish.
That precision comes from precise temperature control, which helps you achieve a consistent crust and juicy center.
I like to pat my meat completely dry before searing it in a scorching hot cast-iron pan or with a torch—this creates that beautiful crust we all crave.
If you’re feeling adventurous, you can also try other finishing methods like deep-frying or chilling then reheating later, depending on what you’re cooking.
Searing For Success
Why stop now when the real magic is about to happen?
After your food emerges from its sous vide bath, it needs that gorgeous crust formation that only high heat can provide.
I’ve learned that proper heat optimization is critical here—you want intense heat for a short time to develop color without cooking past that perfect doneness you’ve achieved.
For the best searing results:
- Pat your meat completely dry with paper towels (moisture is the enemy of browning)
- Use a smoking-hot cast iron pan, grill, or torch—I personally prefer cast iron for the even heat distribution
- Keep it brief—no more than 60-90 seconds per side, or you’ll undo all that precise temperature work
Trust me, this final step transforms your food from perfectly cooked to restaurant-worthy masterpiece.
Alternative Finishing Methods
While searing is my go-to finishing move for most sous vide creations, it’s certainly not the only way to put the perfect final touch on your masterpiece. I’ve found that exploring crust alternatives can actually elevate dishes in surprising ways.
| Finishing Method | Best For | My Take |
|---|---|---|
| Broiling | Delicate fish, thin meats | Quick, even browning without flipping |
| Flame Finishing | Thick steaks, pork | My favorite for dramatic effect and smoky flavor |
| Cold Presentation | Custards, some seafood | Sometimes no heat finish is the perfect finish! |
You know, I actually prefer torch finishing for things like crème brûlée or salmon—it gives me precise control. While a properly seared crust is magnificent, don’t feel like you’re stuck with just one technique. Sometimes, the best finish isn’t a finish at all.
Storing, Safety and Reheating Your Sous Vide Creations
I always cool my food rapidly in an ice bath to reach 41°F throughout—think of it as hitting the “pause button” on bacterial growth.
Using reduced oxygen packaging can slow oxidation and mold growth, especially when combined with proper freezing.
For storage guidelines, remember to keep raw and cooked items separate, especially if serving vulnerable groups.
When it comes to reheating methods, I’ve found these three approaches work best:
- Return the sealed bag to a water bath at your original cooking temperature (at least 130°F)
- For items you’ve frozen, no need to thaw—just increase the reheating time
- Finish with a quick sear if you want that beautiful crust that makes everyone think you’re a pro
Frequently Asked Questions
What Are Common Sous Vide Mistakes?
I’ve seen folks bungle sous vide with improper sealing, temperature mistakes like ignoring water evaporation, timing errors, incomplete submersion, and not drying meat before searing. Don’t make these mistakes!
Do Ziploc Bags Work for Sous Vide?
Yes, I use Ziploc bags for short sous vide cooks. For best results, guarantee proper seal quality by water displacement. For longer, low-temperature cooking, I recommend heat-safe bag alternatives for safety.
How Much Does It Cost to Run a Sous Vide for 24 Hours?
Based on power cost calculations, I’d estimate you’ll spend about $2-5 for a 24-hour sous vide cook, depending on your circulator’s wattage and local energy rates.
What Is the Downside of Sous Vide?
I’ve found sous vide’s main downsides include flavor degradation with longer cooks, high equipment cost, kitchen space requirements, food safety complexities, and the extensive planning needed for precise timing and temperature control.