To master the technique of vacuum sealing jars, you need to start with selecting high-quality glass Mason jars with straight sides and ensuring they are thoroughly sterilized. It's crucial to use fresh contents and leave enough headspace before sealing the jars. Attach the jar sealer to your vacuum sealer machine and activate it to remove the air inside. Always remember to clean and dry the rims before sealing to achieve a tight and efficient seal. Store the sealed jars in a cool, dark place and regularly check the seals for freshness. Stay tuned for more essential tips and troubleshooting steps to preserve your foods effectively.
Selecting the Right Jars
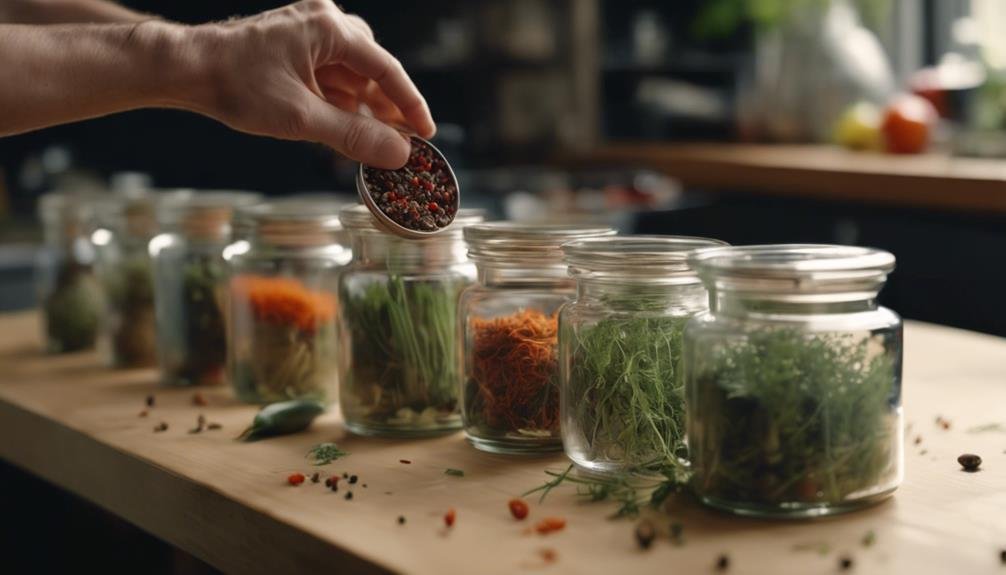
Selecting the appropriate jars is vital to guarantee a successful vacuum sealing process. First, you should choose high-quality glass Mason jars with straight sides. This design ensures a better vacuum seal, providing a more reliable barrier against air and contaminants. Straight-sided jars also help in maintaining the integrity of the seal during storage.
It's important to inspect the jars thoroughly before you start the jar sealing process. Look for any cracks, chips, or defects. Even the smallest imperfection can compromise the vacuum seal, leading to spoilage. Make sure the jars are in pristine condition.
Next, opt for standard jar sizes that are compatible with your vacuum sealer's jar attachment. This ensures a snug fit and a secure seal. Using non-standard jars can result in an inadequate vacuum seal, which defeats the purpose of vacuum sealing.
Another key aspect is selecting jars with the appropriate headspace. This allows for proper sealing and expansion of food during the vacuum sealing process. Too little or too much headspace can prevent a proper seal.
Lastly, ensure the jars are clean and dry before sealing. Any residue or moisture can interfere with the vacuum seal, compromising the preservation of your food.
Sterilizing Your Jars
Sterilizing your jars is a crucial step to prevent bacterial contamination and guarantee the longevity of your vacuum-sealed food. To begin, you can use boiling water or a dishwasher with a sanitize cycle to effectively sterilize your jars. If you choose the boiling method, submerge your jars in boiling water for at least 10 minutes. For dishwasher sterilizing, simply run the jars through a sanitize cycle. Both methods will eliminate bacteria and create a clean environment for your food.
After sterilizing, make sure your jars are completely dry. Any remaining moisture can lead to mold growth, which compromises the quality and safety of your stored food. You can let them air dry on a clean towel or use a clean cloth to wipe them dry.
Properly sterilized jars greatly enhance the shelf life of vacuum-sealed items. They provide a pristine environment, keeping your food fresh and safe for an extended period. Taking the time to sterilize your jars isn't just about cleanliness—it's about ensuring that your preserved food maintains its quality and taste for as long as possible. So, don't skip this essential step in your vacuum sealing process!
Preparing the Contents
Prior to vacuum sealing, make sure your contents are fresh, clean, and free from any signs of spoilage. This step is important to guarantee the longevity and quality of your sealed items. Examine your food thoroughly for any mold or decay, as sealing compromised contents can lead to contamination.
Next, focus on your jars. They should be clean and dry to prevent any form of contamination during the sealing process. Even a small amount of moisture can cause problems once you begin using your vacuum sealer. After cleaning, ensure the jars are completely dry before adding your contents.
When filling the jars, leave enough headspace to allow for proper sealing and expansion. Headspace is the empty space between the contents and the lid, and it's essential for an effective seal. Too little space can hinder the vacuum sealing process, while too much can waste valuable storage capacity.
Before sealing, label each jar with the date and contents. This step will help you easily identify and organize your stored items. Proper labeling ensures you use the older items first, maintaining a good rotation of your vacuum-sealed goods. With these preparations, you're ready for the next step in the sealing process.
Using a Vacuum Sealer
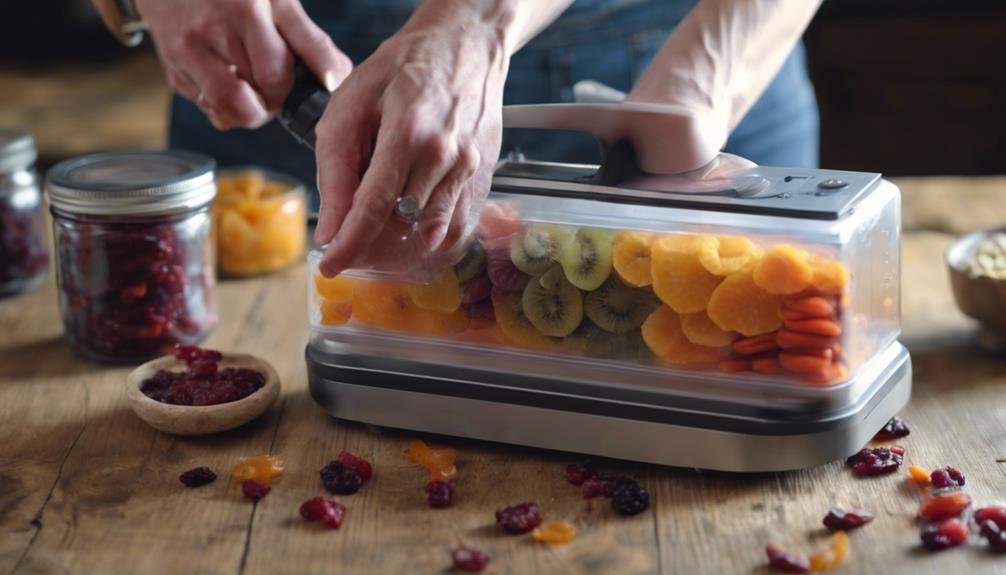
Using a vacuum sealer with a jar attachment guarantees your jars are airtight, maintaining your food fresh for longer. Vacuum sealing jars isn't just about keeping food fresh; it's also about preventing the growth of bacteria and mold. By using a jar sealer attachment, you can make certain your Mason jars are perfectly sealed, making it a game-changer for preserving items like dried fruits, nuts, grains, and homemade sauces.
To get started, make sure your Mason jars are clean and dry. Fill each jar, leaving the appropriate headspace to allow the vacuum sealer to work effectively. Attach the jar sealer attachment to your vacuum sealer machine. Place the attachment over the lid of the Mason jar, ensuring it's centered properly. Activate the vacuum sealer, and the machine will remove the air from the jar, creating an airtight seal.
Here's a quick overview:
| Step | Action | Outcome |
|---|---|---|
| 1 | Clean and dry Mason jars | Ready for filling |
| 2 | Fill jars with food | Leave appropriate headspace |
| 3 | Attach jar sealer attachment | Proper alignment for sealing |
| 4 | Activate vacuum sealer | Air removed, jar sealed |
| 5 | Check seal | Ensure airtight preservation |
Sealing Non-Canning Jars
Even if you're not using traditional canning jars, vacuum sealing can still provide an excellent way to preserve food in non-canning jars. Using a jar sealer attachment with your vacuum sealer machine, you can effectively remove air from the jars, creating an airtight seal. This process extends the shelf life of various foods, making it a valuable technique for your kitchen.
Non-canning glass jars are perfect for storing dry goods, homemade jams, sauces, and other items that benefit from vacuum sealing. To start, place the food inside the glass jar, ensuring the lid is on the jar but not tightly fastened. Attach the jar sealer to your vacuum sealer machine, and position it over the lid. Activate the sealer to remove the air and create a vacuum-sealed jar.
This method is not only convenient but also helps preserve freshness, prevent spoilage, and enhance your food storage efficiency. With the right equipment and by following these simple steps, you can successfully vacuum seal non-canning jars for long-term storage, ensuring your food stays fresh and safe to consume.
Tips for a Tight Seal
How can you guarantee a tight seal when vacuum sealing jars? To be sure your jars are sealed correctly, you need to pay attention to a few key details. First, always use jars with straight sides. These types of jars help secure a better vacuum seal efficiency.
Before you seal jars, make sure to clean and dry the jar rims thoroughly. Any residue or moisture can jeopardize the seal. Also, avoid overfilling your jars. Leave some space at the top to allow for proper sealing and vacuuming.
Here are three essential tips for securing a tight seal:
- Fill your jars correctly: Leave about an inch of headspace to provide room for the seal.
- Use a water bath: After sealing, a short water bath can help guarantee the lid adheres tightly.
- Inspect regularly: Check your sealed jars periodically for any signs of compromised seals, like bulging lids or leaks.
Storing Vacuum-Sealed Jars
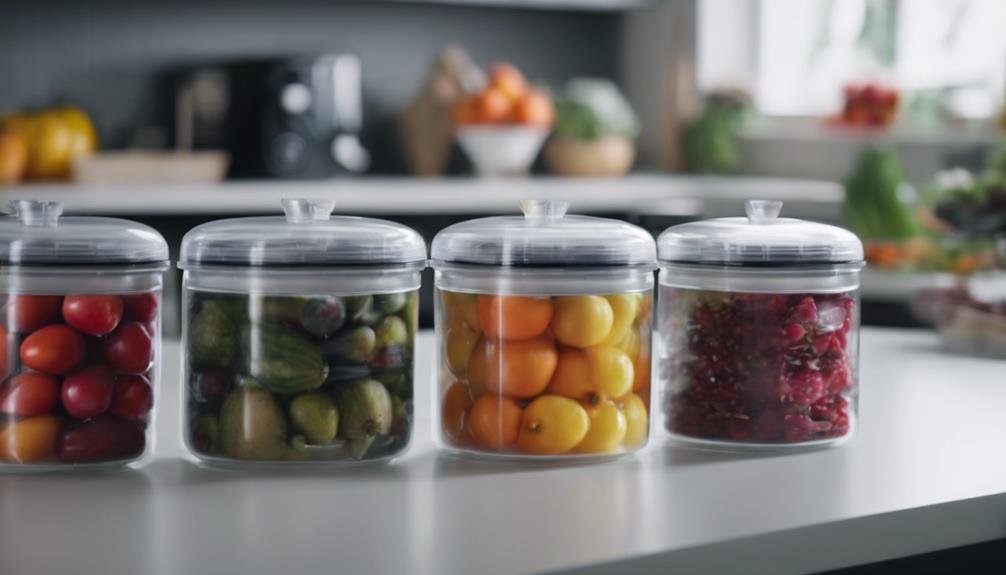
After ensuring a tight seal, store your vacuum-sealed jars in a cool, dark place to maintain the freshness and quality of your stored foods. Keeping mason jars away from heat and direct sunlight prevents compromising the vacuum seal and guarantees the contents stay preserved longer.
To help with organization and efficiency, label your vacuum-sealed jars with the contents and expiration dates. This way, you can easily identify what's inside and manage your pantry or storage area better. Regularly check the seals on your jars to make sure they remain airtight and secure. This is vital for long-term storage, as any compromised seal can lead to spoilage.
Here's a quick reference guide for storing vacuum-sealed jars:
| Action | Reason |
|---|---|
| Store in cool, dark place | Maintains freshness and quality |
| Avoid heat and sunlight | Prevents compromising the vacuum seal |
| Label jars | Easy identification and organization |
| Check seals periodically | Ensures airtight seal for long-term storage |
| Use mason jars | Ideal for preserving a variety of foods |
Troubleshooting Common Issues
When your vacuum-sealed jars don't maintain a proper seal, inspect the jar rims for any cracks or chips that could be preventing a tight seal. Ensuring the jar lids are securely fastened is essential for creating an airtight environment. Here are some steps to troubleshoot common issues:
- Clean and Dry Jar Rims: Make sure the rims are clean and dry before sealing. Any moisture or debris can interfere with the seal, preventing your vacuum sealer machine from creating a proper airtight seal.
- Check the Equipment: Examine both the vacuum sealer machine and the jar sealer attachment for any malfunctions. A faulty machine or attachment can often be the culprit behind sealing problems.
- Adjust Headspace: If your jars aren't vacuum sealing correctly, try adjusting the headspace. Too much or too little space can hinder the machine's ability to remove air properly.
Conclusion
Think of vacuum sealing jars like planting a seed in a garden. Just as a well-planted seed can flourish into a vibrant plant, a properly sealed jar preserves your food's freshness and flavor. You've selected, sterilized, and sealed—now store your jars with care. Remember, a tight seal is your best defense against spoilage. If ever in doubt, revisit these steps for a bountiful harvest of preserved goodness. Happy sealing!