In this article, we will delve into the process of using a vacuum sealer to effectively seal jars. Vacuum sealing is an excellent method for preserving food, extending its shelf life, and preventing spoilage.
By removing oxygen and creating a vacuum seal, the growth of bacteria, mold, and other contaminants is significantly hindered. This guide will provide a step-by-step approach to help you successfully use a vacuum sealer for sealing jars.
Section 1: Understanding the Basics
To begin, let’s familiarize ourselves with the fundamentals of vacuum sealing jars. A vacuum sealer, as my regular readers will know, is a device designed to remove air from a container, creating a vacuum seal that aids in preserving the freshness and quality of food. By removing oxygen, the growth of harmful microorganisms is minimized.
A jar vacuum sealer is a small machine that removes air from jars and seals them tightly, effectively preserving the contents inside. This process can extend the shelf life of foods by up to five times longer than traditional storage methods.
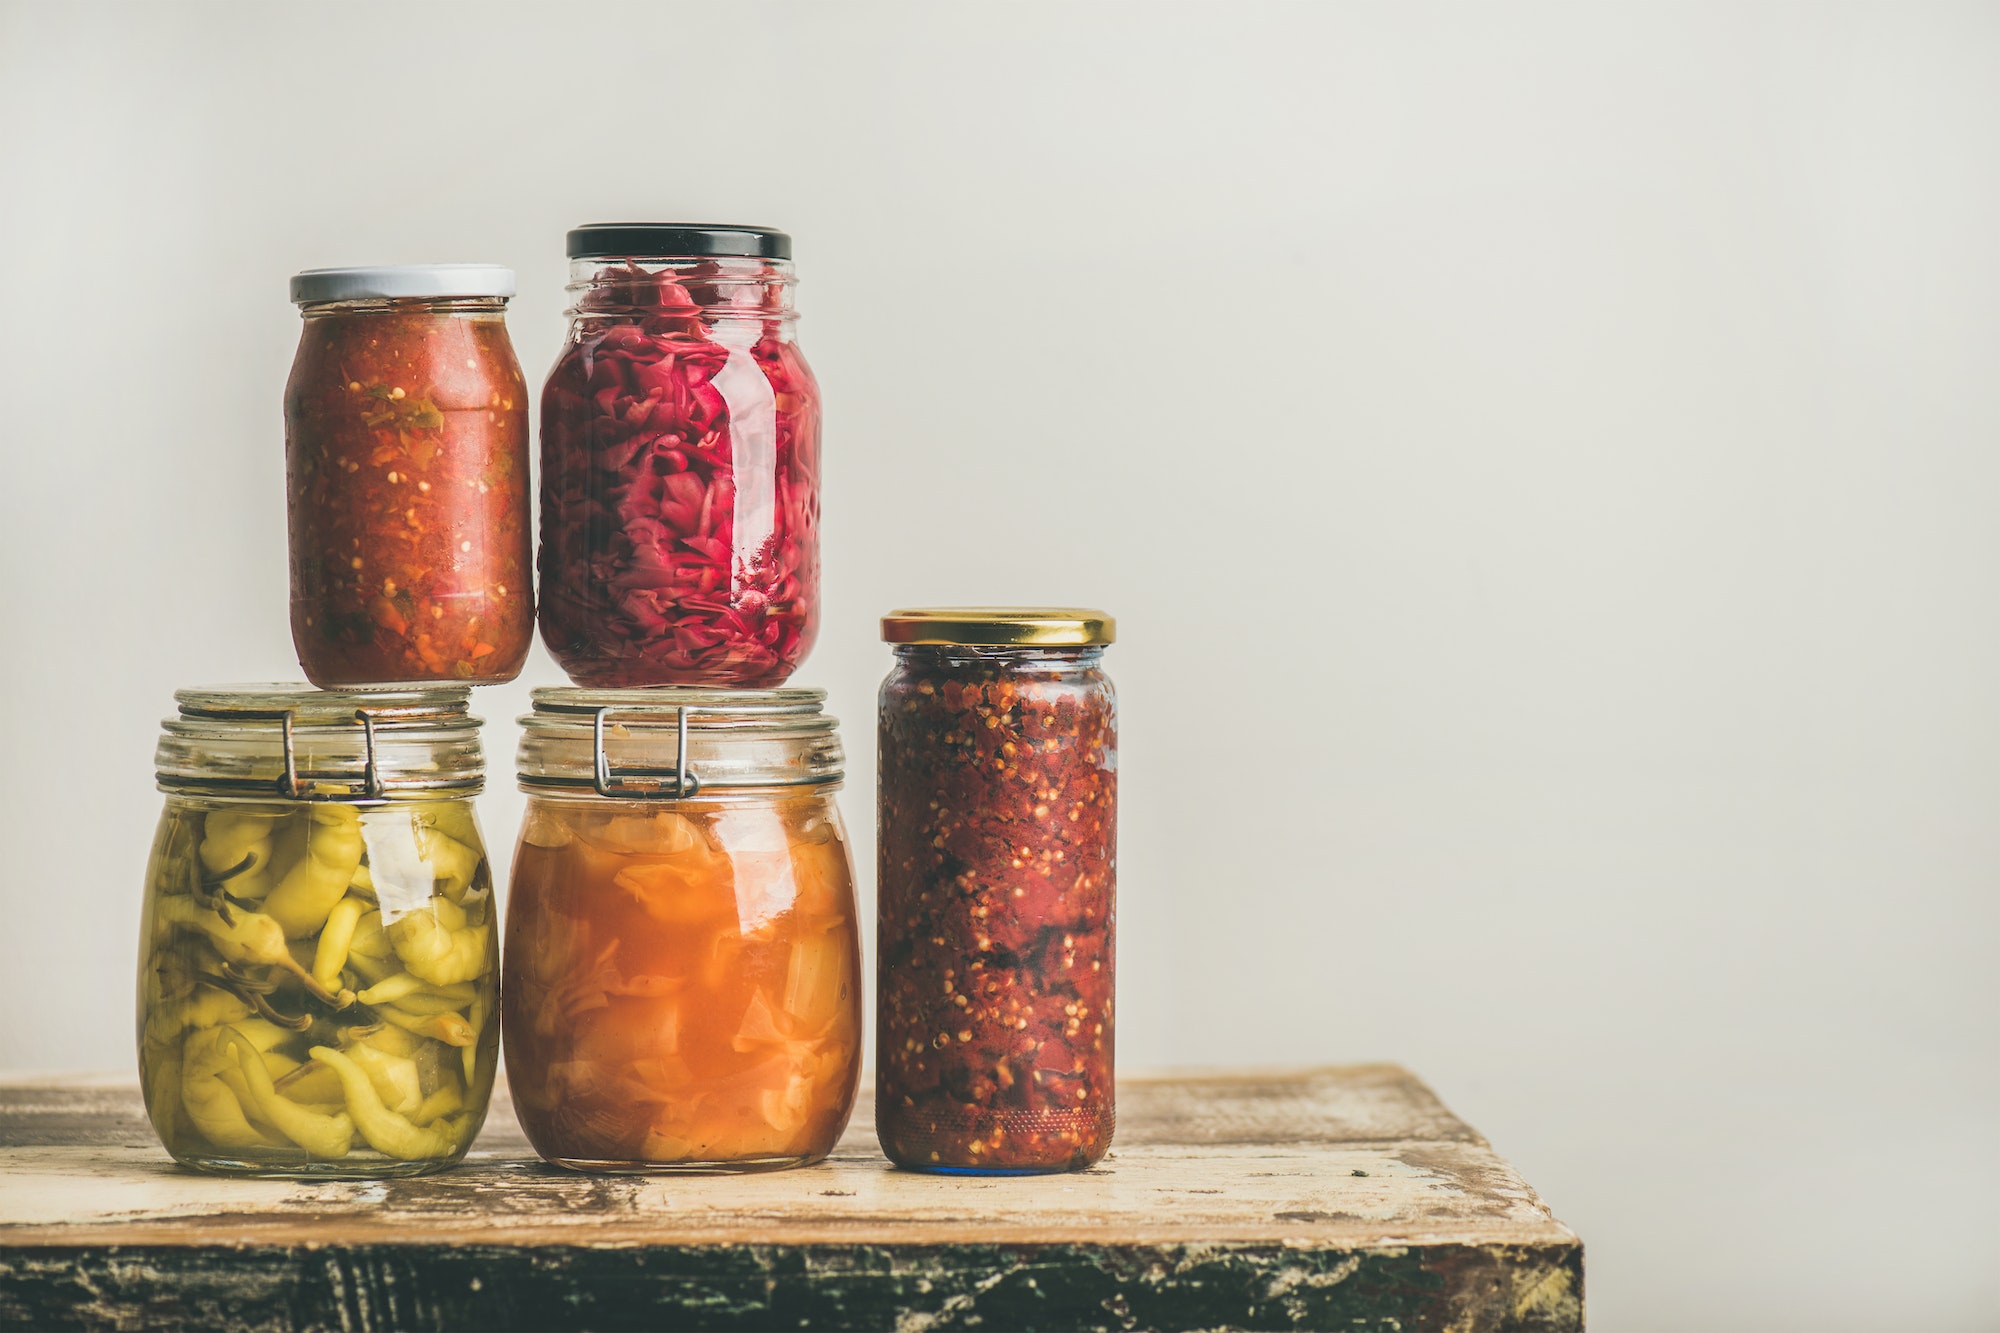
One of the benefits of using a jar vacuum sealer is that it allows you to store a wide variety of foods in glass jars, including fruits, vegetables, nuts, grains, and even liquids like soups or sauces. You can use any type of jar with a vacuum sealing kit – from regular-mouth mason jars to wide-mouth jar kits – making it easy to find the perfect size for your needs.
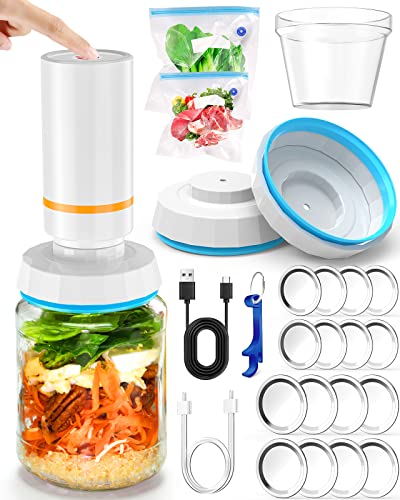
Using a vacuum sealer for jars is simple and straightforward. All you need is a jar sealer attachment and some bags designed specifically for use with your particular model. Once you’ve filled your jar with food or liquid, simply attach the sealing machine over the top of the lid and let it do its work.
There are different types of jar vacuum sealers available on the market today. The most popular brands include Foodsaver and Mason Jar Vacuum Sealer. While both options provide excellent results each has its unique features and benefits.
Section 2: Selecting the Right Jars and Lids
When it comes to jar sealing, selecting suitable jars and lids is crucial. Opt for jars made of glass or other vacuum-safe materials that can withstand pressure changes during the sealing process. Additionally, ensure that the lids are in good condition, free from any deformities or defects that may hinder an effective seal.
Section 3: Preparing the Jars and Contents
Before sealing, it’s essential to prepare the jars and the contents properly. Thoroughly clean and dry the jars to create a clean and sanitary environment for your food items. Be mindful of any specific guidelines related to the type of food you intend to seal, as some items may require pre-cooking or specific handling procedures for optimal results and safety.
Section 4: Using the Vacuum Sealer
Using a vacuum sealer for jar sealing involves a few simple steps. Follow this process:
- Set up the vacuum sealer on a stable surface and ensure it is connected to a suitable power source.
- Place the jar with the prepared contents into the sealer’s chamber, ensuring it fits securely.
- Carefully position the lid onto the jar, ensuring a tight and proper fit.
- Activate the vacuum sealing function on the machine, allowing it to remove the air from the jar.
- Once the process is complete, the vacuum sealer will indicate a successful seal. Remove the jar from the machine.
Section 5: Verifying the Seal
To ensure the effectiveness of the seal, it’s essential to verify it. Perform the following checks:
- Examine the jar’s lid. It should feel concave when pressed lightly at the center, indicating a proper seal.
- Carefully inspect the jar for any visible signs of air leakage, such as bubbles or loose lids.
- For added assurance, gently tap the lid to ensure it feels secure and does not move.
Section 6: Labeling and Storage
After sealing the jars, proper labeling and storage are essential for organization and efficiency. Use labels to identify the contents of each jar, including the date of sealing. Store the jars in a cool, dry place away from direct sunlight to maintain the quality and freshness of the sealed items.
So if you’re looking for an efficient way to keep your food fresh and organized while reducing waste at home, consider investing in a food vacuum sealer with jar attachment today!
Benefits of Using a Food Vacuum Sealer for Jars
Longer Shelf Life
One of the primary benefits of using a food vacuum sealer for jars is that it increases the shelf life of your food. By removing oxygen from the jar, you are preventing spoilage and bacterial growth, which means your food will last longer. This is especially useful for foods that have a shorter shelf life, such as fresh produce, meats, and dairy products.
Fresher Taste and Flavor
Vacuum sealing your food in jars also helps to retain its freshness and flavor. Without exposure to air, your food won’t suffer from freezer burn or become stale. You’ll be able to enjoy the same great taste and texture as when you first sealed it. Plus, because vacuum sealing locks in moisture, your food will stay juicy and tender.
Reduced Food Waste
Using a vacuum sealer for jars can also save you money by reducing food waste. When you store your food properly, it lasts longer and stays fresher, so you’re less likely to throw away spoiled or expired items. Vacuum sealing also allows you to buy in bulk without worrying about wasting excess food.
Convenient Meal Prep
Vacuum sealing your meals in jars can make meal prep easier and more convenient than ever before. You can prepare large batches of meals ahead of time and store them in individual portions for quick reheating later on. This is especially useful if you have a busy schedule or don’t have time to cook every day.
Versatile Storage Options
Another great benefit of using a vacuum sealer for jars is that it offers versatile storage options. You can use any size mason jar or another compatible container to store different types of foods like soups, stews, sauces, fruits, vegetables, etc.. Vacuum sealers come with attachments that fit right onto most standard mason jar lids making it easy to use.
Tips and Tricks for Vacuum Sealing Jars of Different Sizes and Shapes
Understanding the Different Sizes and Shapes of Jars
One size does not fit all. There are different sizes and shapes of jars that require different sealing techniques. Some common jar sizes include the regular mouth, wide mouth, and even specialty sizes like pint-sized or quart-sized jars. Knowing the size and shape of your jar is essential in determining the best way to vacuum seal it.
Using Gaskets and Glass Rings for a Tight Seal
To ensure a tight seal when vacuum-sealing your jars, consider using gaskets and glass rings. These small accessories help create an airtight seal that prevents air from entering the jar during storage.
- For regular mouth jars, use a gasket that fits snugly inside the lid.
- For wide-mouth jars, use a glass ring that sits on top of the jar’s rim before placing the lid on top.
Applying Downward Pressure While Using the Tube Connector
When using a food vacuum sealer for jars, applying downward pressure on the lid while using the tube connector is crucial in creating an effective vacuum seal. This pressure helps remove any remaining air inside the jar to create an airtight environment for storing your food.
Here’s how to do it:
- Place your food in the jar.
- Place the lid on top with either a gasket or glass ring in place.
- Insert one end of the tube connector into your food vacuum sealer’s port.
- Insert the other end into your jar’s lid.
- Apply downward pressure with your thumb or hand while turning on your vacuum sealer to begin suction.
- Once all air has been removed from inside the jar, turn off your vacuum sealer and remove both ends of the tube connector.
How to Vacuum Seal Non-Canning Jars and Canning Jars
Vacuum-sealing jars is an excellent way to preserve food for extended periods. It’s a popular method of preserving food because it keeps the food fresh and extends its shelf life.
Vacuum Sealing Non-Canning Jars
Vacuum sealing non-canning jars is possible with a food vacuum sealer for jars. These types of jars are not designed for canning but can be used for various purposes such as storing dry goods, leftovers, or snacks.
To vacuum seal non-canning jars, follow these steps:
- Fill the jar with your desired item.
- Place the lid on top of the jar.
- Attach the hose from your food vacuum sealer onto the lid’s valve.
- Turn on the vacuum sealer and let it do its job until all air has been removed from the jar.
- Once all air has been removed from the jar, remove the hose and store your jar in a cool dry place.
Canning Jars
Canning jars are the most common type of jar used for vacuum sealing because they are designed for canning and preserving foods. There are two types of canning jars: regular mouth and wide mouth.
To vacuum-seal a canning jar, follow these steps:
- Fill your clean canning jar with your desired item.
- Wipe down the rim of your jar with a clean cloth or paper towel to ensure no debris is present on it.
- Place your lid on top of your filled jar.
- Screw on your band tightly but not too tight that air cannot escape during processing.
- Place your filled jars into a pressure cooker or boiling water bath according to their recipe recommendations.
How to Vacuum Seal Bottles and Jars with Plastic Lids
If you want to extend the shelf life of your food, vacuum sealing is a great solution. However, you need to use plastic lids for jars and bottles instead of metal ones. The reason behind this is that plastic lids provide an airtight seal that will help keep your food fresh.
Before vacuum sealing your jar or bottle, make sure it’s clean. Any dirt or debris left inside can cause air pockets, which will compromise the air-tightness of the seal. So, wash both the jar and lid in warm soapy water before drying them properly.
Once you’ve cleaned your jar and lid, place the plastic lid on top of it. Ensure that it’s fitted tightly over the opening; otherwise, there’ll be room for air to get in.
It’s essential to use a plastic lid that fits perfectly onto your jar or bottle. If it doesn’t fit well enough, there’ll be space between the lid and container where air can enter. So choose a size that matches your jar correctly.
Vacuum sealing jars with plastic lids can significantly increase their shelf life by keeping out moisture and oxygen from entering into them. As such, you won’t have to worry about spoilage as soon as you would without vacuum-sealed jars.
Foods That Can be Safely Stored in Vacuum-Sealed Jars
Safe and Effective Food Storage
If you’re looking for a way to extend the shelf life of your pantry staples, vacuum-sealed jars might be just what you need. By removing oxygen from the jar, vacuum-sealing can help prevent things like water, sugar, and may from spoiling. This means that foods stored in vacuum-sealed jars are less likely to spoil or go bad.
Dry Goods
Vacuum-sealed jars are safe for storing dry goods such as pasta, flour, and rice. These items typically have a long shelf life already but can still benefit from being stored in an airtight container. Vacuum sealing these items will ensure that they remain fresh and free from pests.
Dehydrated Foods
Dehydrated foods can also be stored in vacuum-sealed jars to extend their storage life. This includes fruits, vegetables, herbs, and even meats. By removing the moisture from these foods before storing them in a vacuum-sealed jar, you’ll reduce the risk of mold growth and spoilage.
Perfect for Pantry Storage
Vacuum-sealed canisters are perfect for pantry storage of dry goods and other foods. They come in various sizes and shapes to fit your needs. You can use them to store everything from snacks to coffee beans safely.
Conclusion: Get Your Food Vacuum Sealer for Jars Today
If you’re looking for a way to keep your food fresher for longer, a food vacuum sealer for jars is the perfect solution. By removing excess air from jars and bottles, you can prevent spoilage and extend the shelf life of your favorite foods.
There are many benefits to using a food vacuum sealer for jars, including the ability to seal jars of different sizes and shapes, as well as non-canning jars and those with plastic lids. You can safely store a variety of foods in vacuum-sealed jars, from dry goods like pasta and rice to fresh produce like berries and vegetables.
To get the most out of your food vacuum sealer for jars, be sure to follow our tips and tricks for sealing jars effectively. And if you have any questions about using your sealer or which foods are safe to store in sealed containers, don’t hesitate to reach out to our team.
So why wait? Invest in a food vacuum sealer for jars today and start enjoying fresher, longer-lasting foods in your kitchen!
FAQs
1. Can I use my food vacuum sealer on glass jars?
Yes! A food vacuum sealer can be used on both glass and plastic containers.
2. How long will my food stay fresh when stored in a vacuum-sealed jar?
When stored properly in a sealed container, many types of foods can last up to five times longer than they would otherwise.
3. Do I need special lids or attachments to use my vacuum sealer on jars?
Nope! Most food vacuum sealers come with adapters that allow you to seal both wide-mouthed and regular-sized Mason jars without any additional equipment.